
The Editor glues together a handy sized 3S electric jet for some smile inducing mini jet fun.
Words: Kevin Crozier Photos: Kevin Crozier, Barry Atkinson
Just before Christmas, I was chatting to my old chum Graham Ashby at J Perkins (yes, RCM&E’s very own editor emeritus and Kick The tyres columnist – don’t worry, he’ll be back soon) when I happened to let slip that I was interested in adding a small mini jet to my flying fleet for the New Year. Many of our readers will be well aware of the Arrows range of small EDF jets that J Perkins distribute to model shops across the UK and we discussed the merits of the various models in that range. But time slipped by and what with one thing and another I never did place an order for my new Christmas toy.
Enjoy more RCM&E Magazine reading every month.
Click here to subscribe & save.
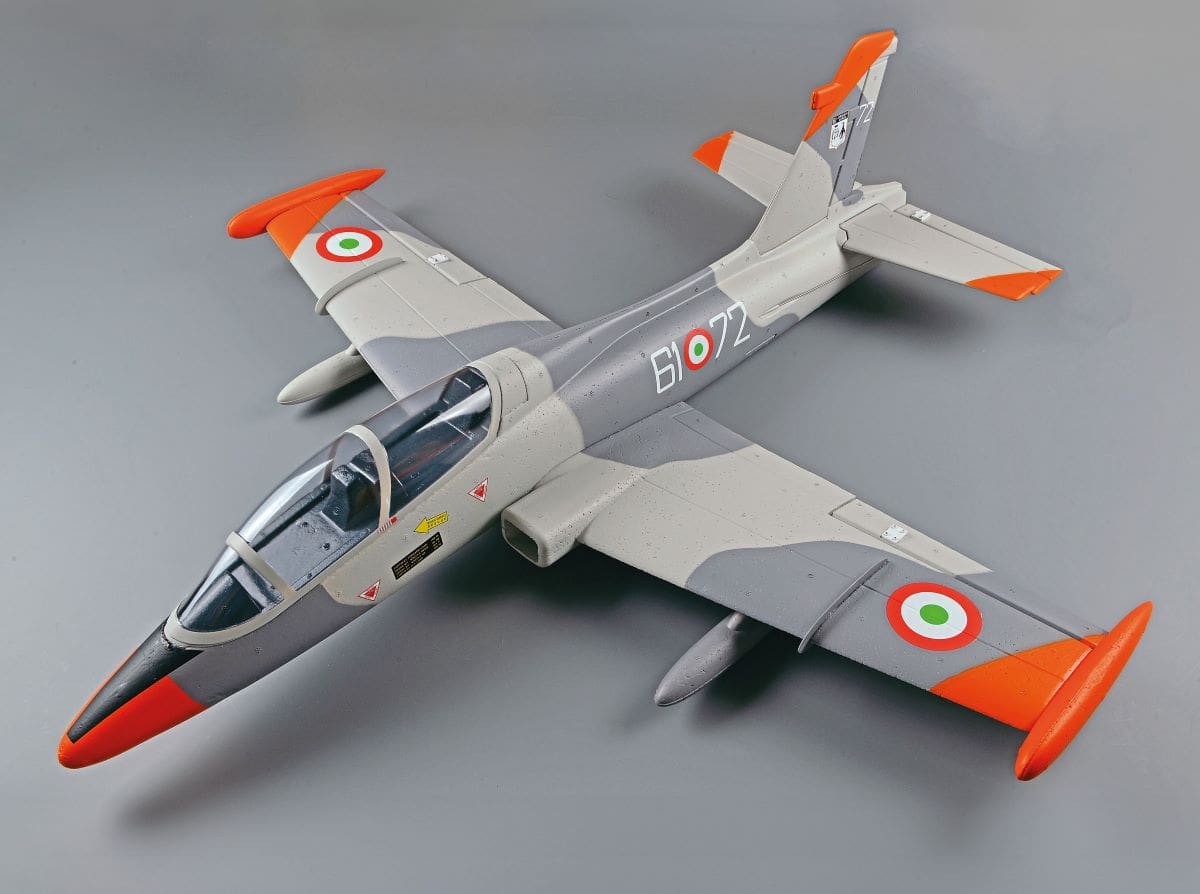
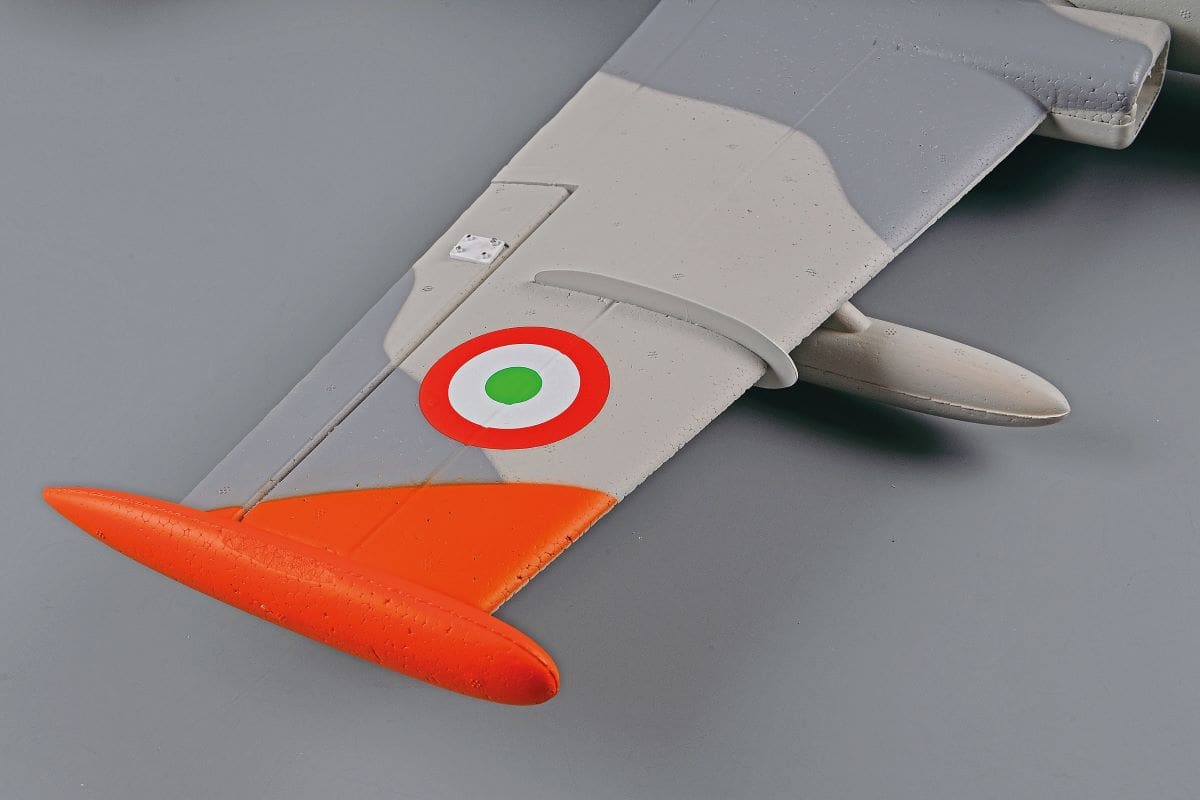
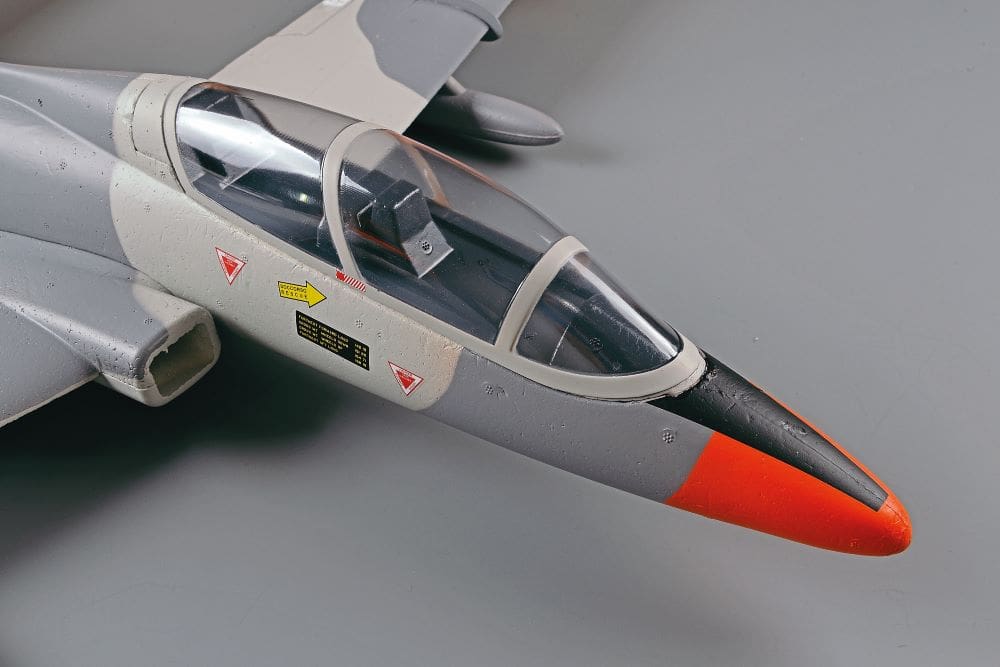
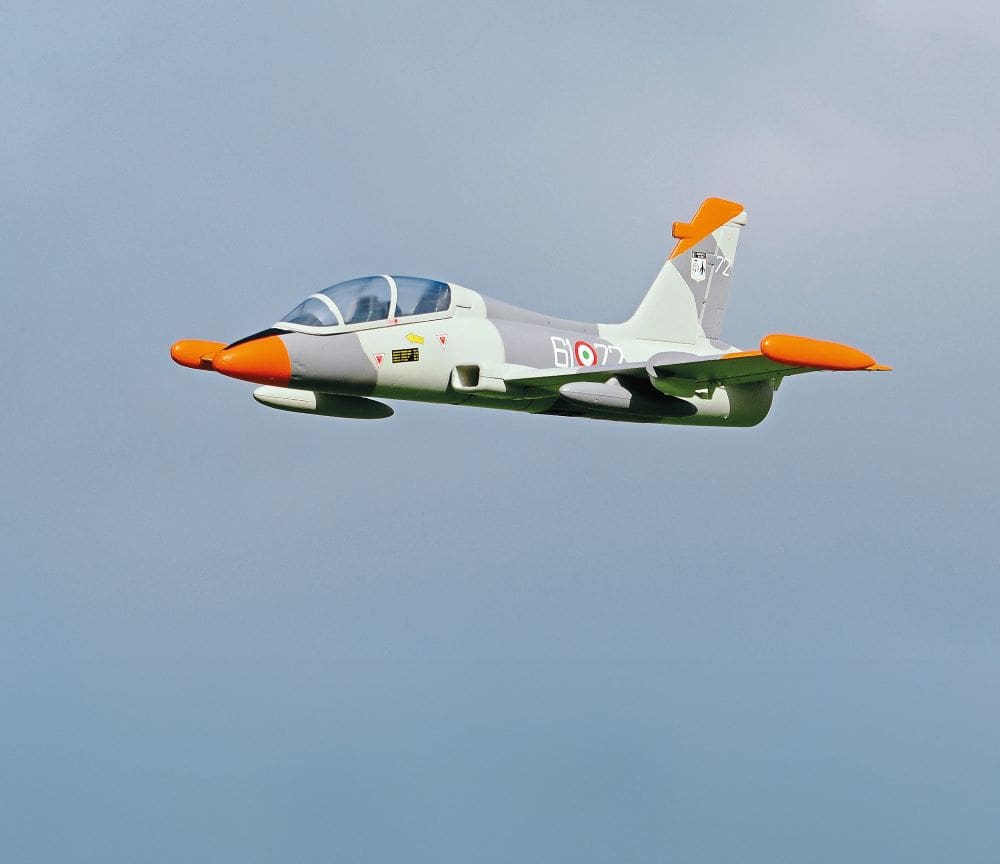
Roll on a few months and Graham contacted me, saying he had a new model that I might be interested in. The kit in question was the JP MB-339 which at a compact 800 mm wingspan was just the type of small jet that I was looking for. An ongoing shoulder injury also dictated that it should be capable of getting away following a gentle underarm hand launch and the nicely rounded fuselage and low wing configuration of Aermacchi’s jet trainer / light attack aircraft looked to tick all those boxes. It also helps that the MB-339 is quite an attractive aeroplane in its own right, especially when decorated in the high viz livery of the Italian Air Force training wing, the 61° Stormo.
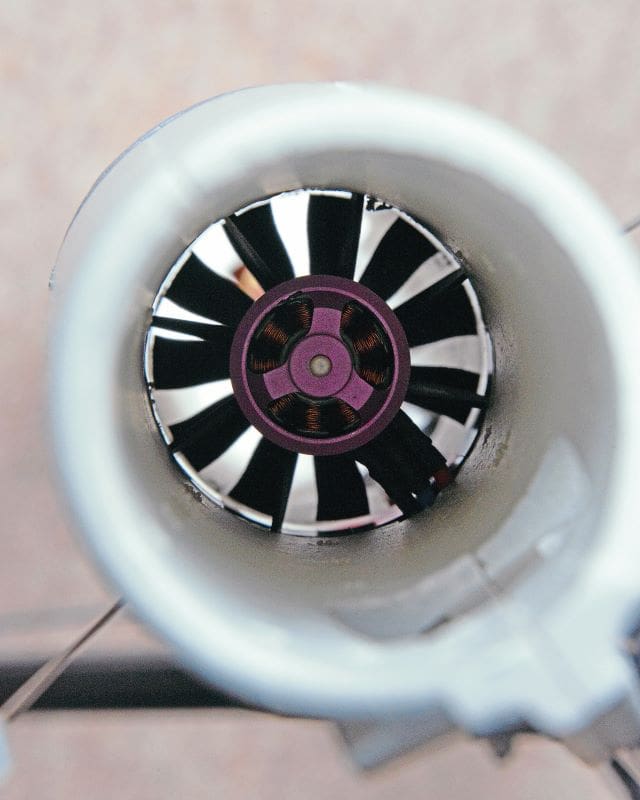
Discovering that this pretty little model was powered by a quiet but efficient 50 mm, 11 blade fan unit driven by a 2627 4900KV brushless motor, the deal was sealed, especially when I realised that the battery of choice was a 3S 2200 mAh LiPo which I have several examples of. The 3S 2200 pack has become pretty much the ‘standard’ LiPo for sport electric models these days so it’s good to know that it doesn’t require anything special or expensive in the battery bay. If you only have smaller capacity 3S packs to hand then the MB-339 will also fly on 1600 or 1800 LiPos but with a commensurate drop in flying times.
KIT SPREAD
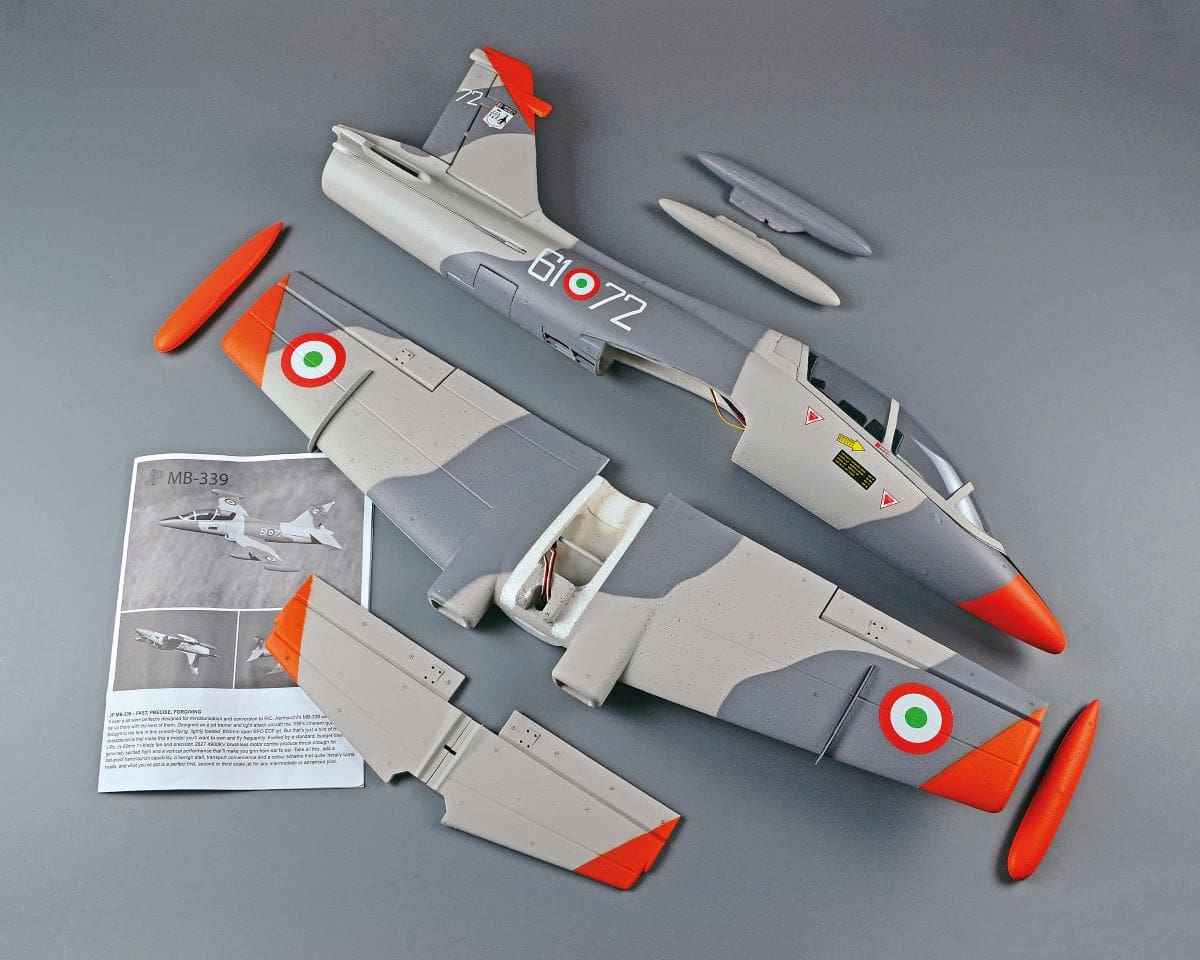
As you can see from the nearby kit contents photo the airframe is largely complete. I do like a nice box and that one that this model comes in is a particularly nice example as it has a carry handle and so could double up as a small carry case for a pull apart model. But, sadly, not this one as the MB-339 is largely glued together. The only screws are four tiny ones used to secure each of the nylon control horns to the ailerons and elevators; this is the first job detailed in the instruction pamphlet, which is well illustrated with a mixture of photos and sketches.
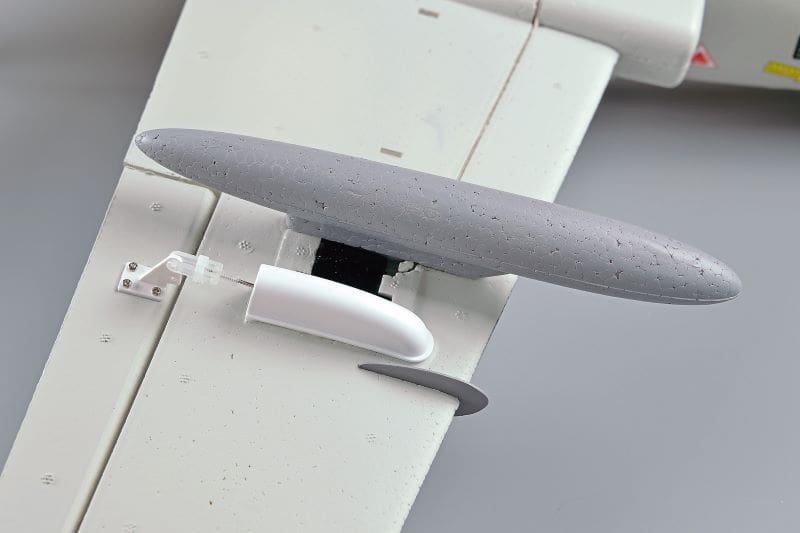
Next up is centring the aileron servos (a servo tester is handy for this) and fitting the aileron pushrods, after which the booklet tells you to glue on the servo covers. These bullet shaped plastic mouldings are designed to protect the servo output arms when belly landing so it’s best not leave them off. However, I decided to wait until my receiver had been installed to do this just in case some further adjustments were necessary.
Fitting the wingtip tanks and the drop tanks are next in the book but as with the servo covers I elected to do this after assembling the airframe to minimise any ‘hangar rash’ when swinging the model around on the workbench. The tip tanks are moulded with recesses that push onto matching ‘tongues’ protruding from each wingtip, ditto the drop tanks but in reverse, the tongues now being on the weapon pylons and fitting into recesses in the underside of each wing. The fit is a bit sloppy so I used a pair of short cocktail stick rods pushed into the foam to support each of the tanks whilst the glue set.
The instructions call for EPO-friendly glue and while I do have some foam friendly adhesive, I elected to use 30-minute epoxy instead to ensure a strong bond. This was my glue of choice for the whole airframe as I reasoned that it would give me plenty of time to make any small adjustments, especially when lining the tail up with the wings.
FIN FIRST
The first main part to be fitted is the fin with its moulded-on rudder. This is attached using a similar tongue & groove mounting as used for the tip and drop tanks. Again, the fit is quite loose but it is imperative that the fin is glued on absolutely vertically so I made up another couple of short cocktail sticks to act as internal braces while the glue set.
In truth this is also another area where I went out of sequence with the instructions as I reasoned that I needed the tailplane to be solidly mounted before fitting the fin in order that I could prop the fin up between two 90-degree squares made from blank postcards, with the corners cut away to clear the fuselage on either side. So, my next job was to fit the carbon joiner in one tailplane half, where it was left to set before sliding that half through the tailplane mounting slot in the rear of the fuselage and then gluing on the other half. The joiner sits deep in its recess underneath each tailplane half, so I filled the gap with some slivers of thin balsa, intending to cover the slots with short lengths of grey insulating tape when the model was finished. A simple job but it’s still on the ‘To Do’ list!
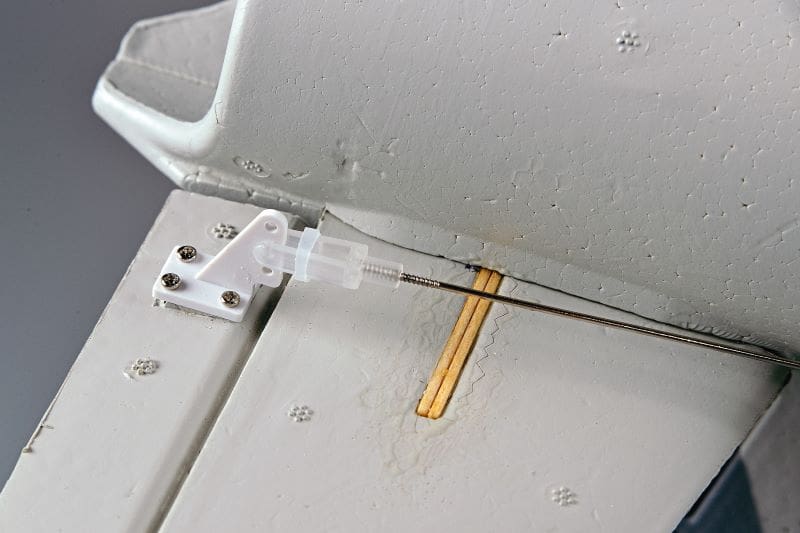
With the fin and tailplane glued on and all square the next job was to centre the elevator servo and connect the two wire pushrods to each elevator. The pushrods are clamped together at the servo arm using an adjustable screw lock connector.

WING INSTALLATION
We are nearly there, with just the wing to glue in place, making sure that it sits square to the tail and the aileron servo leads are fed up into the canopy area. The wing on my kit lined up just fine with no packing required.
NO GYRO, NO PROBLEM
The Arrows range of mini jets that J Perkins distribute have proved to be very popular and all now come with a gyro installed. Hence, I was a bit surprised when I popped the canopy off the MB-339 to not see a gyro underneath – and then it clicked!
You see, this is not an Arrows kit but is instead a JP branded model, the first EDF jet in their own range. The good news is that foregoing a gyro means that the MB-339 is cheaper than any of the Arrows jets and it doesn’t really need one if your flying skills are at the level when you might want to consider buying a model like this.
RADIO BAY
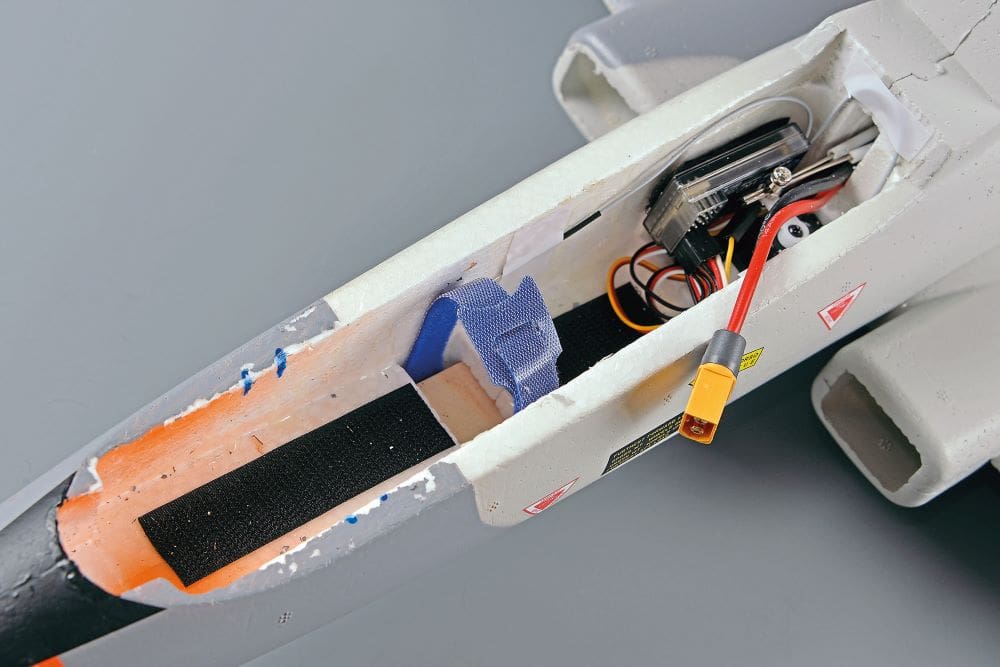
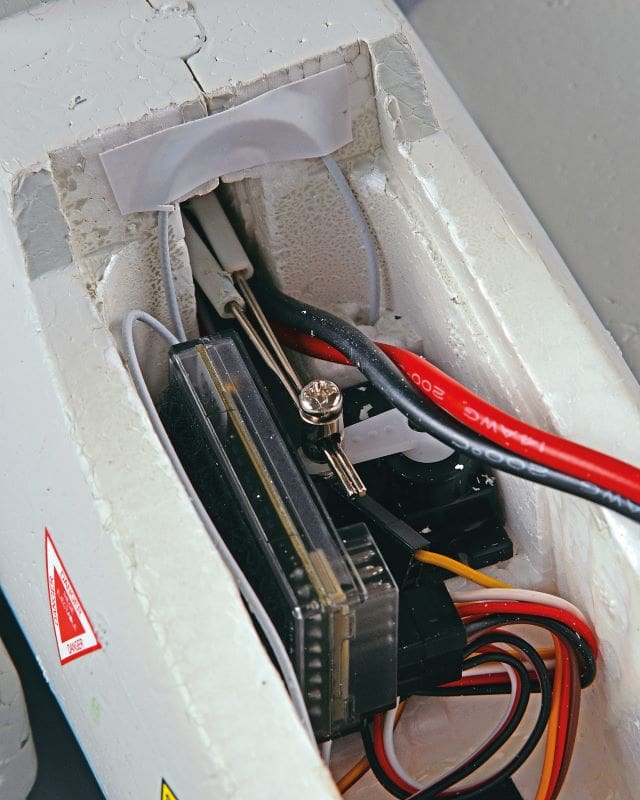
As you can see in a nearby photo the radio / battery bay is quite small, especially with a 3S 2200 mAh LiPo installed, so the only available space for the receiver is in the small space adjacent to the elevator servo. Hence my words of caution about fitting a gyro, although where there’s a will, I am sure there is a way…
The factory fitted 40A ESC is fitted with an XT60 connector, my favourite type. However, most of my 2200 packs are fitted with EC3 connectors but this is no problem as the two types are compatible, at least with an XT plug on the ESC and an EC socket on the LiPo. A hook and loop strap is supplied to secure the battery but I also laid a couple of strips of Velcro along the length of the battery tray for extra security. With a 3S 2200 LiPo strapped in, the battery needs to be placed to the rear of the bay to achieve the recommended balance range. I have found that the battery/ESC wires are best secured underneath the battery strap because if they are left loose then they can flex upwards just enough to stop the magnets at the rear of canopy from securing properly.
Regarding radio set up and CG location then just follow the recommended settings and all will be fine. You can adjust things to suit your personal preference if required after the maiden flights.
JETTING OFF
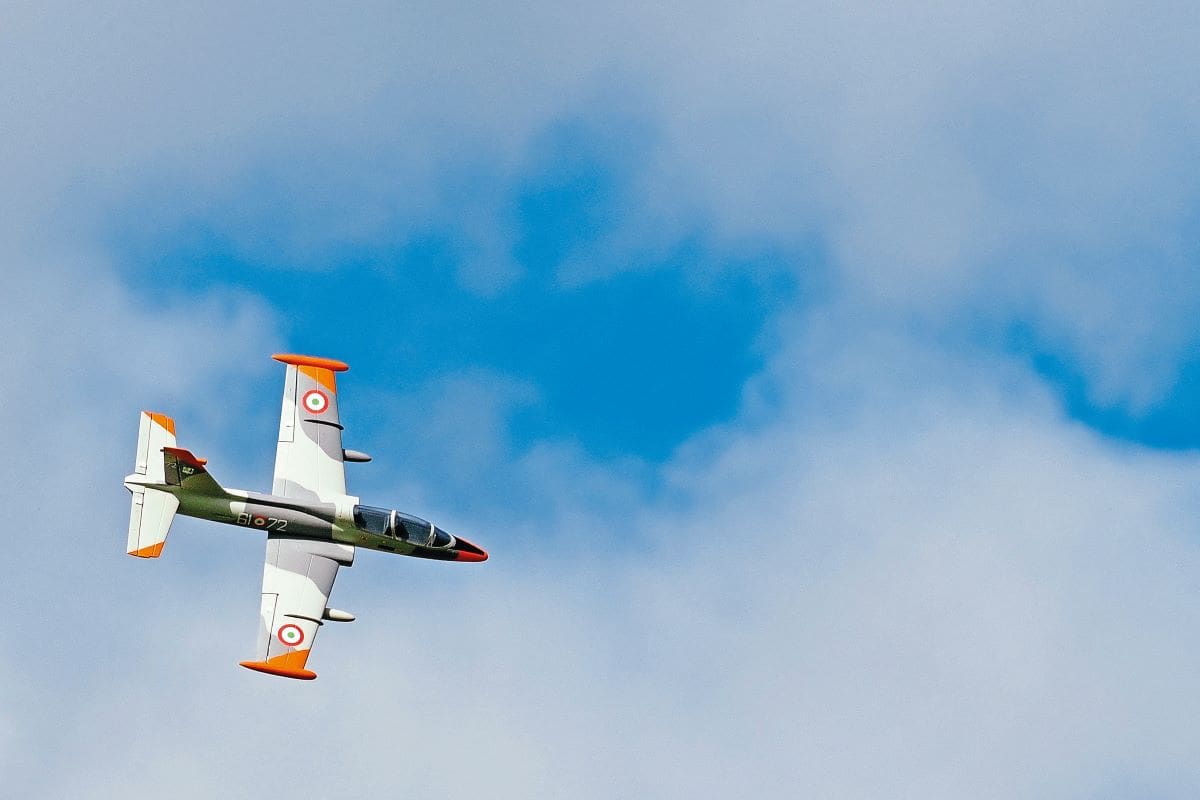
Although the JP MB-339 went together very quickly it had to join an ever-growing squadron of review models, all waiting for their maiden flights due to weeks of wet and windy weather. Eventually the rain stopped and the wind died down – a little bit! So JP’s little jet joined a couple of other models in the back of my car ready for its first outing. One of the attractions of a little model like this is that while it’s not short of performance, its small planform and light weight means that it can be popped into a suitable clear space above or below your other models, making it a useful back up plane.
After a range check, my friend Barry, with his camera in one hand and the MB-339 in the other, stepped forward and gave the small jet a firm launch into the brisk wind. A small amount of right trim was needed along with a fair few clicks of down elevator and then it was time to swish the small Aermacchi past Barry’s telephoto lens for a series of low speed and fast flypasts. The small jet handled all this abuse with aplomb, although as with all jets its best to not slow her up too much in tight turns. If I did then the MB-339 gave me due warning, waffling slightly and urging me to put my foot down. But she never tip stalled, which is better than some EDFs I have flown, which can bite if slowed up too much when arcing around for the camera.
With electric jets I always set a relatively short time on my Tx timer as some models can be very power hungry and can run down a LiPo to a dangerously low capacity in just a short amount of time. I reasoned that five minutes would be a good start with the MB-339 so I was quick to line her up for landing when the Tx buzzer started to sound.
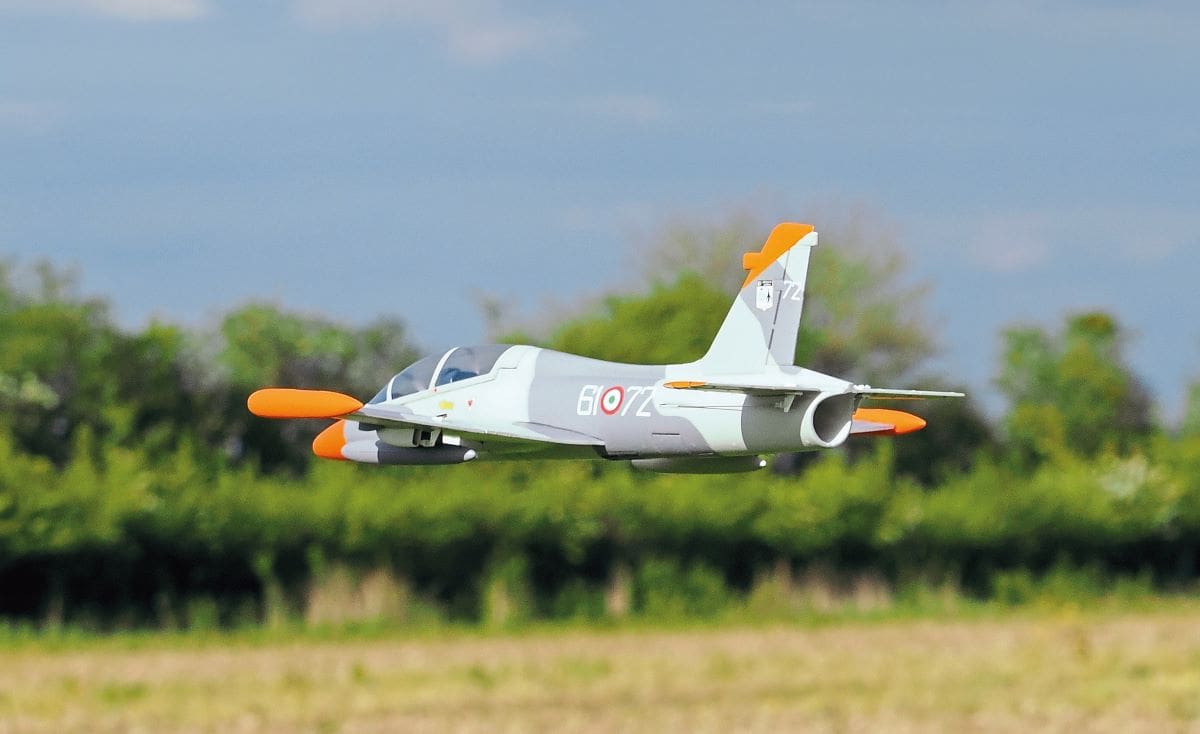
Before this first flight I have to admit that I had concerns about ripping off the underslung drop tanks when landing so I deliberately chose to fly her from a club site with short mown grass (not easy to find so early in such a wet season) but I should not have worried as the MB-339 slid in for a smooth landing. It was almost as if she was landing on an inflatable hovercraft like skirt – nice! This has been replicated during subsequent landings, even over slightly longer, bumpy grass. The only thing I have noticed is that the drop tanks are starting to lose some paint on their undersides so I might add strips of clear tape to help protect them – and maybe cover up the tail joiner slot too!
SUMMARY
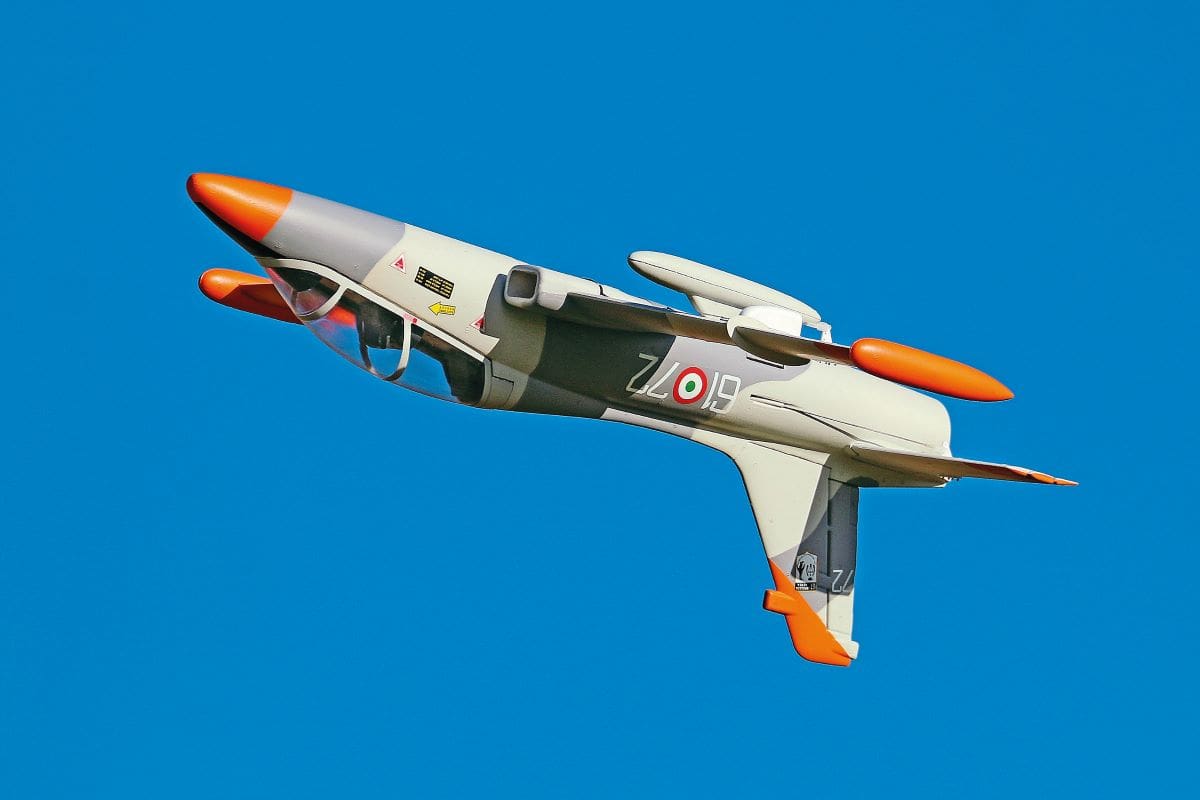
The JP MB-339 has flown many times now in a wide range of conditions and it has proven to be a joy to fly. Whilst you don’t need to hare it around all the time, like most jets it looks its best grooving around at pace. All the usual jet style aerobatics are possible and she looks particularly good on an inverted pass. Pulling up for loops and steep climbs is effortless, rewarding the pilot with a sparkling vertical performance. Speaking of which…
Some may think that the 50 mm fan unit may benefit from the use of a 4S LiPo, but I think that’s probably overkill, especially as a fresh 30 – 50C 3S pack provides such good performance. The extra weight and possible balance issues, not to mention the difficulty of squeezing in a bigger pack, is likely to override the advantage from any possible increase in thrust. You’re on your own with that one!
As for flying times, my 5-minute timer has proved to be a tad too conservative and so I’ll be adding more time in small increments until my LiPos start showing below 30% capacity after each flight.
To sum up, here we have a stylish small rendition of a great looking military jet which not only flies very well but is also kind to LiPos whilst offering reasonably long flight times. You won’t want to overdo things of course, but with the JP MB-339 and a decent LiPo you are sure to enjoy more than just a handful of fast passes before needing to land.
DATAFILE
Model: JP MB-339
Model type: ARTF mini jet
Manufacturer: JP
UK distributor: J Perkins https://www.jperkins.com/products/JPDF1201
RRP: £159.99
Length: 32.5″ (825 mm)
Wingspan: 31.4″ (800 mm)
Flying weight: 20.8 oz (590 g)
Motor size: 2627 4900KV
ESC: 40A with XT60 connectorEDF unit: 50 mm, 11 blades
Servos: 3 x 9 g analogue
Functions (servos): Ailerons (2), elevator (1), throttle (ESC)
CG: 55 – 65 mm from leading edge at air inlets
LiPo: 3S 1600 – 2200 mAh, 30 – 50 C


