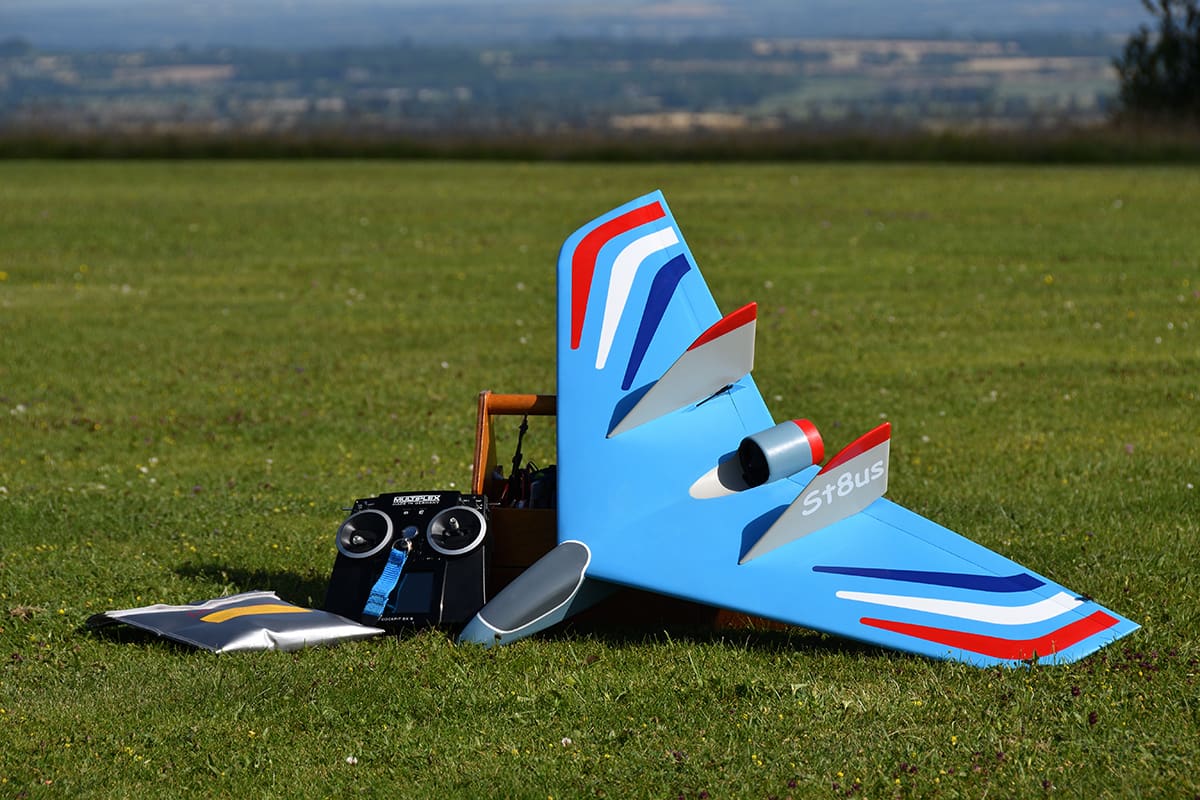
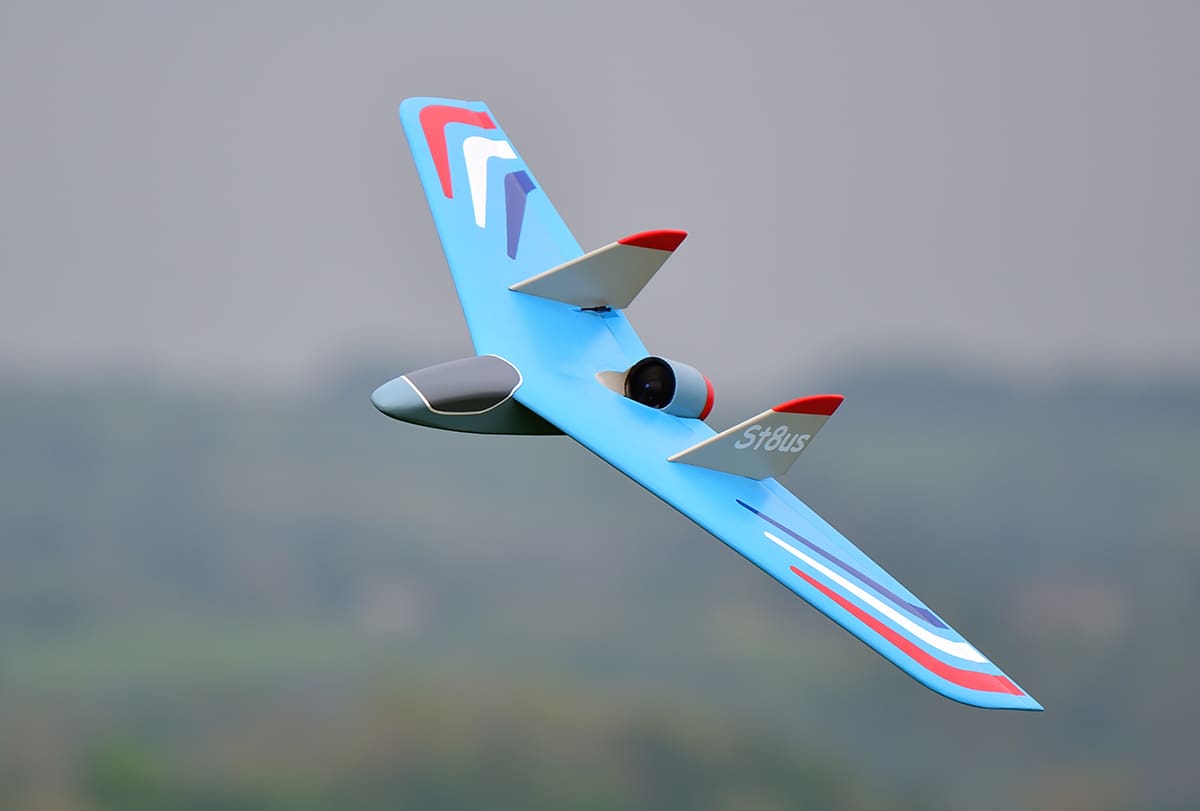
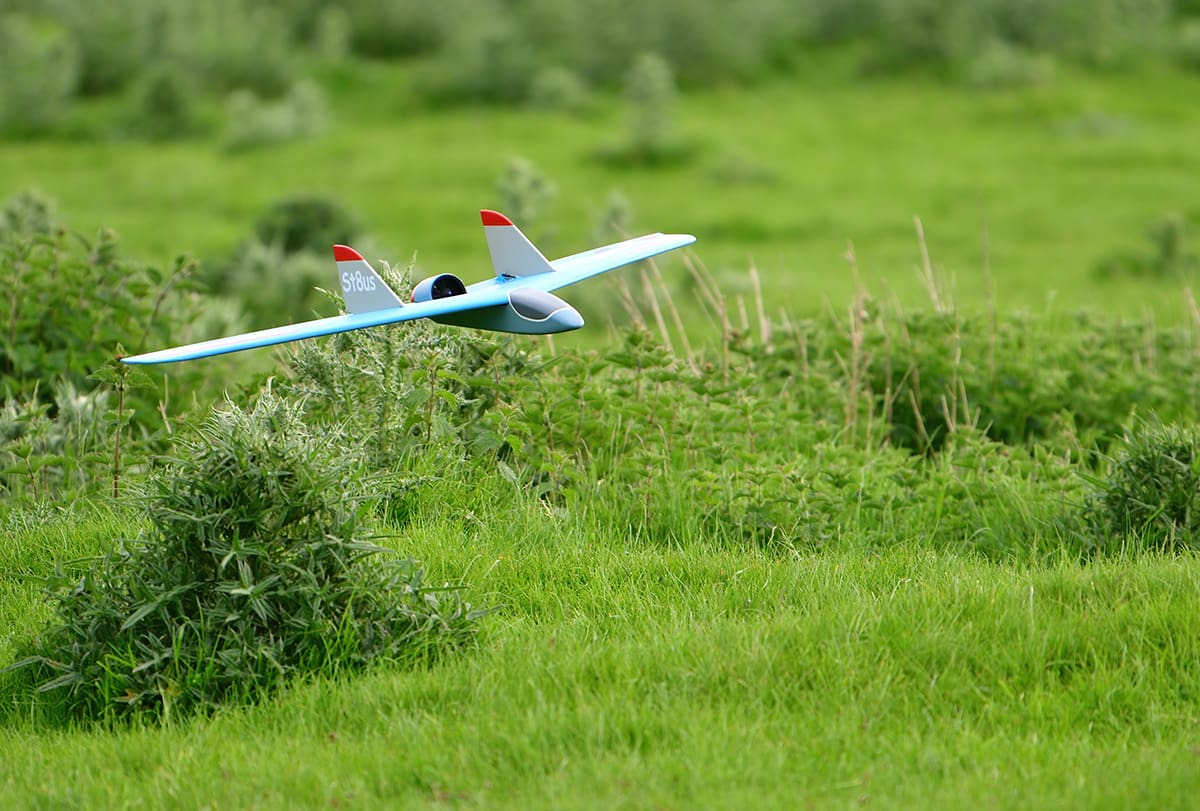
A 1.0m (39.4”) span EDF flying wing. Built entirely from Foamboard and brown paper.
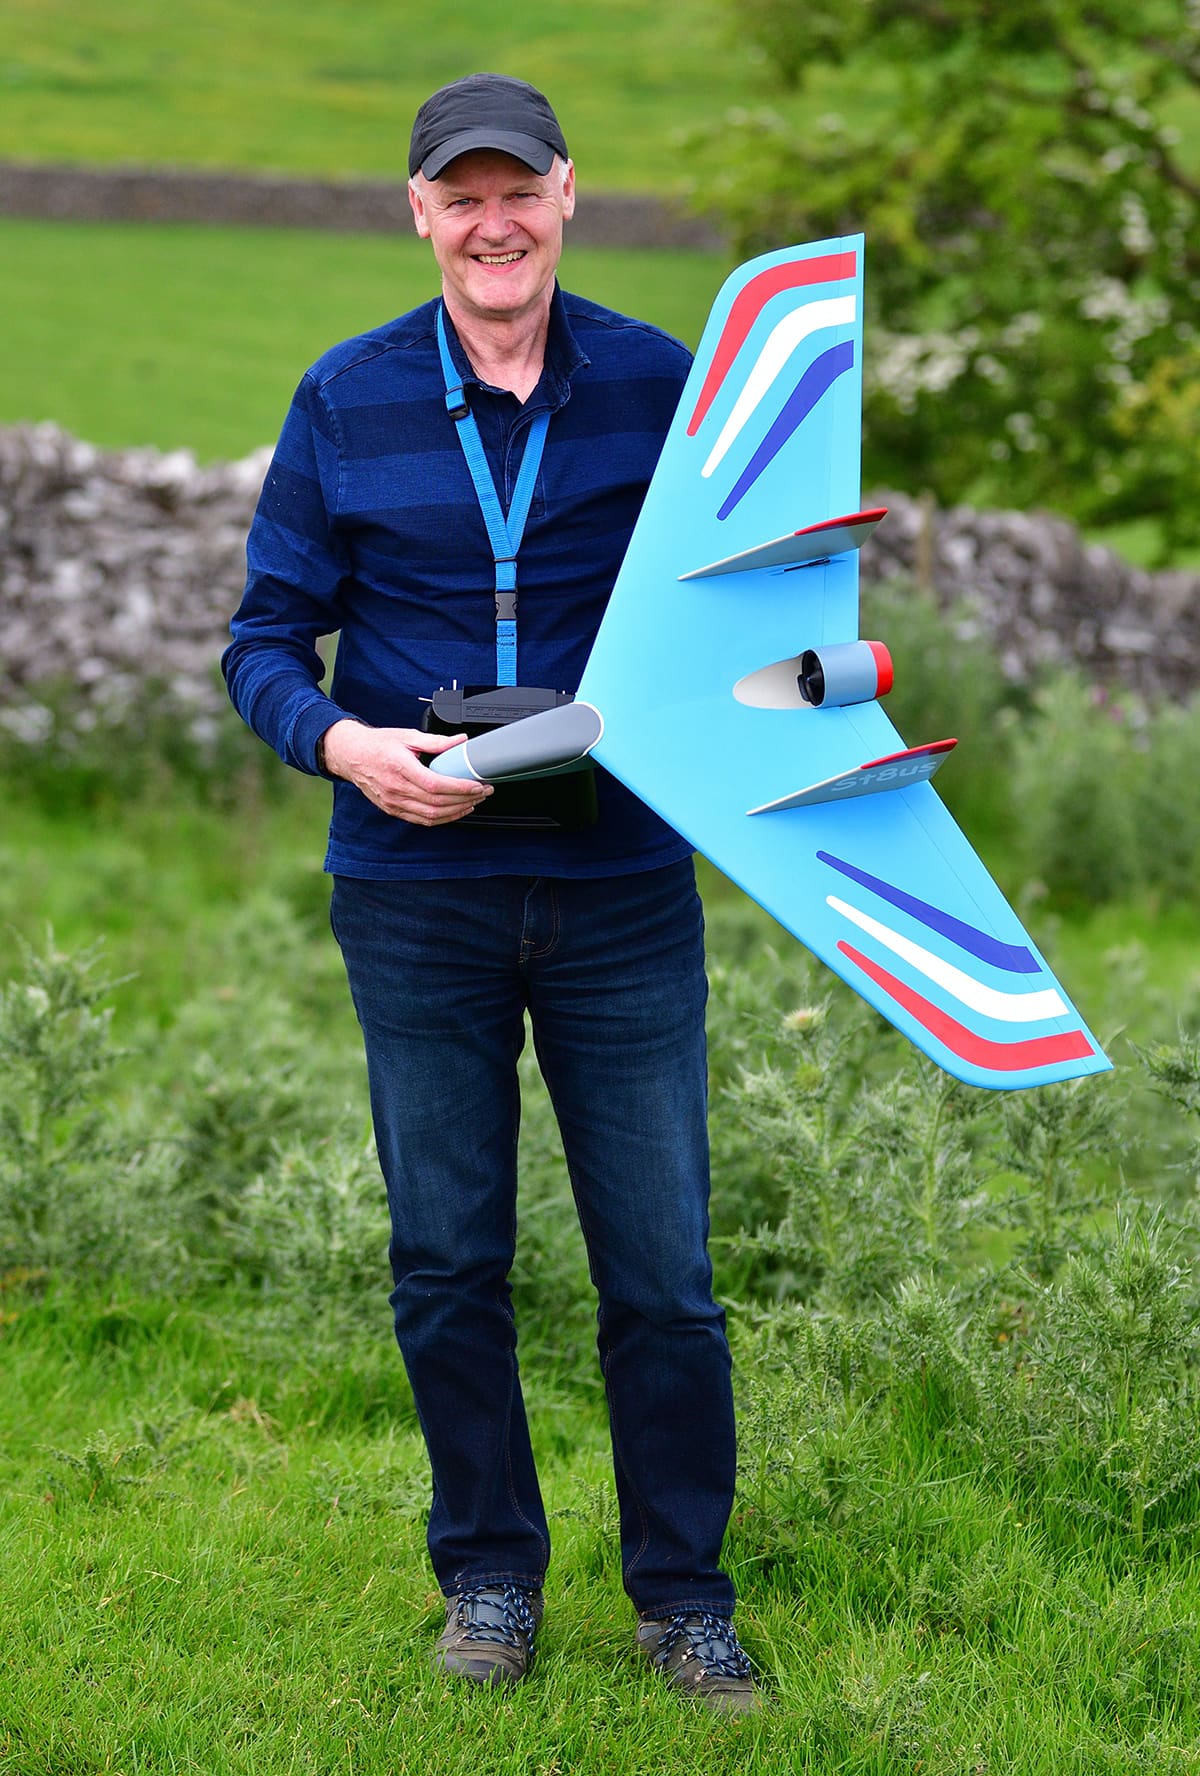
Words: Mike Freeman Photographs: Mike Freeman & Al Freeman
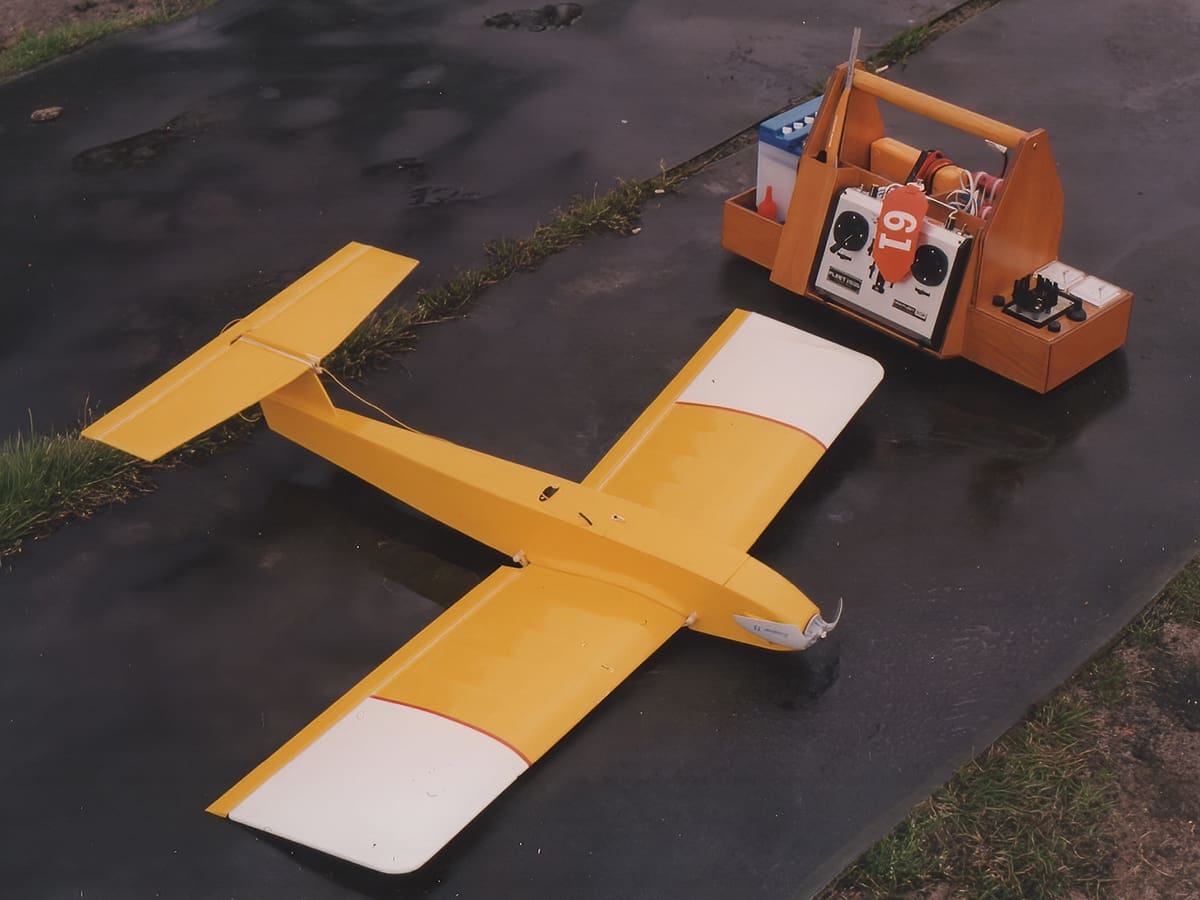
I’ve been really pleased with my Hi8us flying wing model which featured in the July ‘22 issue. That is until one winters day I launched and the spinning prop clipped a knuckle as it flew past! I hadn’t heeded my own advice to quickly get my hand out of the way!! Thankfully I had gloves on and they took the brunt but it still hurt!
Once the pain had subsided and to avoid the risk of it happening again I decided to build an EDF version using one of the tiny 50mm Powerfun units that George at 4-Max Models sells. These delightful little units are very reasonably priced but I was shocked at the cost of balsa these days. Whilst searching for a cheaper alternative I remembered a model I’d designed 33 years ago called Omnibox which had a boxy fuselage and tailplane made from Foamboard. I thought it might be time to have another go with this mysterious material but was sure the subsequent years of aeromodelling experience could come up with something a little more elegant. After a very interesting and rewarding learning curve and three prototypes the St8us you see here finally emerged.
Enjoy more RCM&E Magazine reading every month.
Click here to subscribe & save.
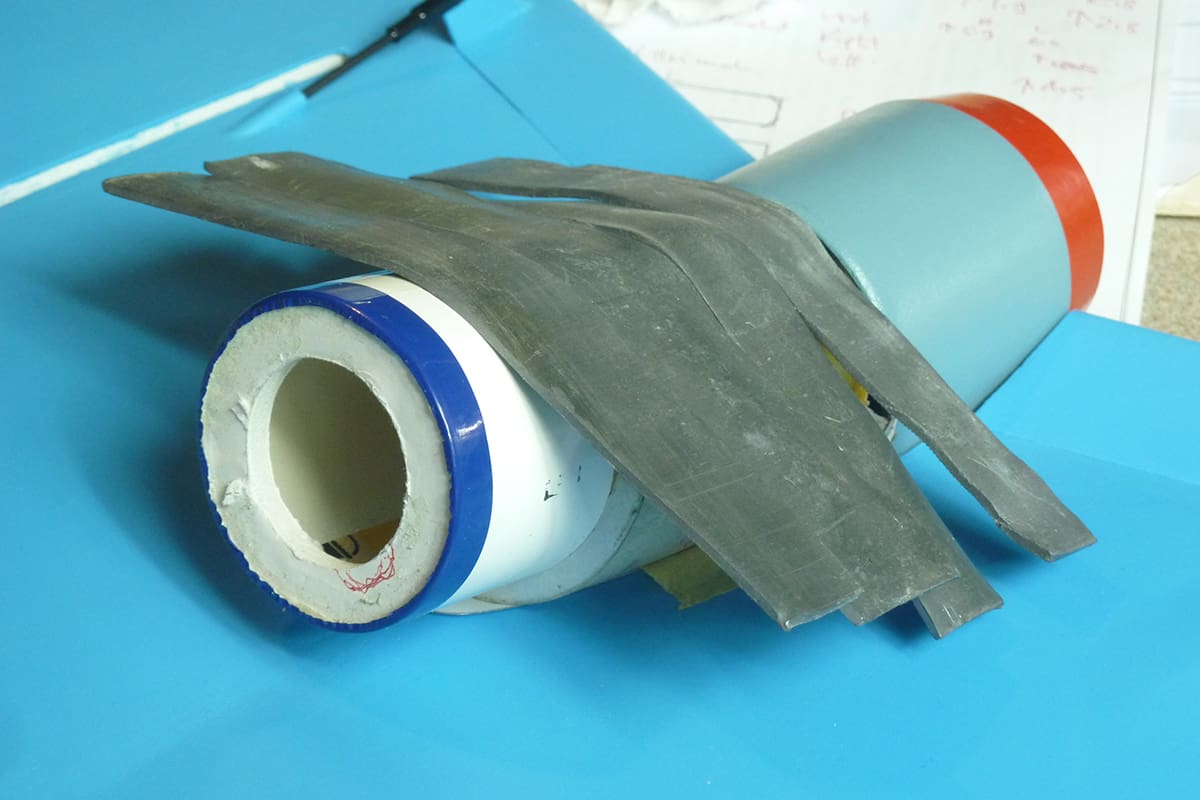
The fuz & tailplane are Foamboard and the wing is traditional balsa built-up unit.
BUILDING A ST8US
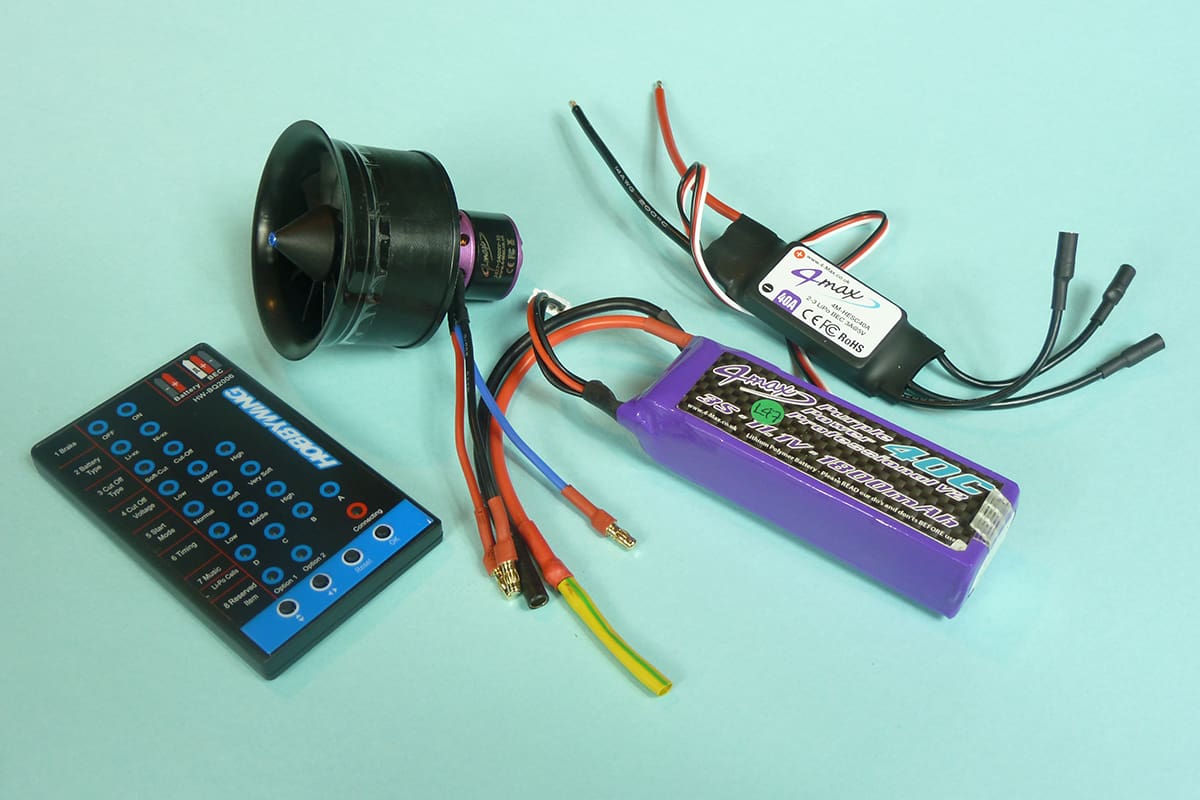
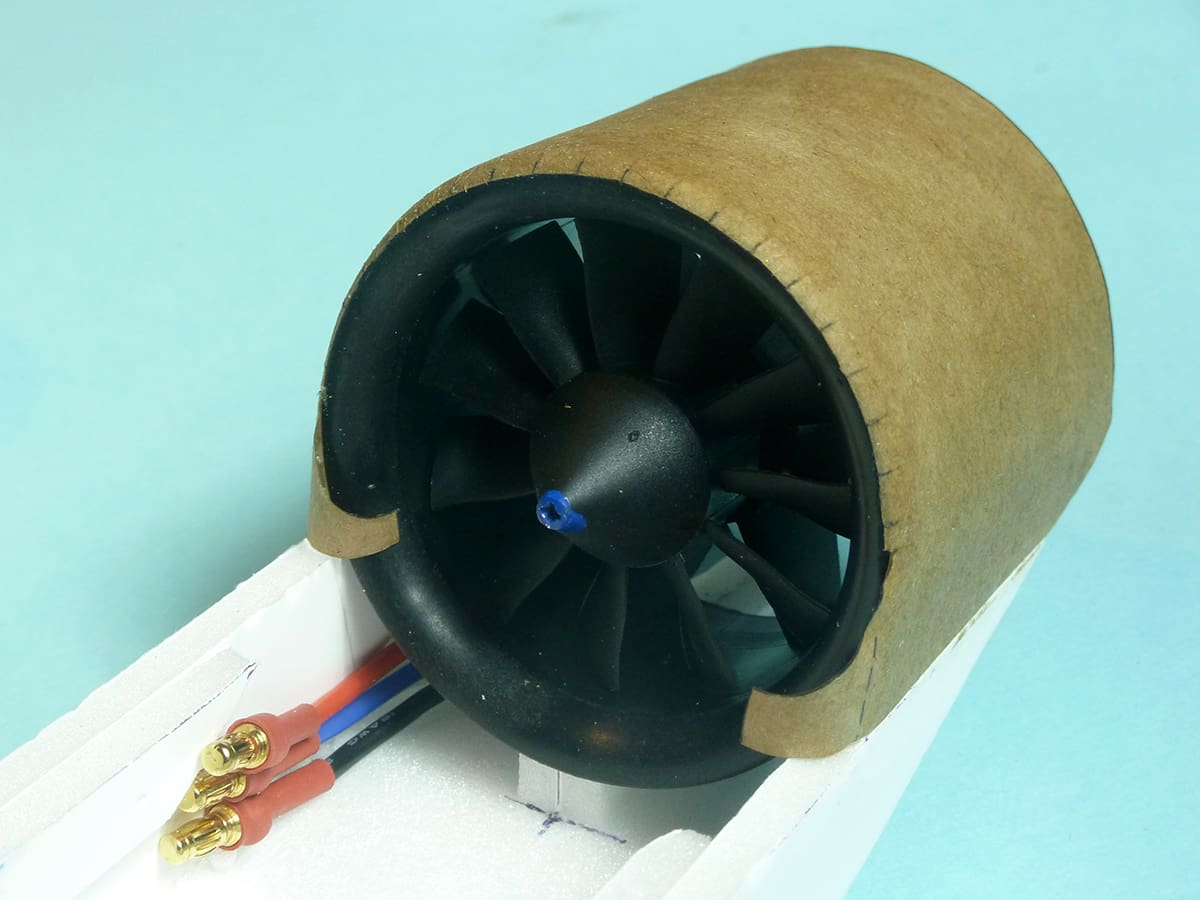
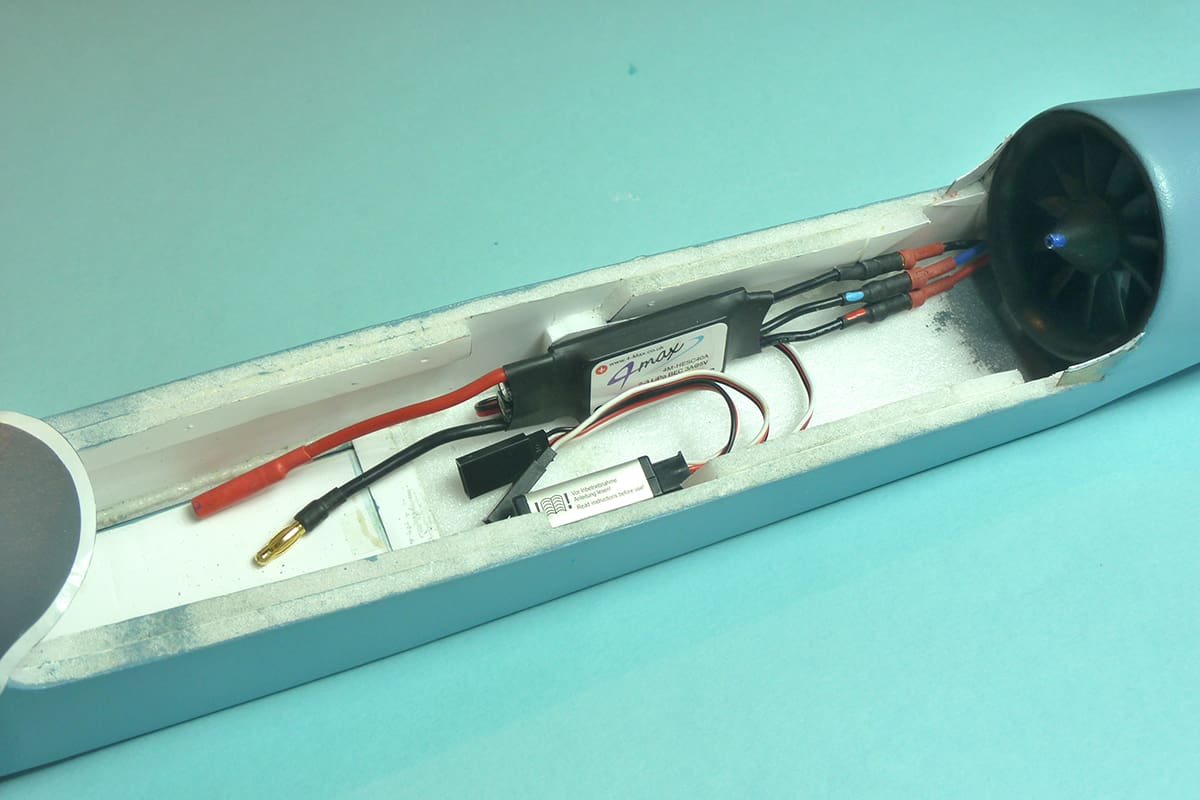
St8us is made entirely from Foamboard and brown paper. There is no wood or other traditional modelling materials involved. A 50mm 4-Max PowerFun 3S 5400kV EDF, 50A ESC and 3S 1800mAhr Lipo provides the oomph.
Foamboard is a great material to build with but there are a few things to bear in mind:
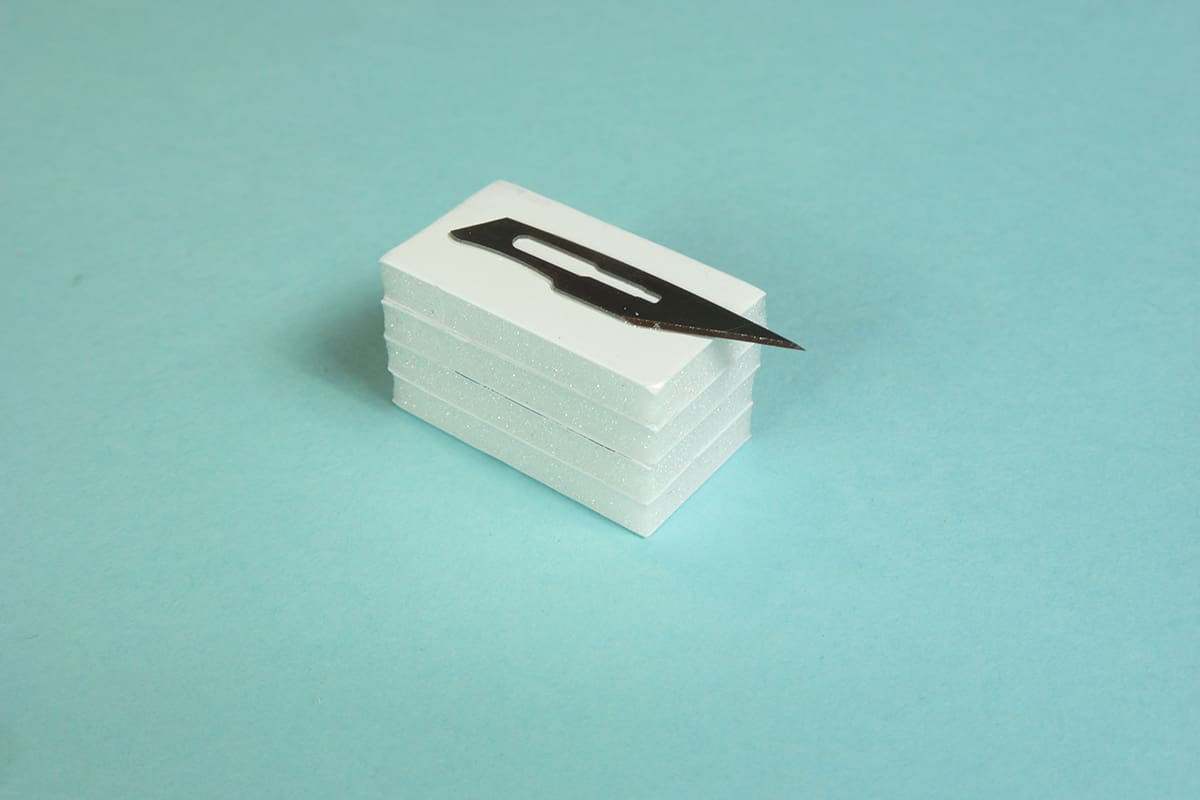
- Make sure the building board is kept meticulous clean as any debris will damage the surface of the Foamboard.
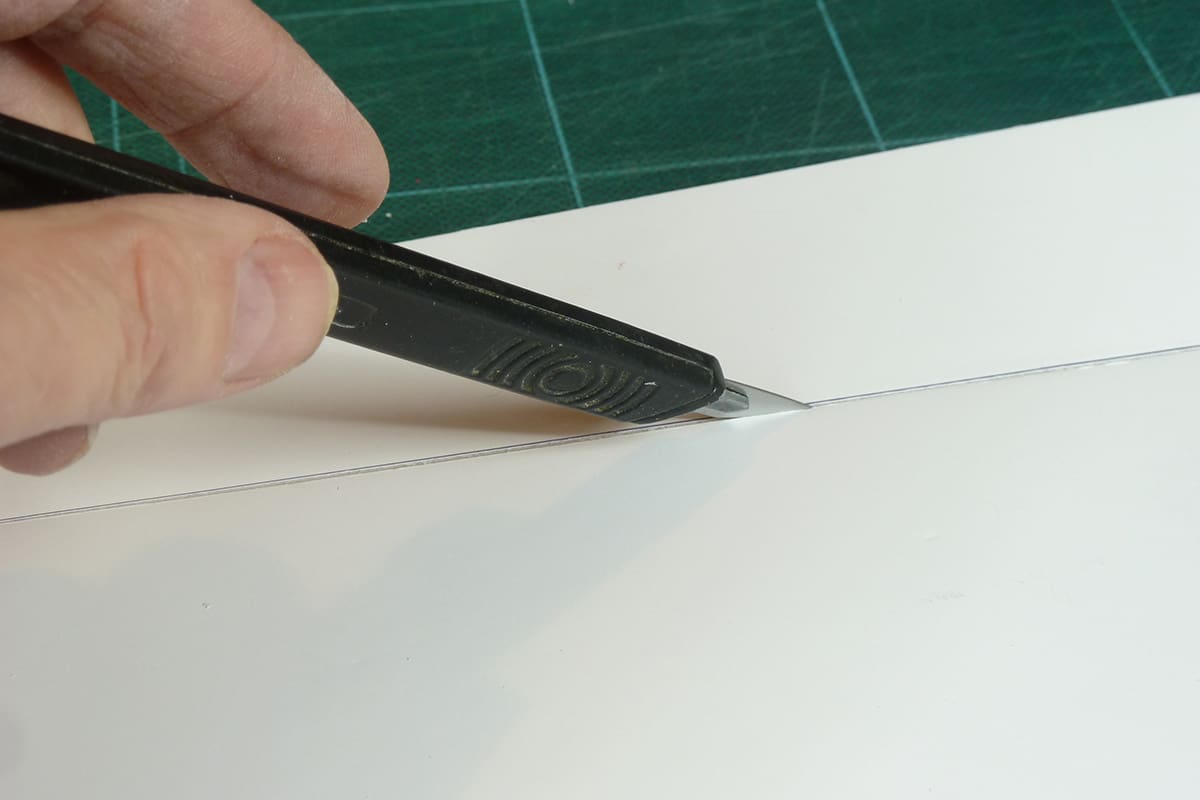
- Make sure your blade is sharp as they go blunt surprisingly quickly. You’ll need a good supply of fresh blades or a sharpening stone to keep a few blades nice and sharp.
- Always make sure the blade is at 90° to the Foamboard when cutting out as the finished surface is occasionally on the opposite side to the cut.
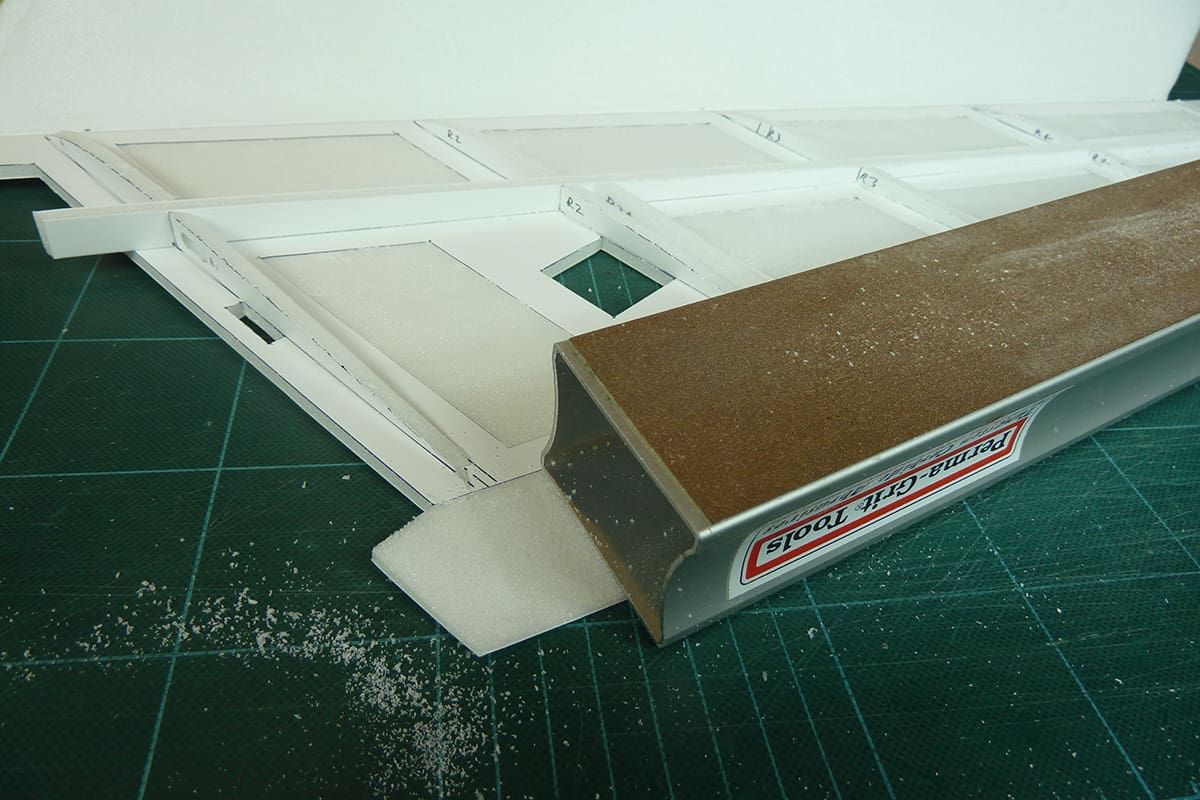
- Foamboard is very easy to sand… too easy, so be careful! I find a few strokes with the rough side of a Permagrit block followed by some 180 grit sandpaper to finish works best.
- Most foam safe glues work well with Foamboard but key the surface of the card and foam first to take the shine off. My favourites glues to use are:
- Gorilla Glue Clear and UHU POR for general joints.
- Gorilla Glue Original where the expanding properties can be utilised.
NOTE: not all Foamboards are equal!
The St8us design was based on 5mm Foamboard with a trade name “Westfoam” readily available from Hobbycraft. Great for modelling as the card can be removed with a hot iron to save weight and increase the versatility of the product. Just prior to the planned publication of this St8us article in RCM&E Hobbycraft changed supplier and the new stuff isn’t as good. It’s slightly thicker at 6mm (the plan has been revised to cater for this) but sadly heat doesn’t remove the card – water needs to be applied and the card rubbed off with a fingertip. A little messy and time consuming but doable if you can’t get hold of the Westfoam Foamboard. If using water try to keep it away from areas where the card is to remain and leave to fully dry before moving on to the next stage. Alternatively, if you don’t mind covering a model, you could use 5mm Vitrex underlay and cover it with brown paper or iron on film. Some parts of the model use salvaged card from the Foamboard. If you had to wash the card off use 120-150gsm card/paper where required. Apply a thin coat of Deluxe Materials Covergrip for bonding together.
As the construction is quite unorthodox what follows is a step by step set of instructions which probably took longer to write out than it will take to build the actual model!! Some of the photos around are from earlier versions so may not perfectly match the plan but will show the intent! St8us needs 3 x A1 sheets of Foamboard and there’ll be plenty of bits left over to practice on!!
I’ve also started a thread on RCM&E’s forum with more photos and explanations where I’ll also try to answer any questions that may arise. Here goes…. Good Luck.
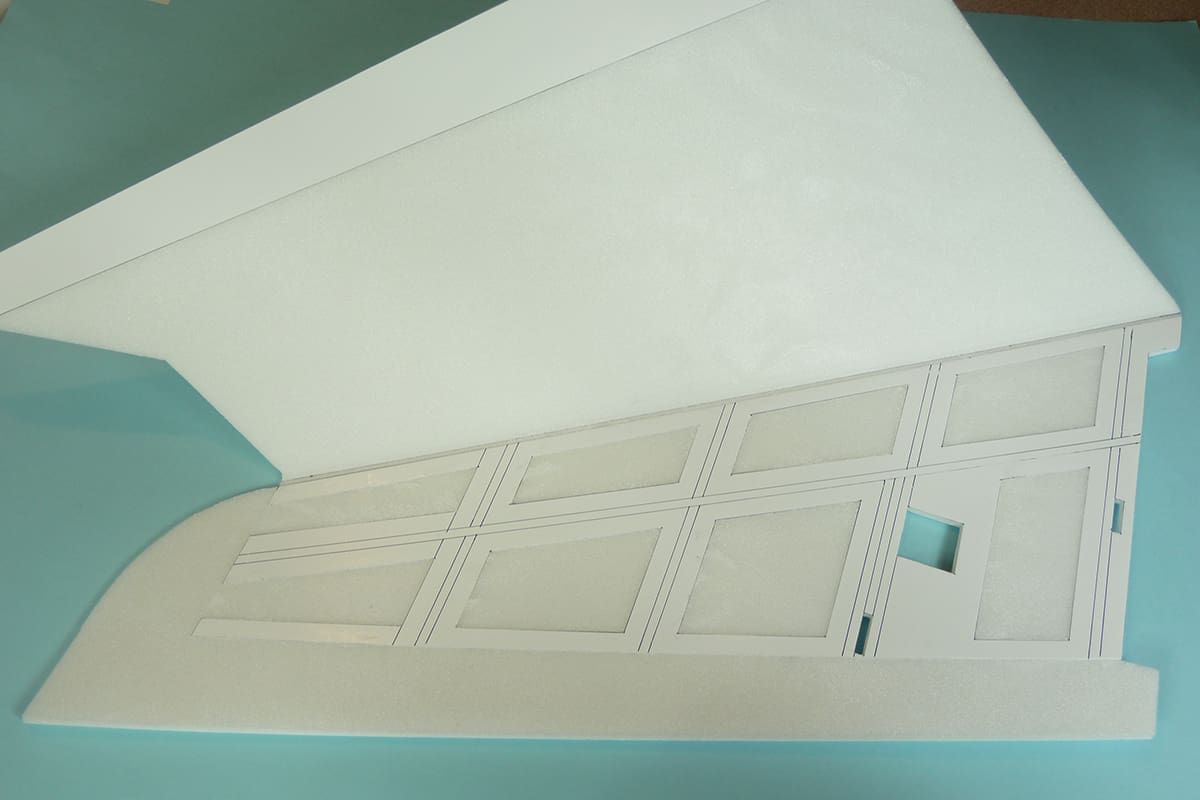
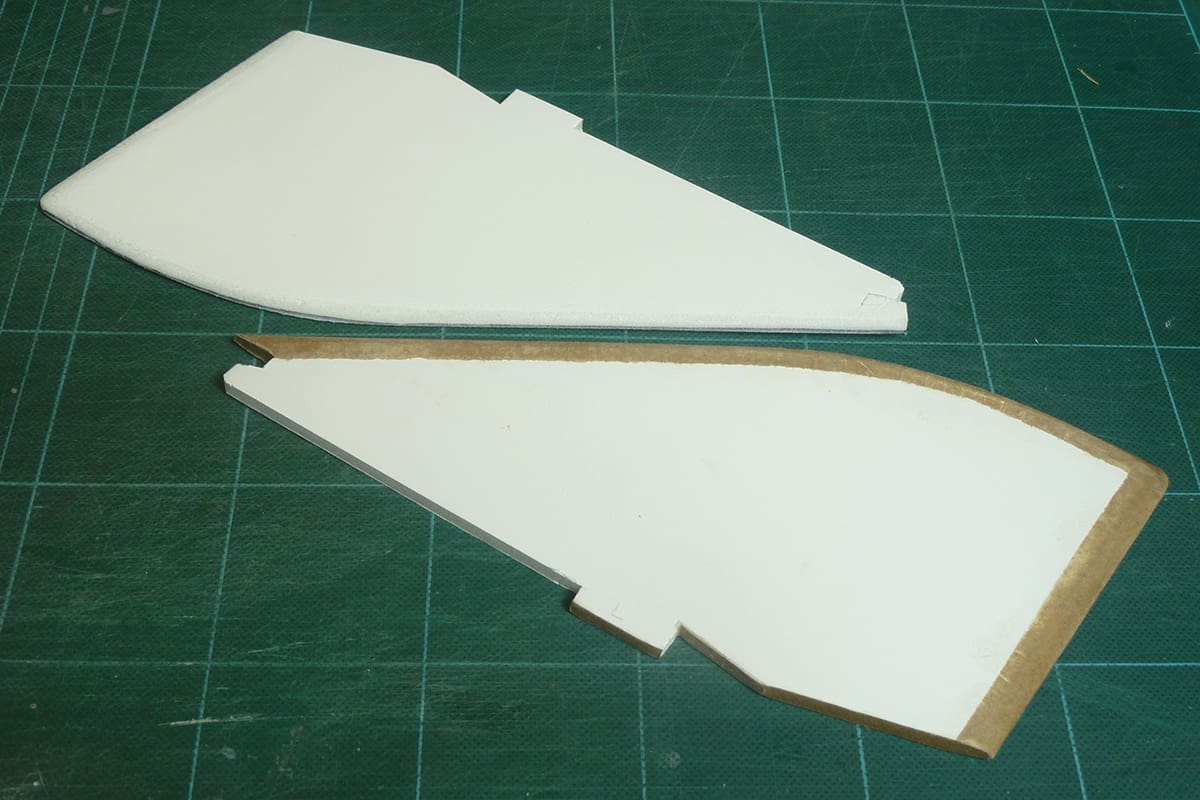
Wings
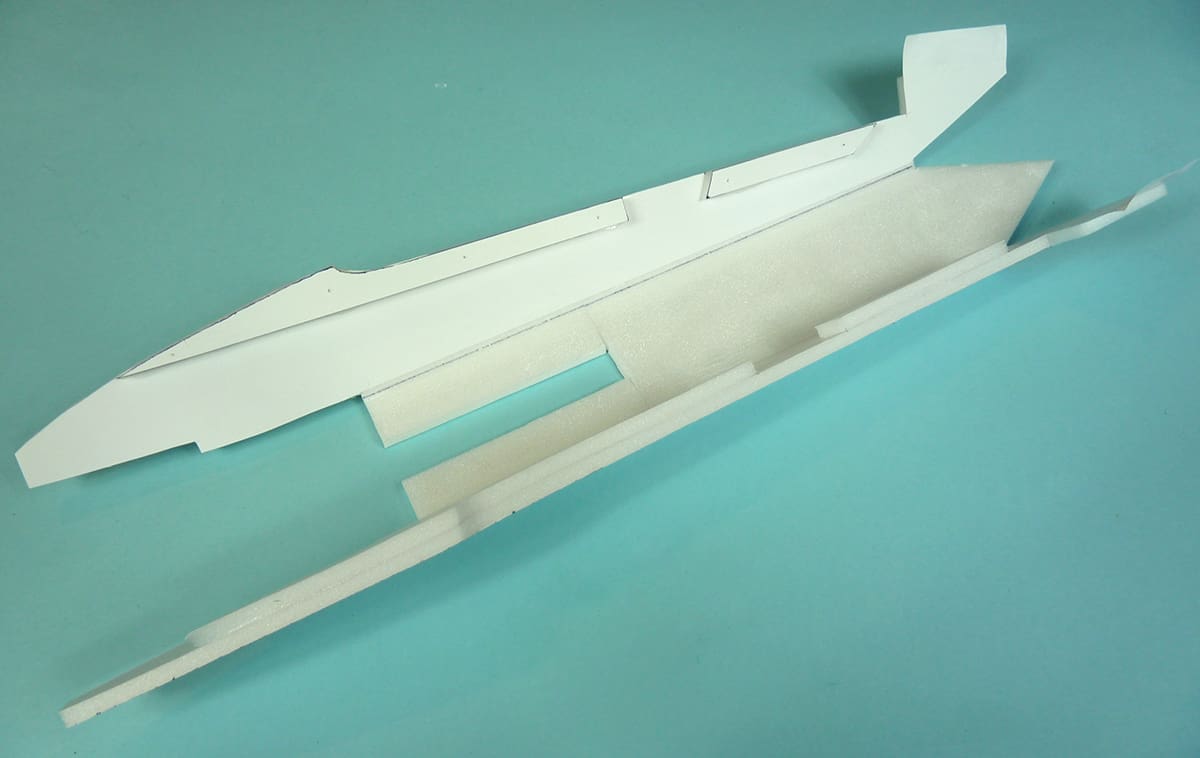
We start with the right wing panel shown on the plan.
- Tape the plan onto the Foamboard and prick through with a pin to locate all the salient points. With constant reference to the plan join up all the pin holes to give you an outline, cut lines and rib/spar locations.
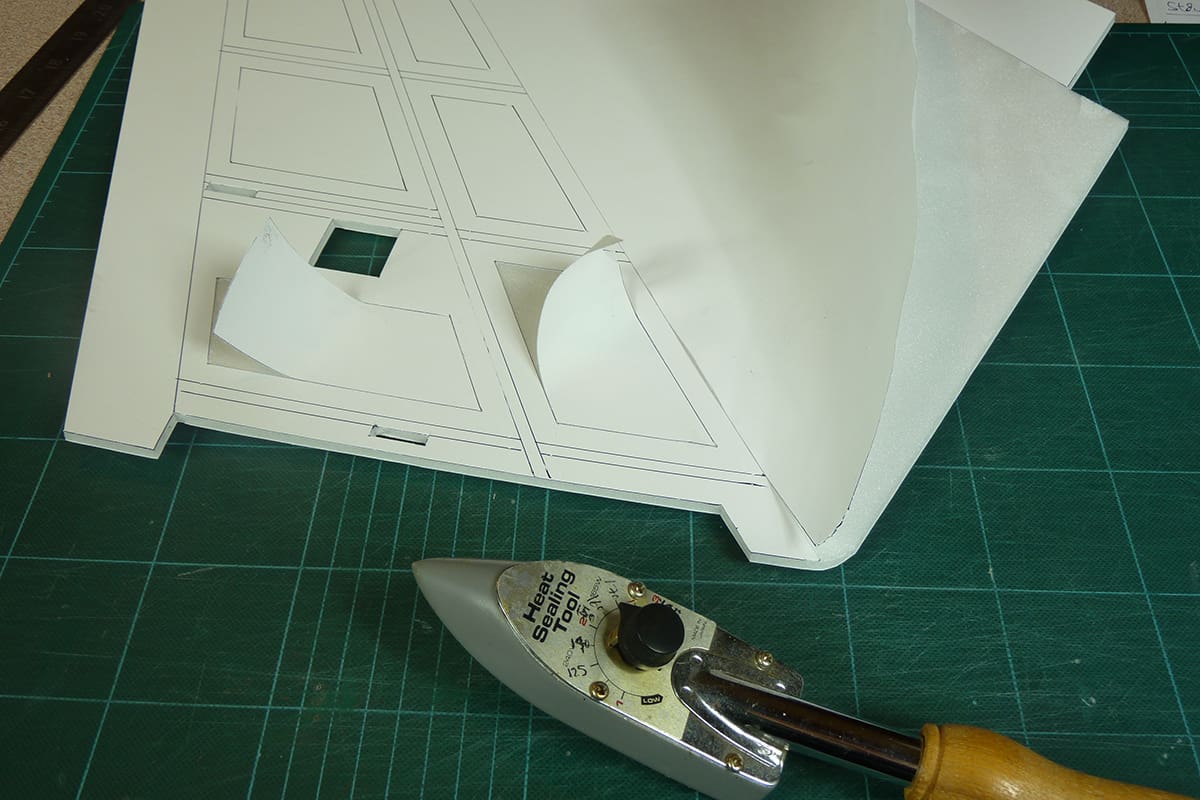
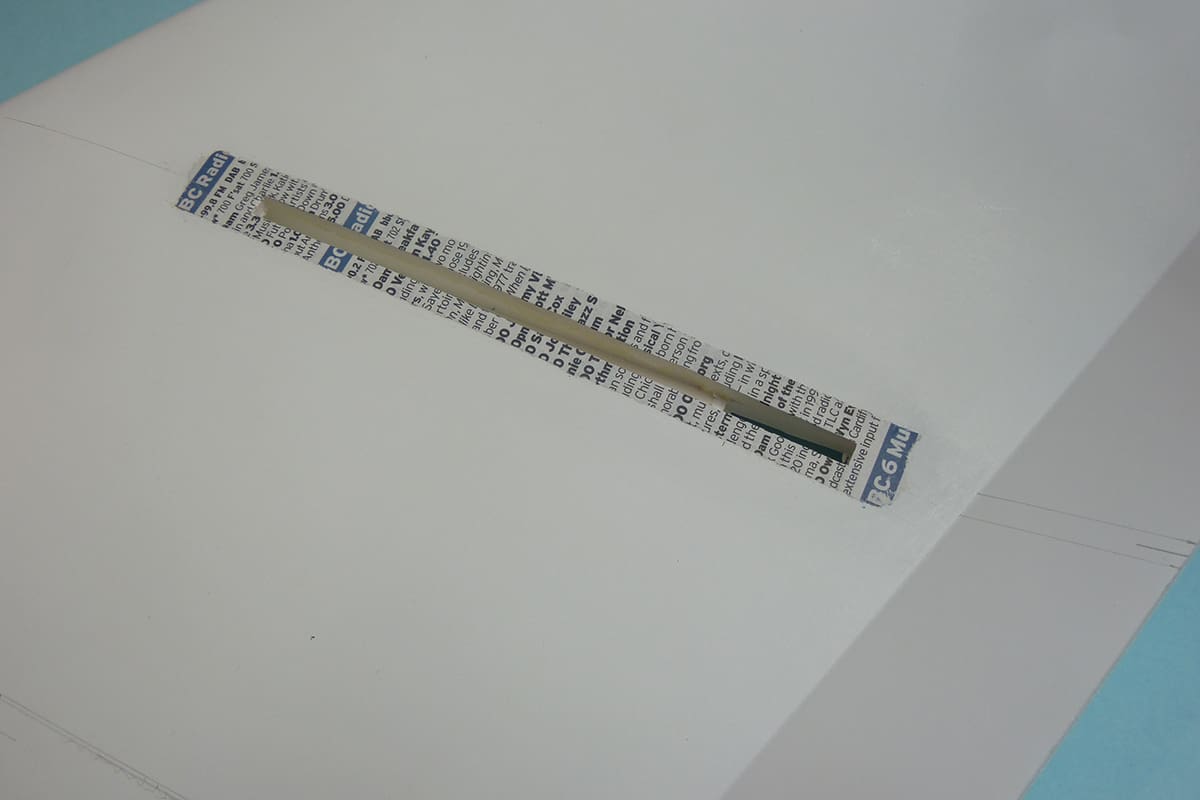
- Cut the openings for the servo access and slots in the top and bottom skin for the fin. Note the fin slot in the top skin is undersized to cater for both thicknesses of Foamboard and is opened up later when the wing is folded up and glued.
- Cut out the outline and carefully cut through just the card where sections of card are to be removed.
- The next step depends on which Foamboard you’re using…..
- If you’ve got the heat-sensitive stuff set your film iron to approx. 160°C and carefully run the iron over the sections of card to be removed and peel off the card. It takes a bit of practice but once mastered is quite quick. Use some offcuts to practice on if preferred. This is a worthwhile exercise as it shaves about 25g off the weight of each panel!!
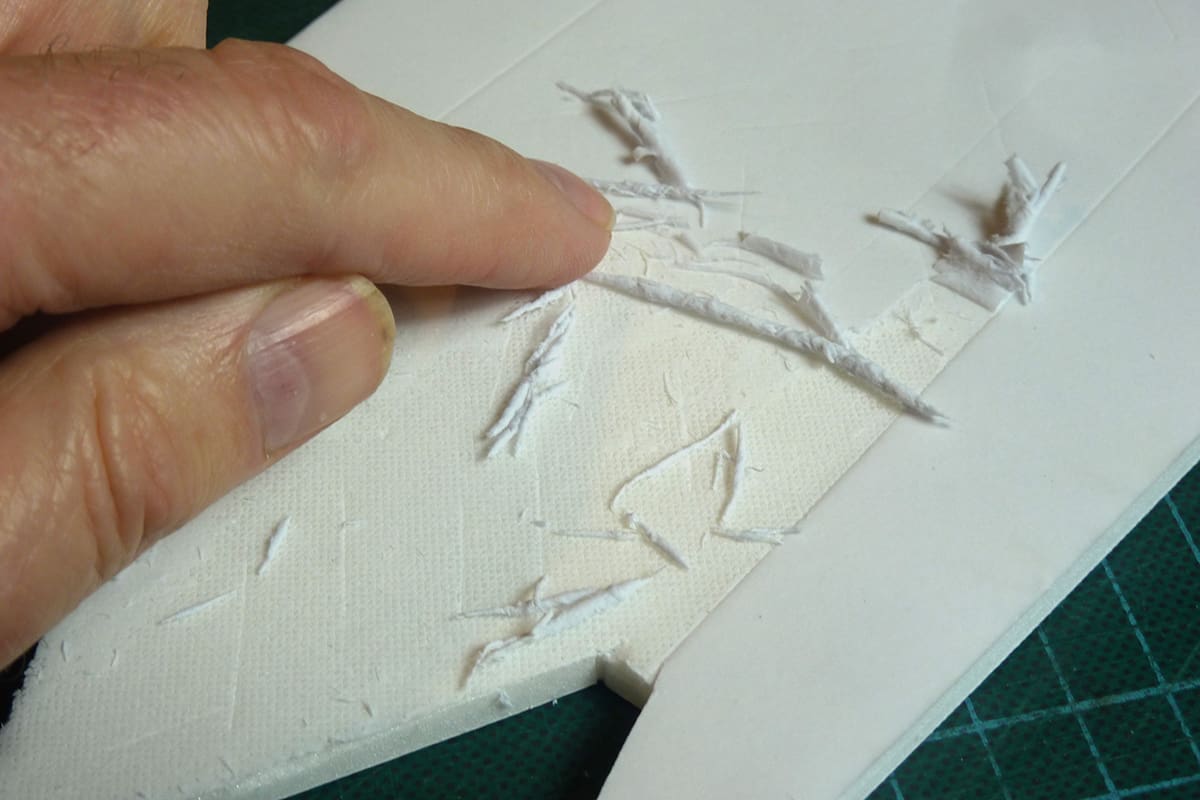
- If you’ve got the non heat-sensitive stuff roughen the surface of the card to be removed with sandpaper and brush plain water onto the surface. Leave for a few minutes to soak in and then rub the surface with a fingertip until the top surface comes away then the rest of the card will easily rub off. Leave to thoroughly dry before moving on.
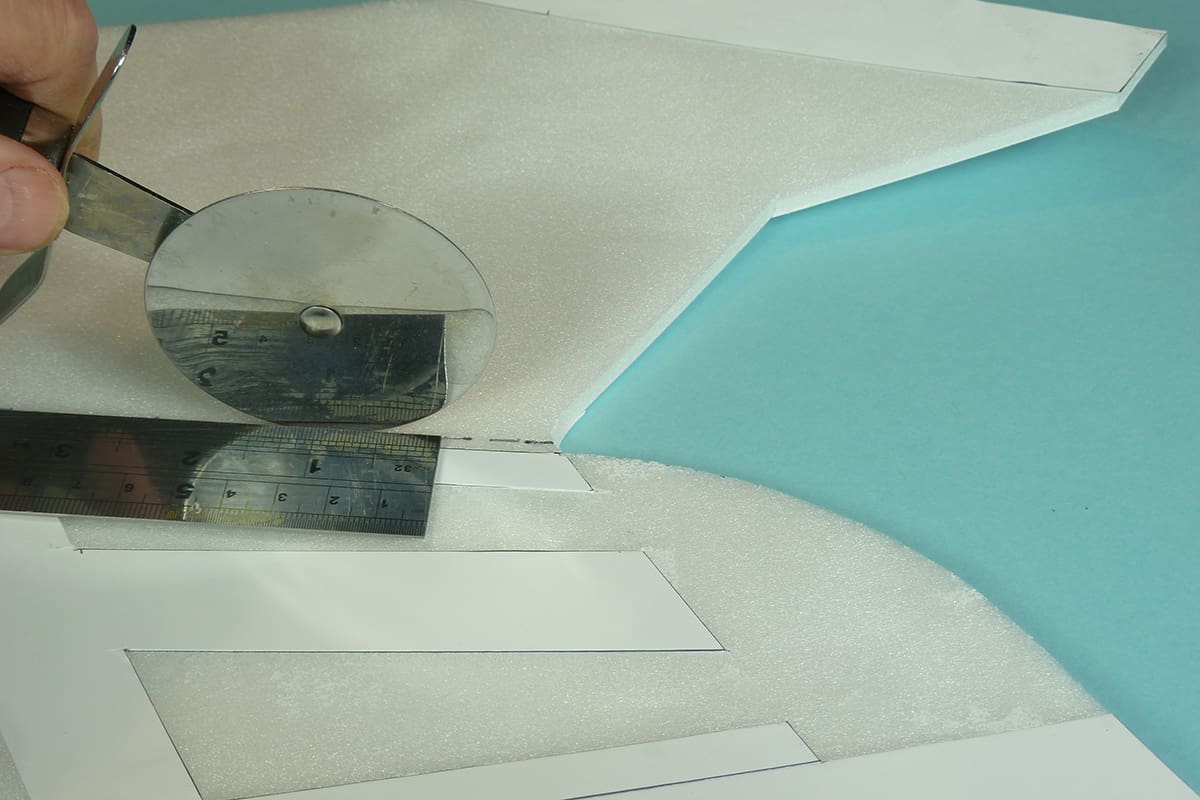
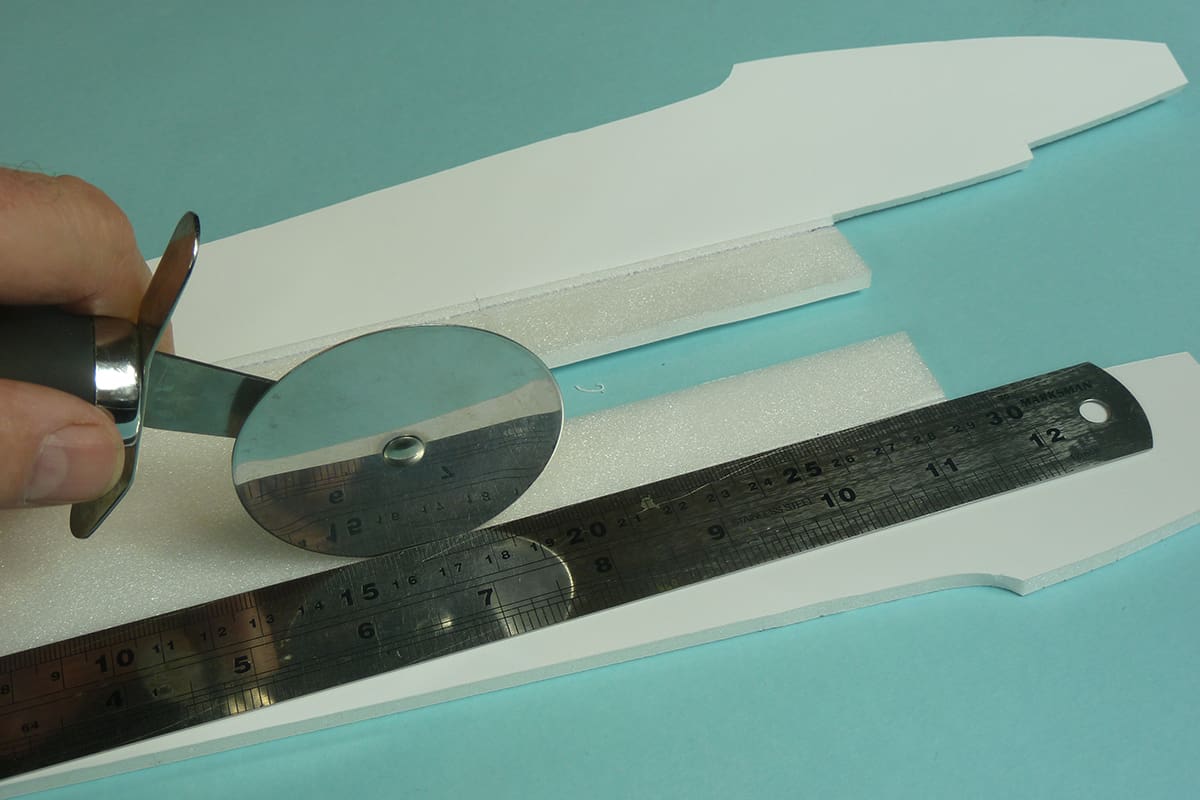
- Mark a line 3mm in front of the bottom sheet card LE and using a straight edge and a pizza cutter form a crease in the foam to help the LE form as the top skin is folded over. Go back and forth several times to make a deep crease. Practice on some scrap Foamboard first to establish how much pressure to apply.
- When the top skin is folded over weigh down for a while to allow the foam at the LE to “give” and allow the fold to become permanent.
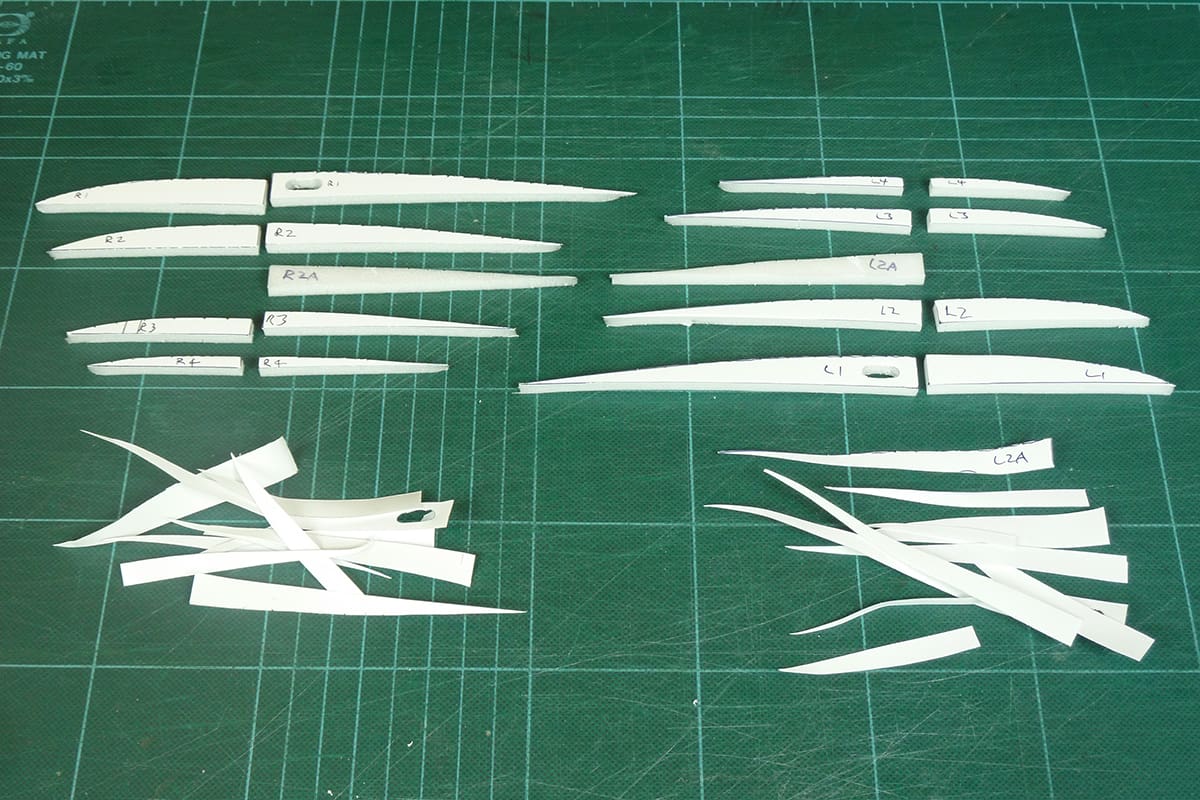
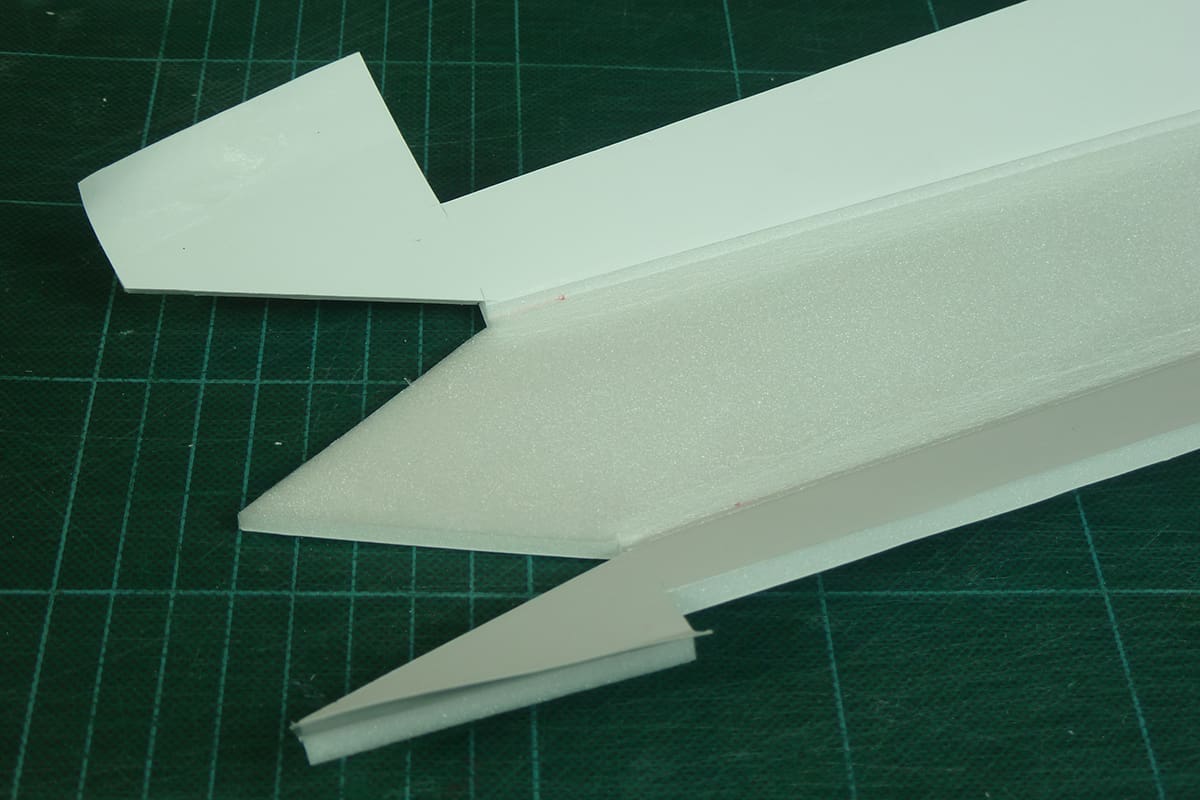
- Cut out the ribs and remove the card on the wing tip side of each rib. Chamfer the LE of the ribs and at the spar location to accommodate the wing sweep.
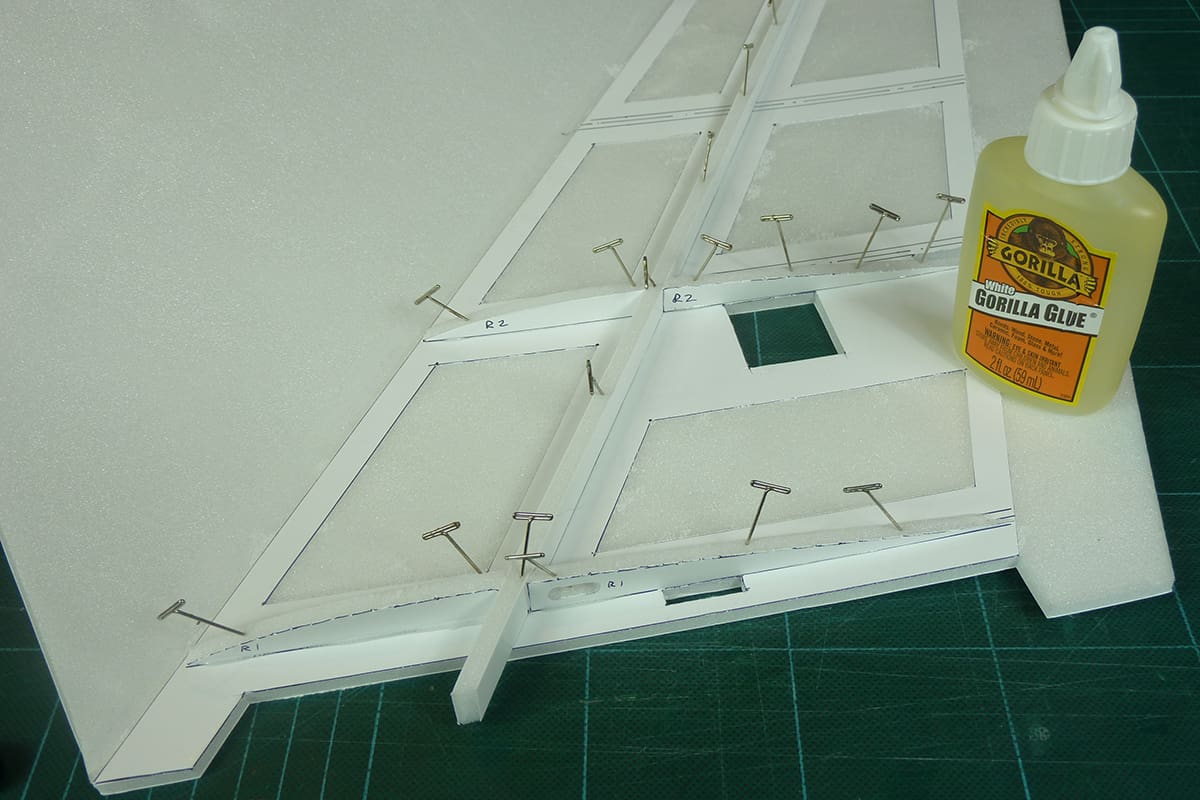
- Cut out the spar and chamfer the root. Glue and pin the spar to the lower skin.
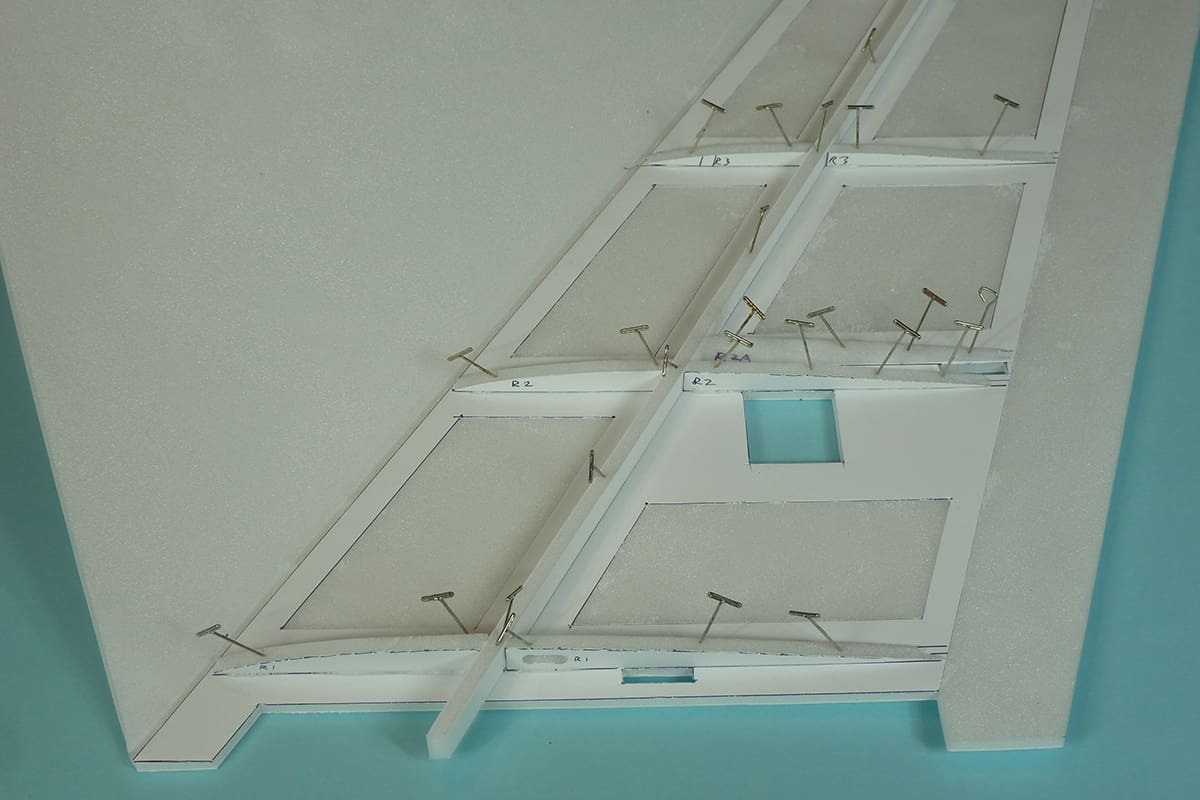
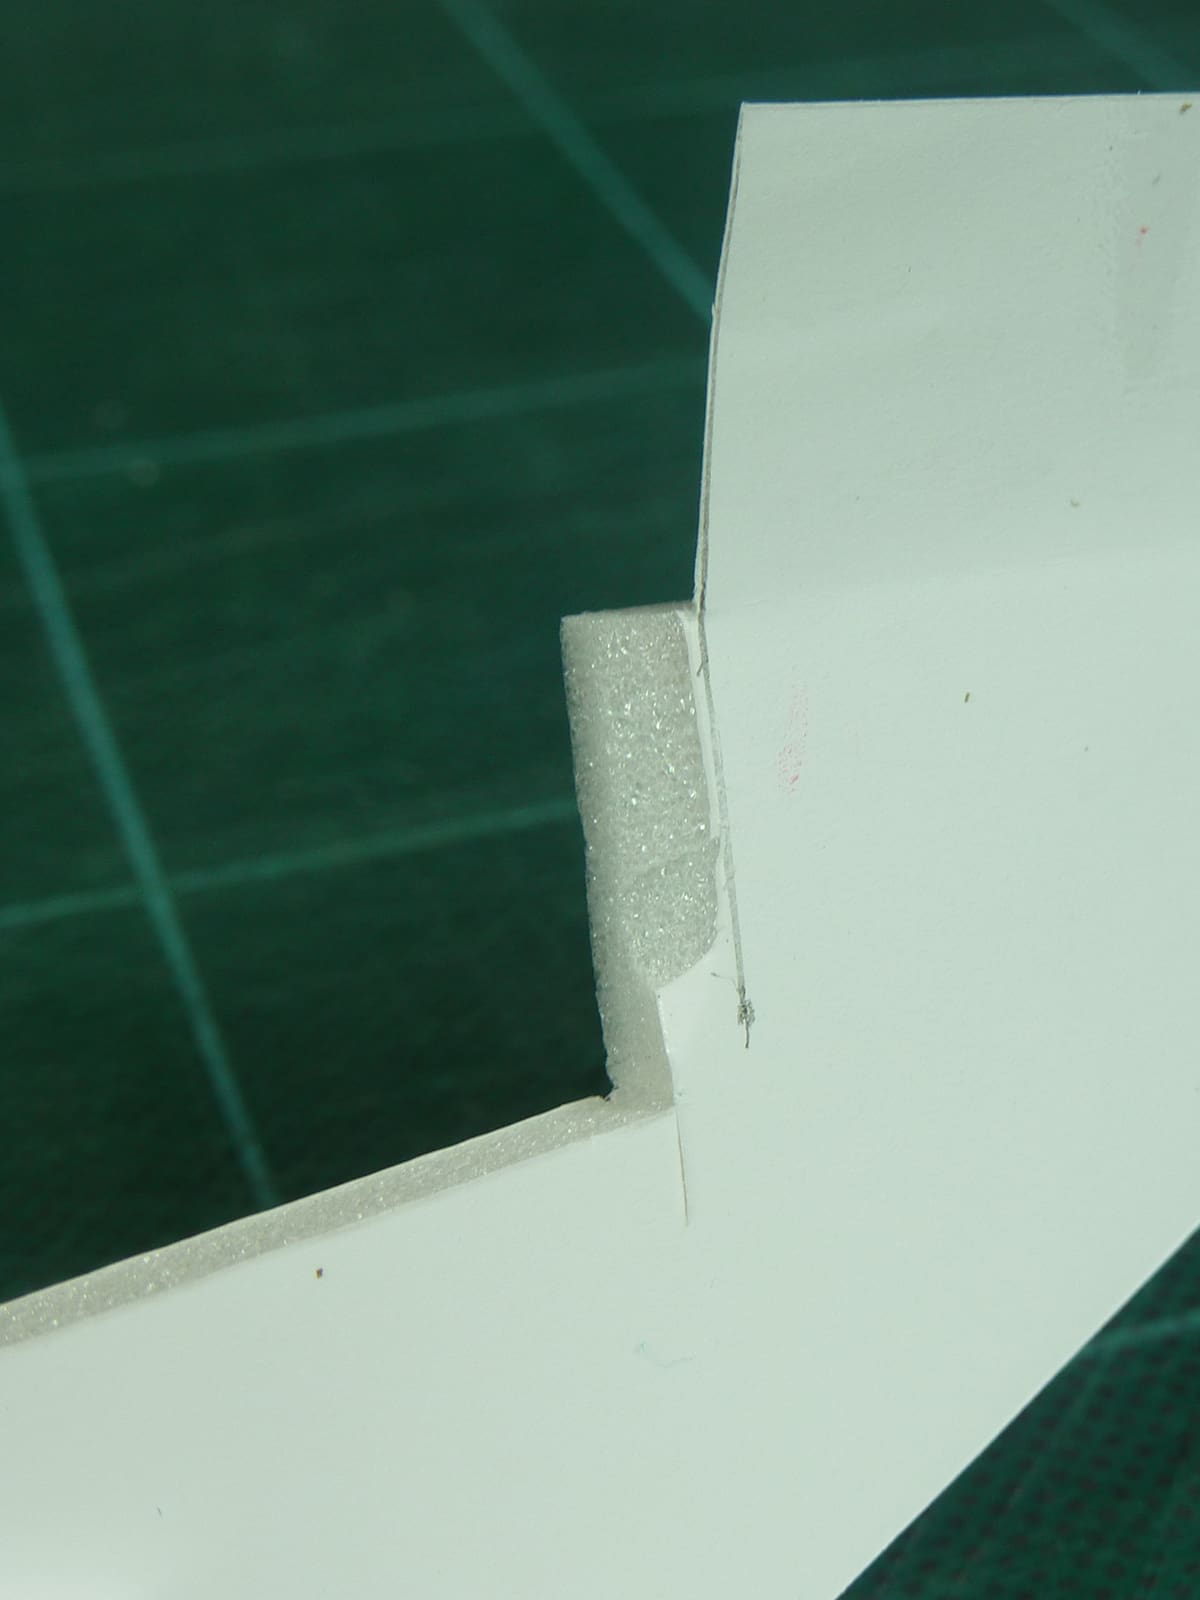
- Glue all the ribs in place making sure they are vertical, especially R2 and R2a which form the slot where the fin will be located. Use a scrap of Foamboard and two pieces of card as a spacer (the slot will be lined with card later) to make sure the gap between R2 & R2a is wide enough. The spacing isn’t super critical as the slot can be shimmed later but it is good to get it as close as possible here. Pin/weigh the whole bottom skin assembly onto a flat surface while the glue dries.
- Sand the top of the ribs in front of the spar on the wingtip side to cater for the wing sweep and improve the gluing area. Take care not to sand any of the root side card away as this will maintain the correct profile.
- Carefully slice and sand a taper to the TE of the bottom skin. This will form the gluing area for the top skin when folded over.
- Form the elevon hinge by cutting through the foam on the inside of the top skin at the hinge line being careful not to cut into the card on the outside.
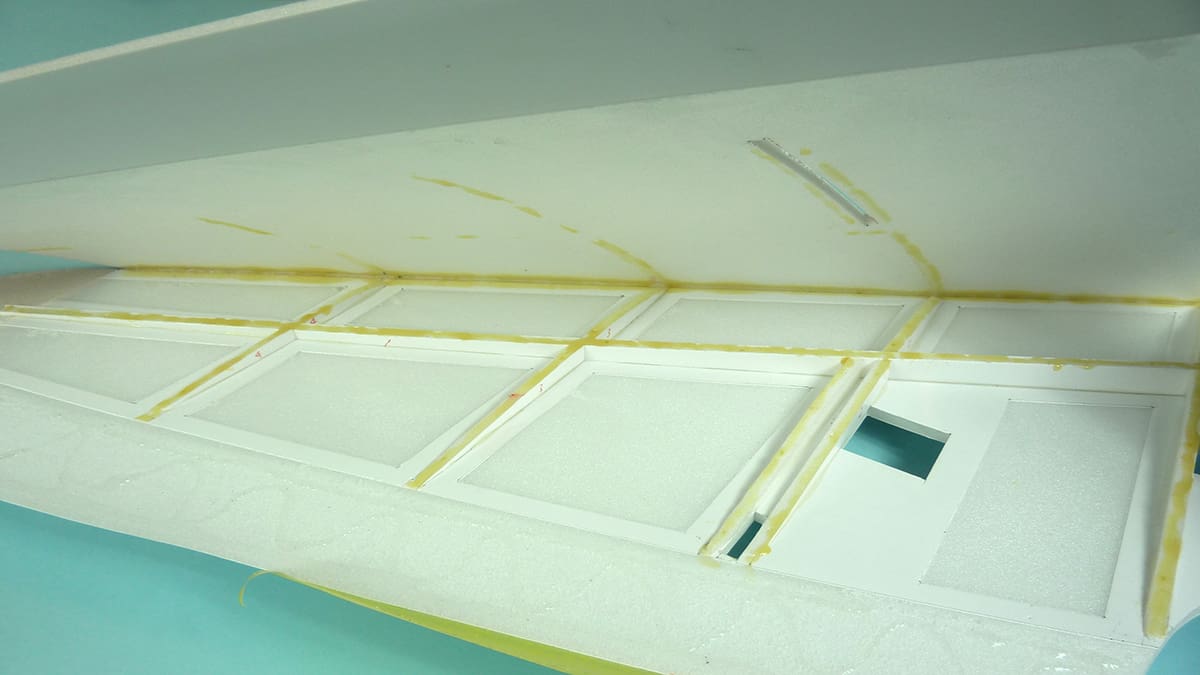
- Apply Gorilla Glue Original down the LE crease in the foam, along the top of the spar and the ribs making sure that non gets into the slot between R2 & R2a. Also smear Gorilla Glue Clear over the exposed foam area of the bottom sheet TE.
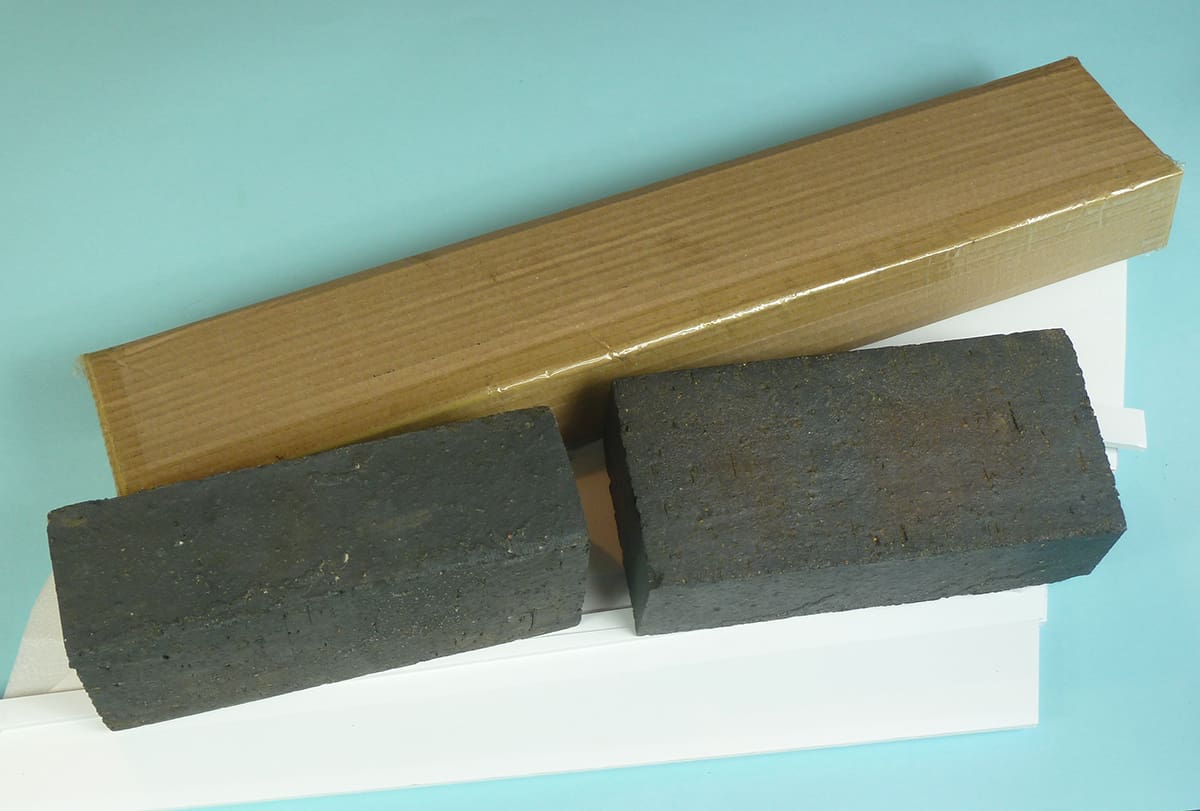
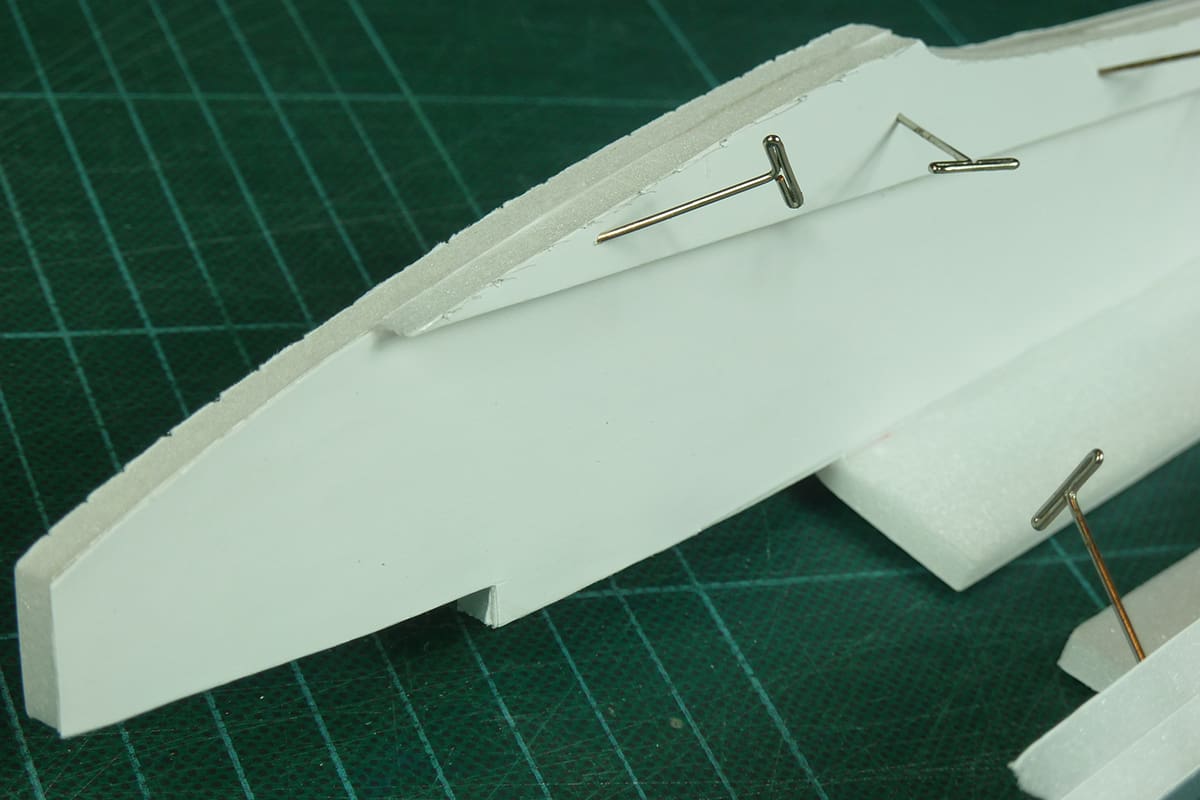
- Fold the top sheet over, lay the wing panel onto a flat surface and place a heavy weight over the spar line. I made a weight from a cardboard box filled with sand which worked fine.
- Next fold the Elevon back onto the top of the wing and add lots more weight over the top of the wing with scraps of Foamboard or strips of wood underneath to spread the load. The idea is to get the top skin in contact with the spar, the ribs and the bottom sheet at the TE. Leave to dry overnight.
- When removed the wing panel should feel strong and torsionally rigid.
- Using the reverse of the plan use the pin prick holes to mark the outline and locations for the left wing. And repeat the whole process again for the left wing.
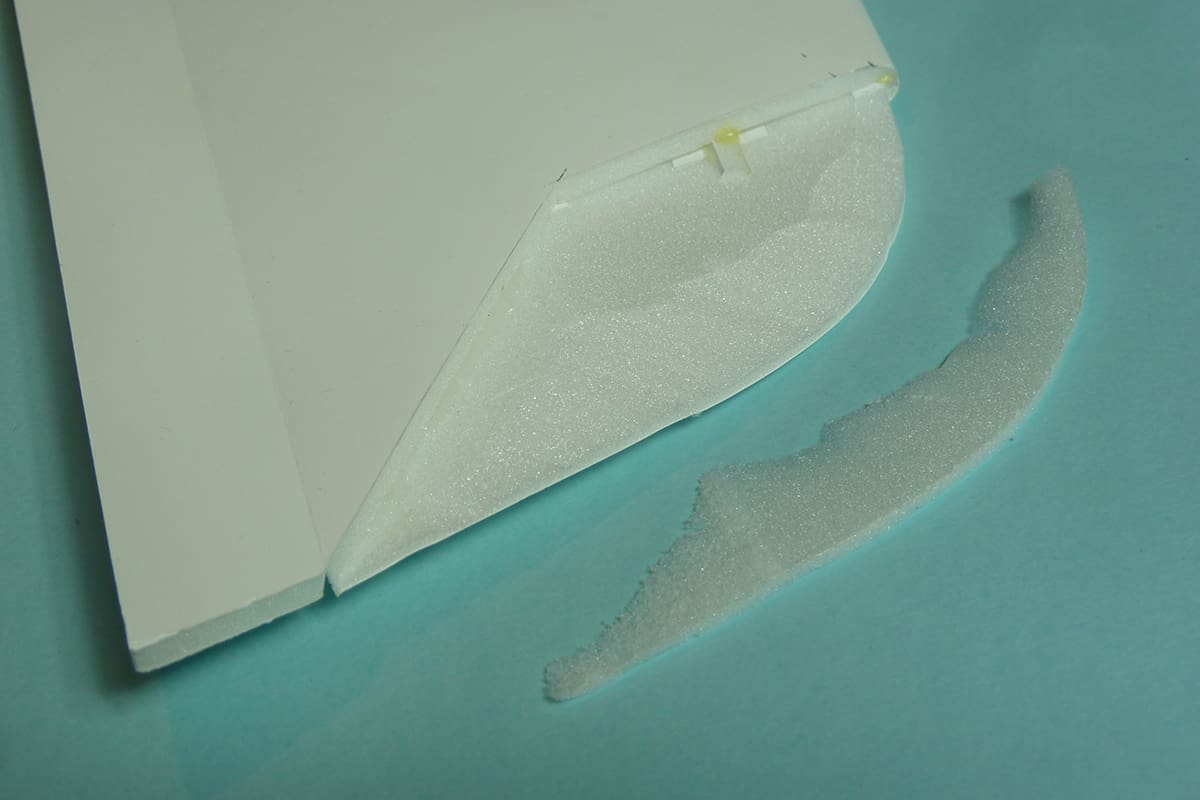
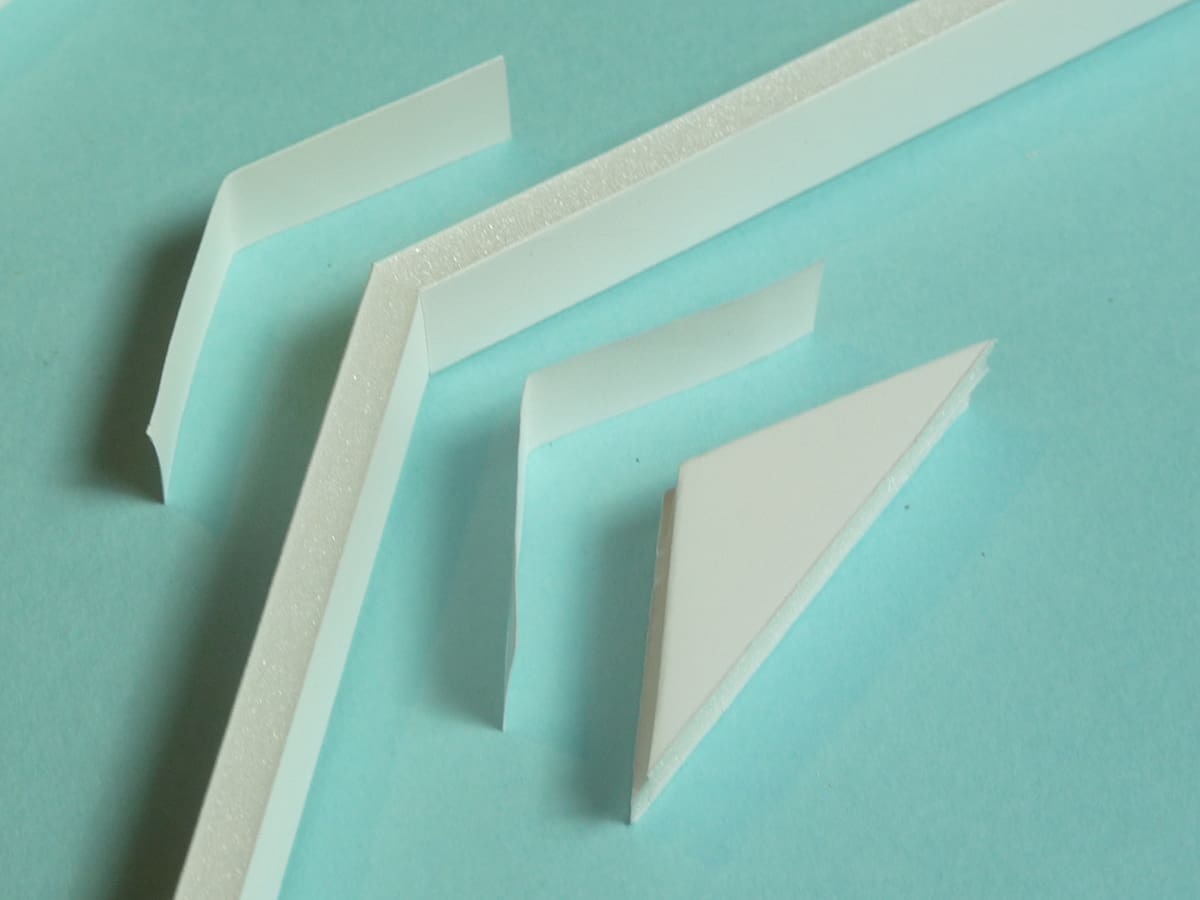
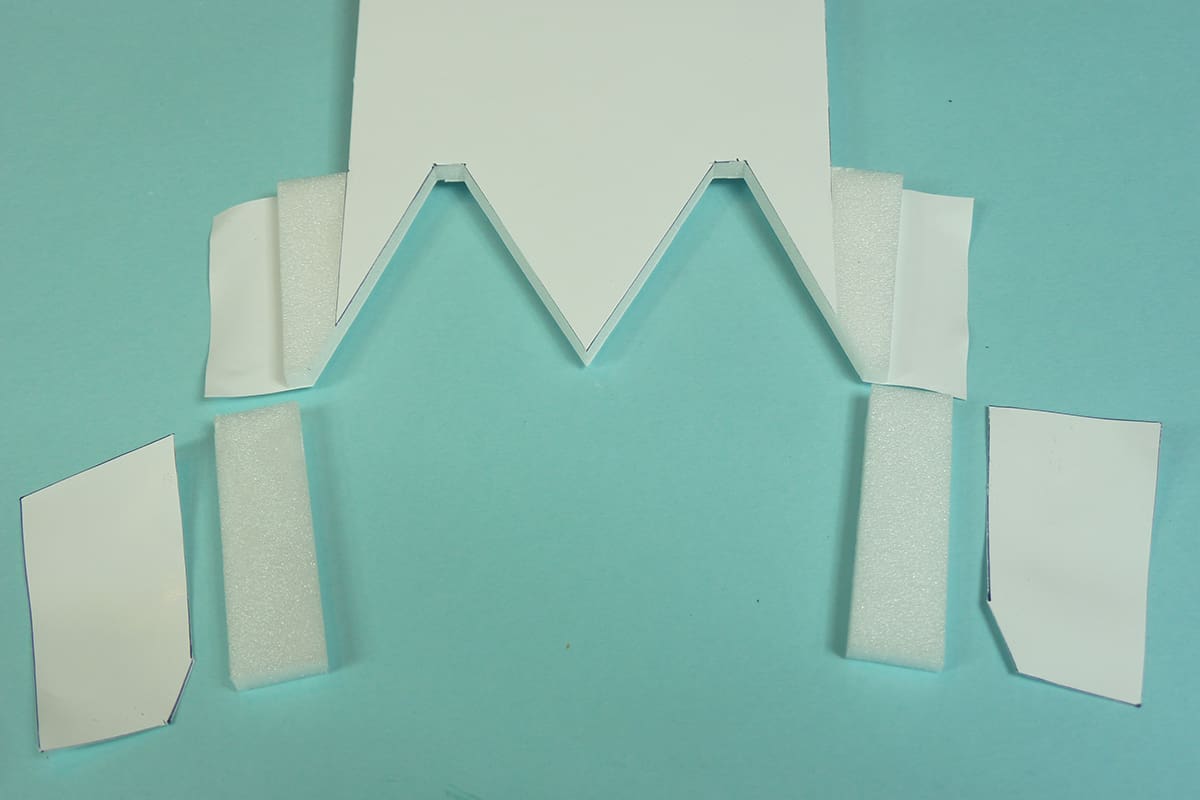
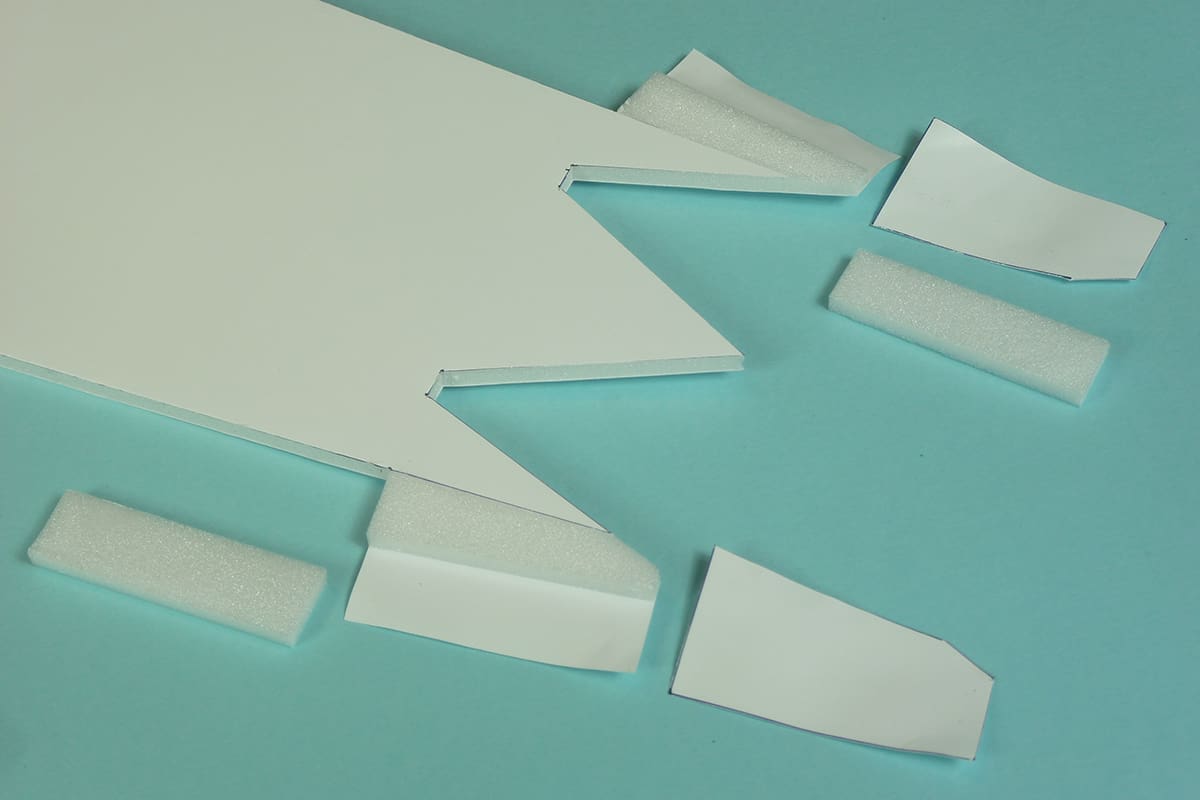
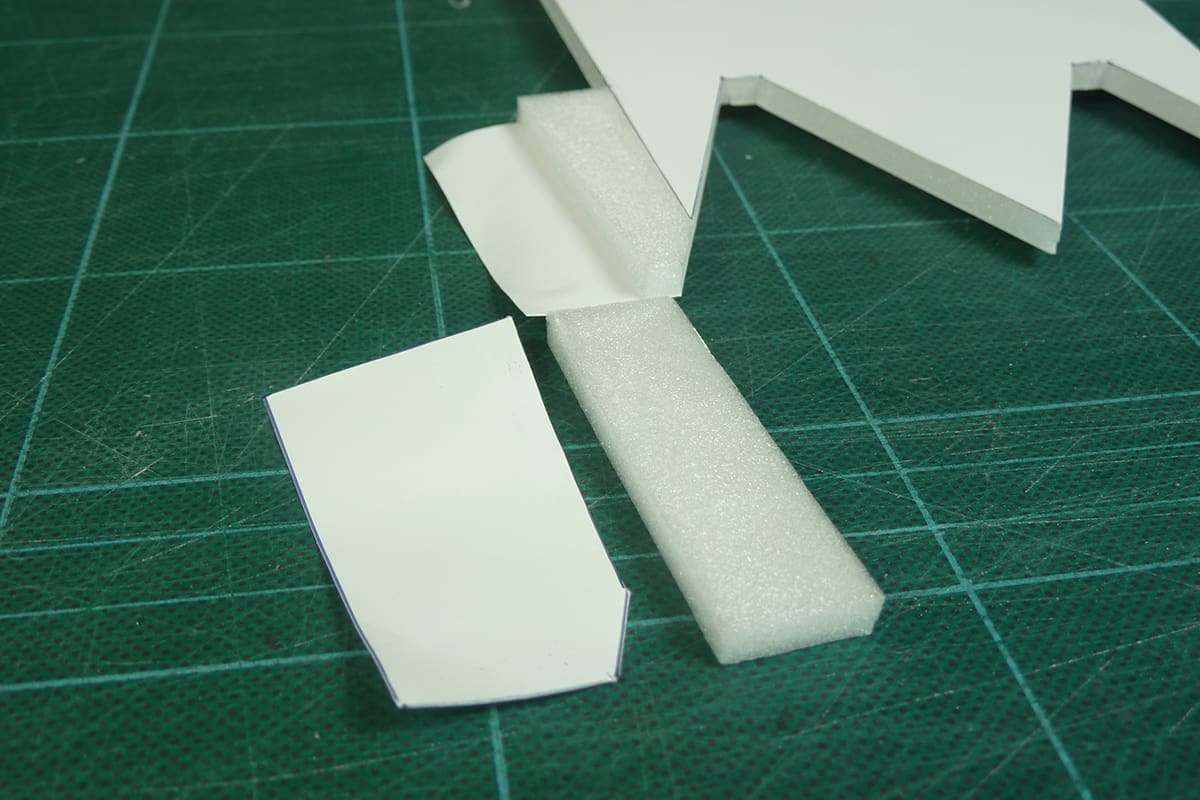
- Cut out the wing tip uppers and remove the card from both sides.
- Slice off and sand a slope on the bottom sheet tips as shown on the plan and glue the uppers in place making sure the edges stand slightly proud as they join the top skin.
- A small strip of foam is also required on the underside at the LE tip to fill the gap formed during the folding.
- Sand and blend in the tips to a pleasing shape and round of the TE of the elevons.
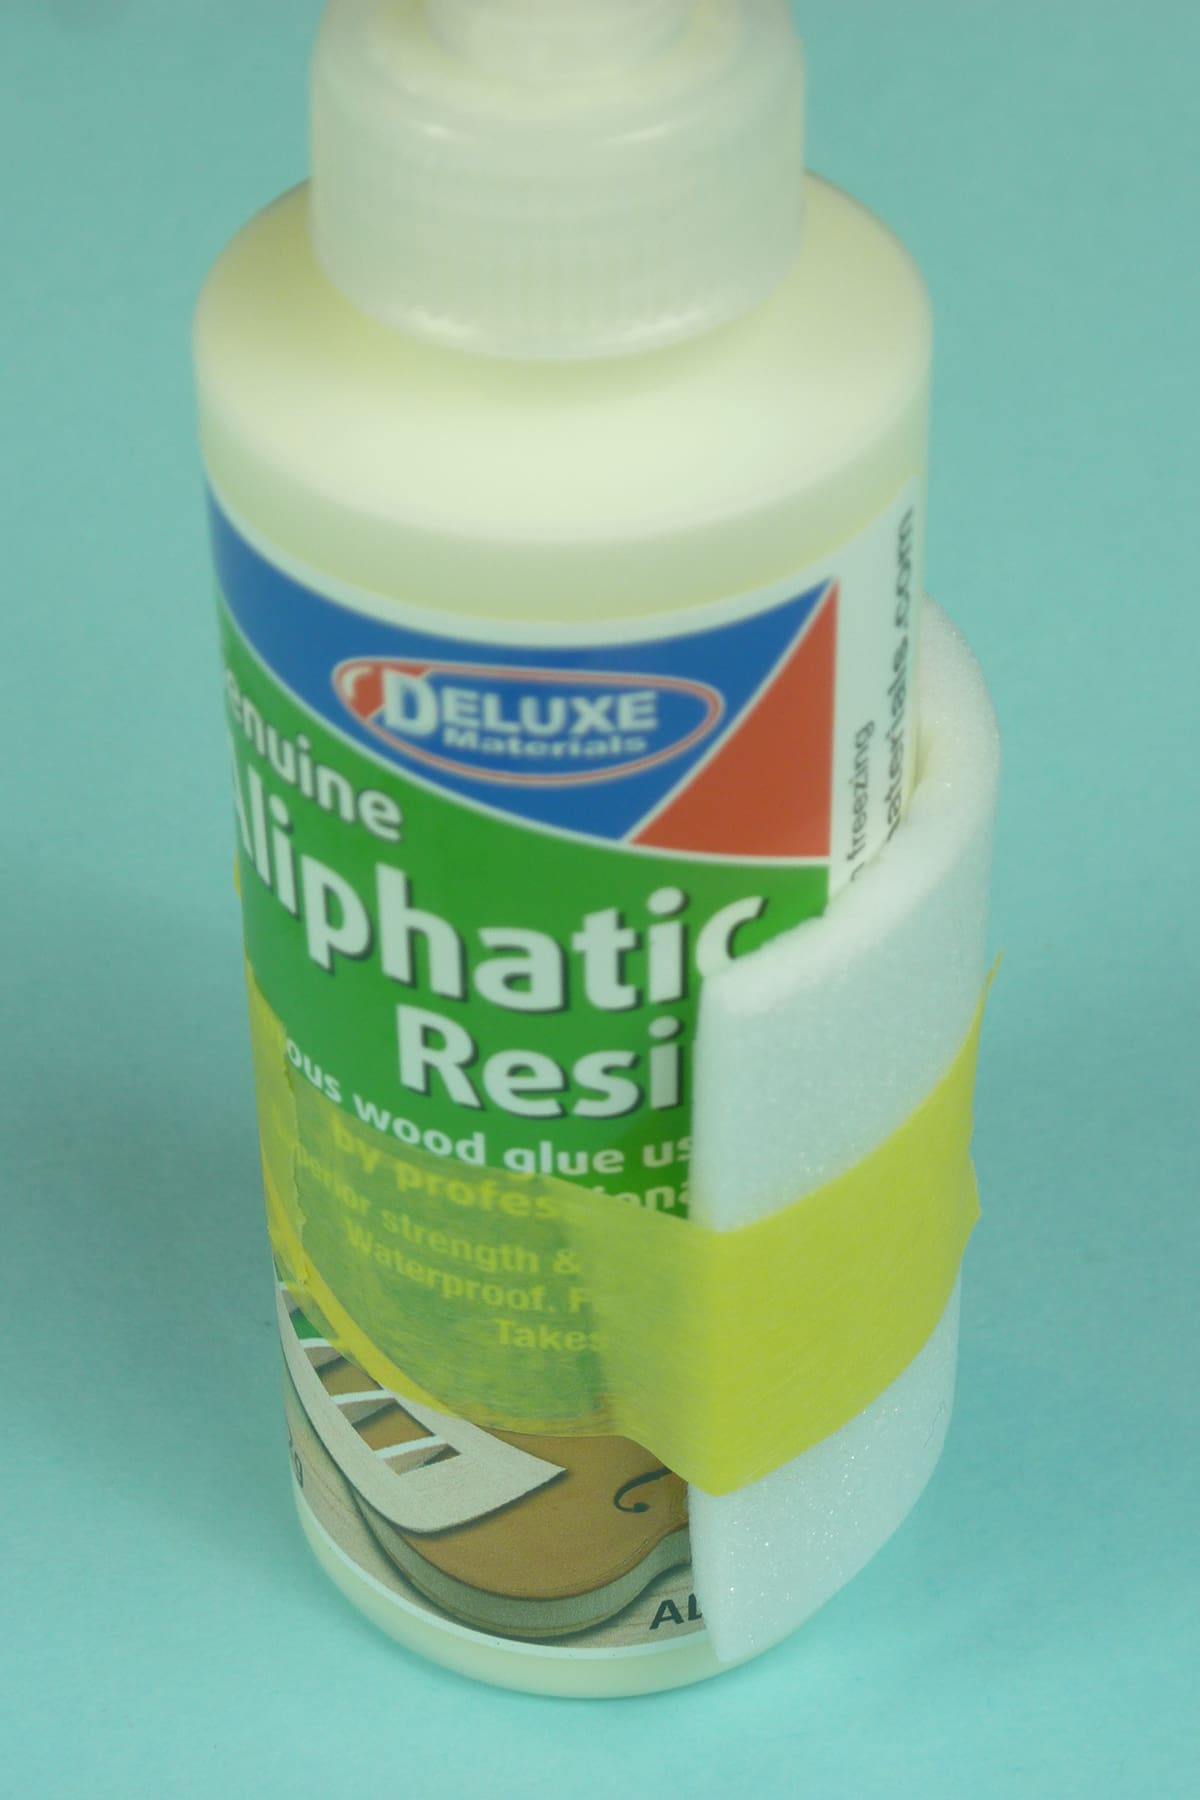
- Seal the exposed edges of foam and wing tips with a layer of brown paper and thinned Aliphatic glue. A 70% glue to 30% water worked well for me.
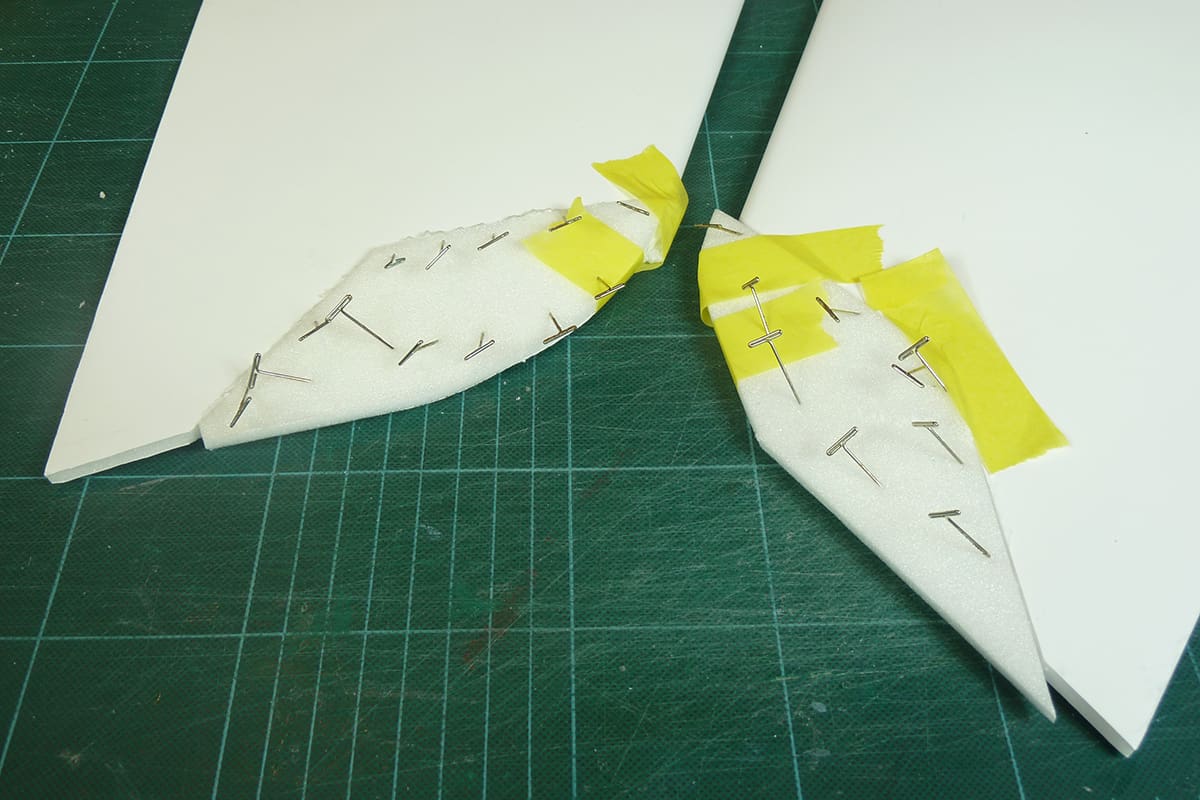
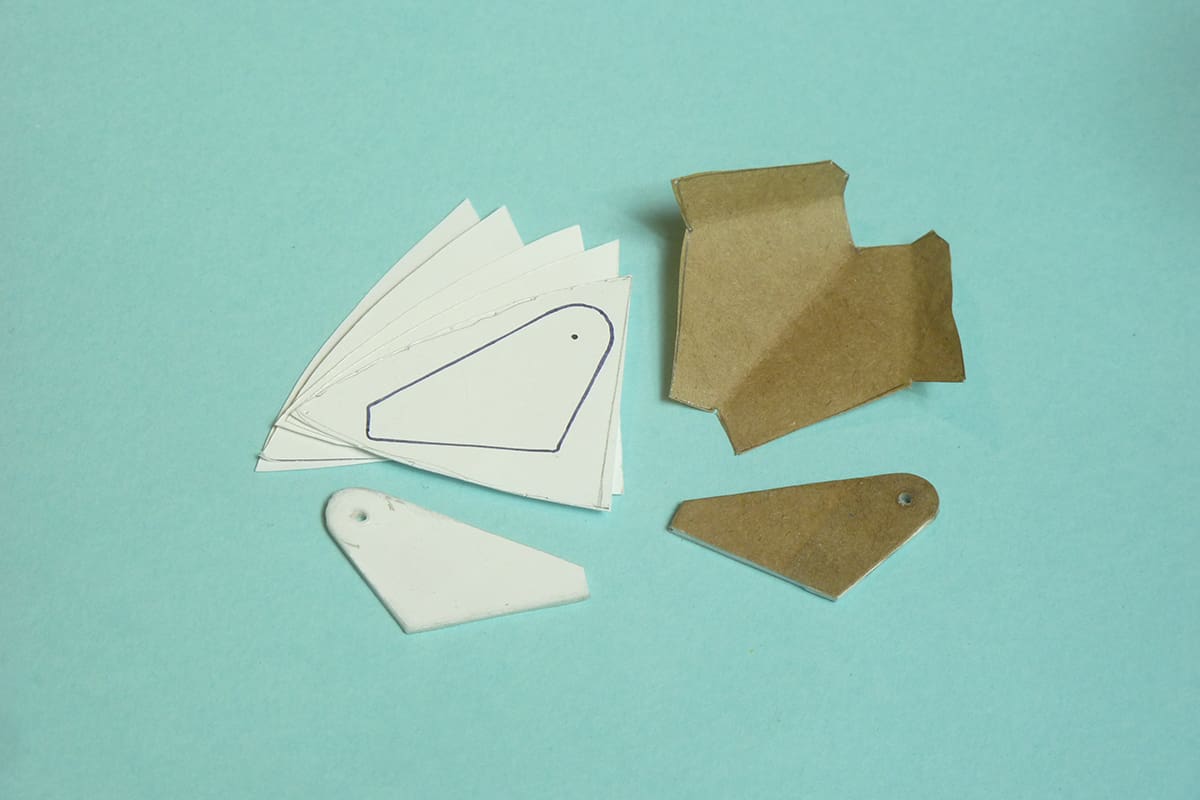
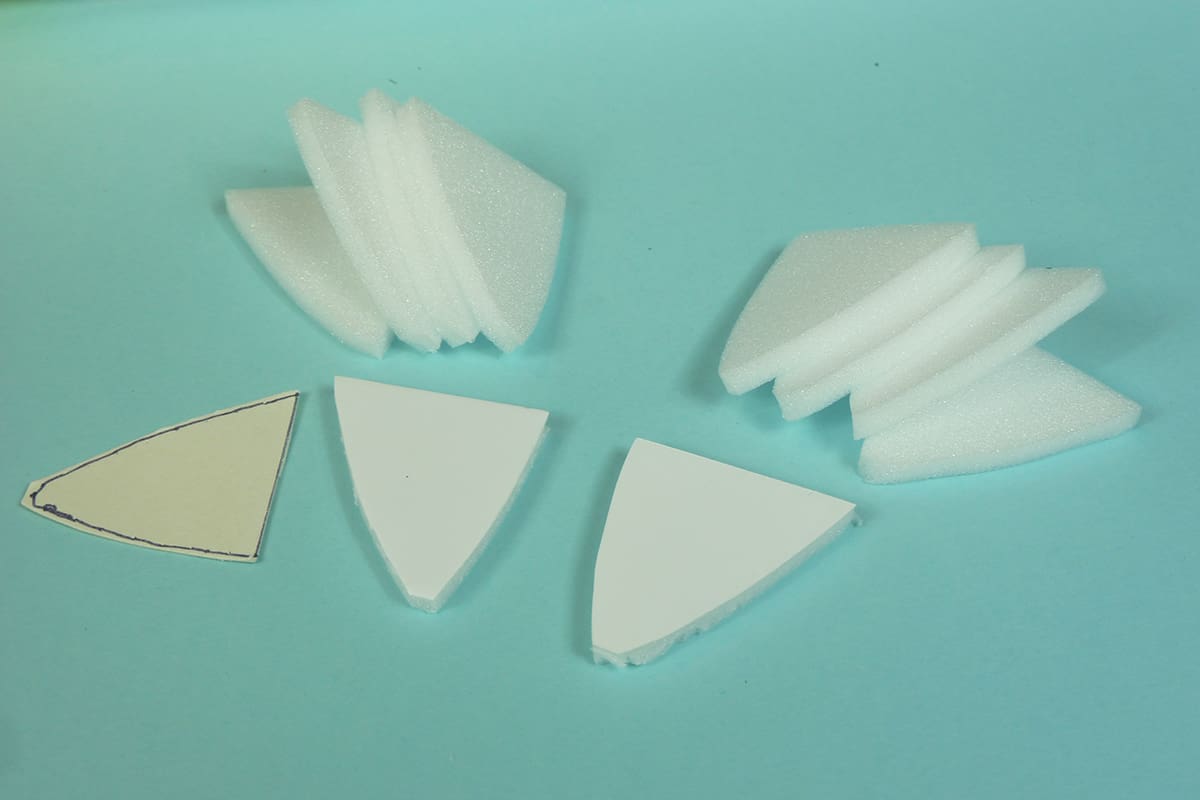
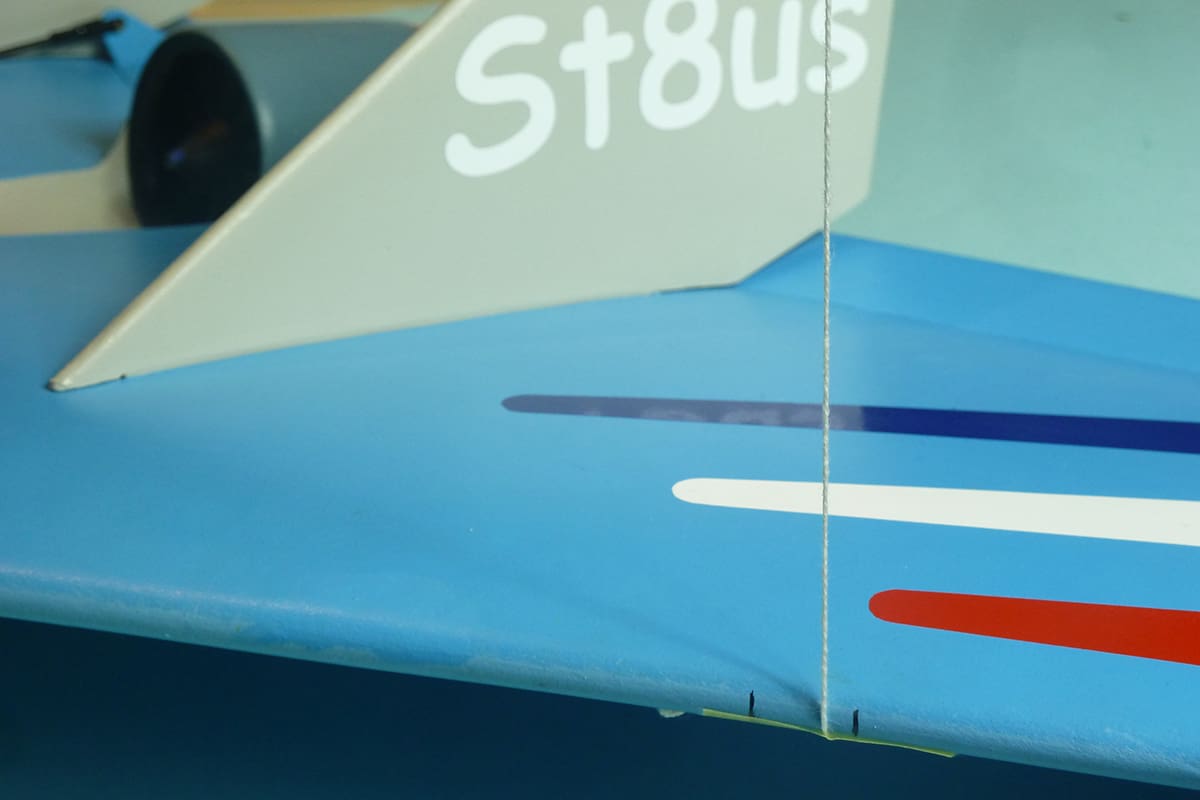
- Cut out the two fins, round off the edges and seal with brown paper and thinned glue.
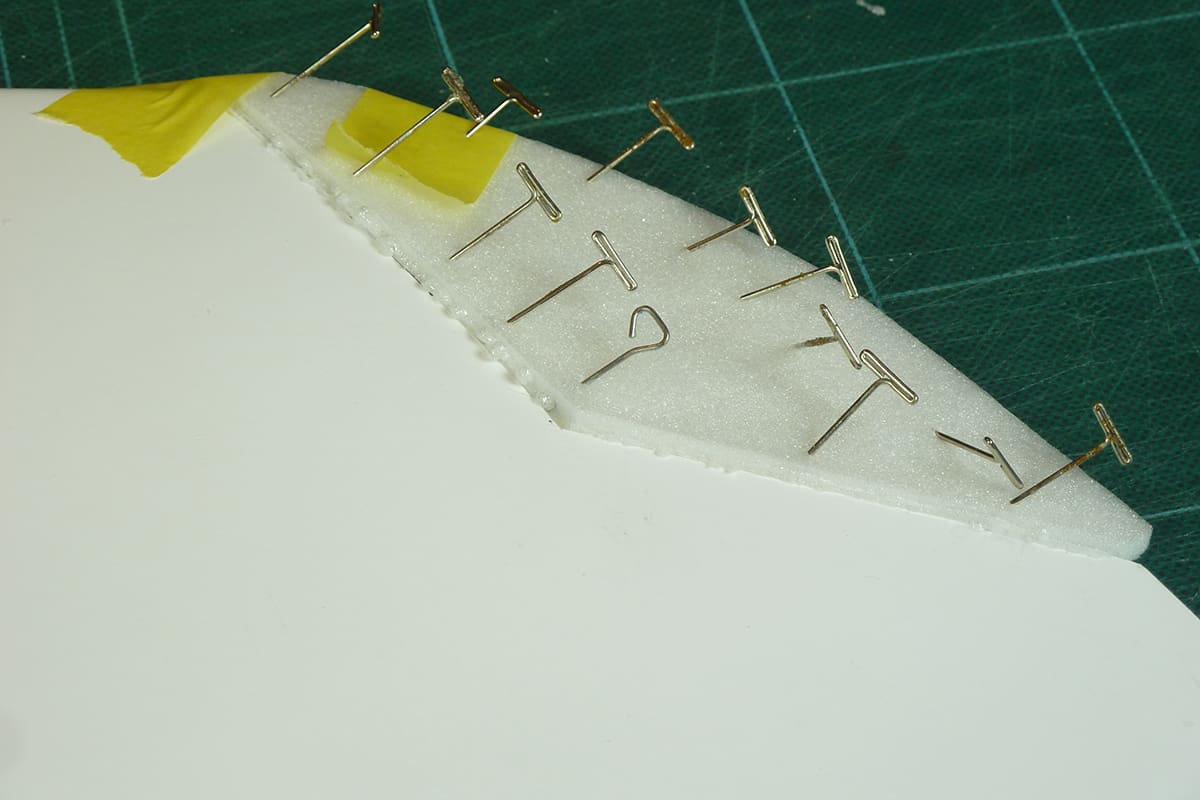
- Open up the slots in the top of the wings for the fins and check they are perpendicular to the top of the wings.
- Line the slots with card. Add shims to fill any gaps and/or to straighten the fins up.
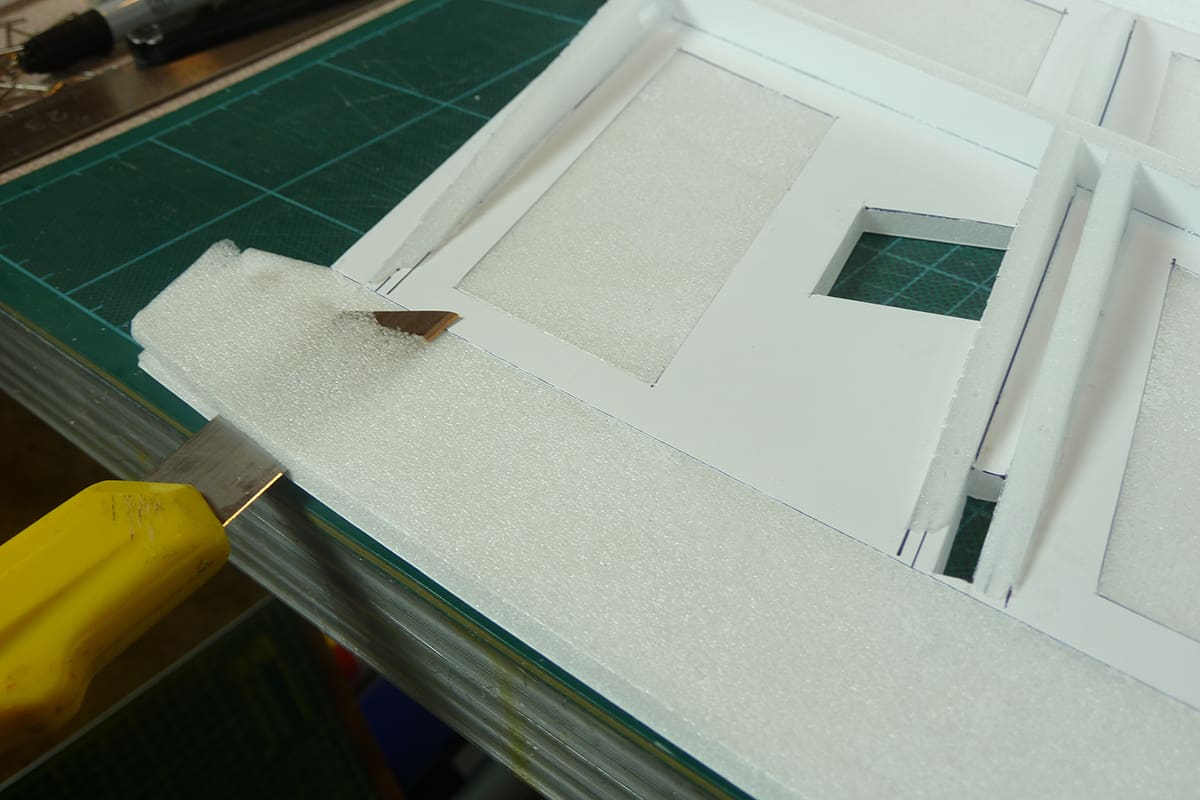
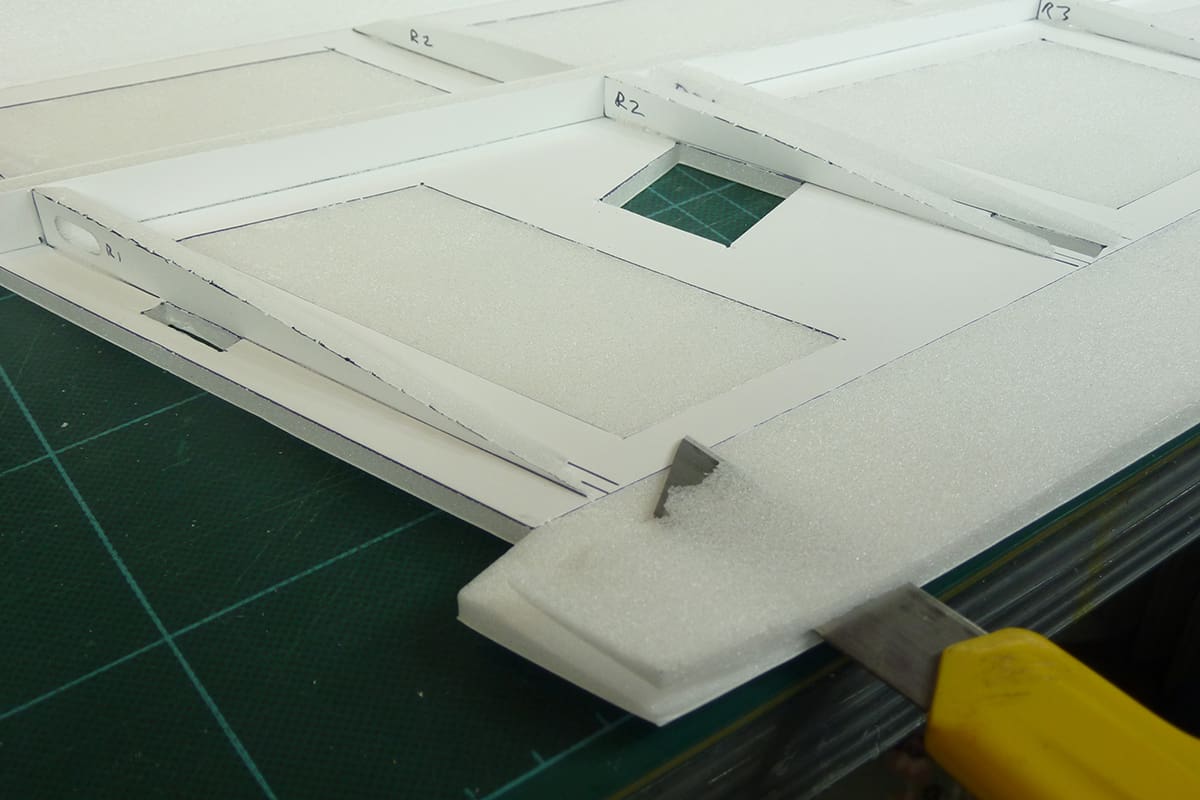
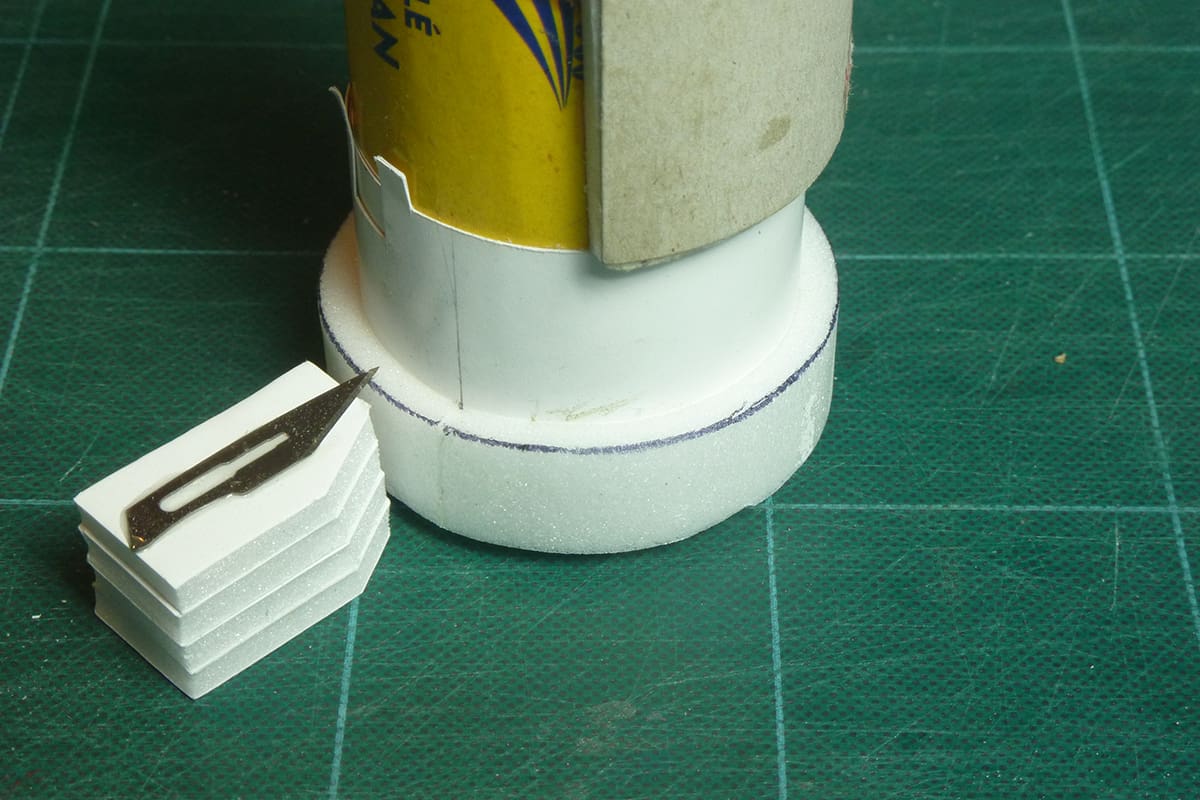
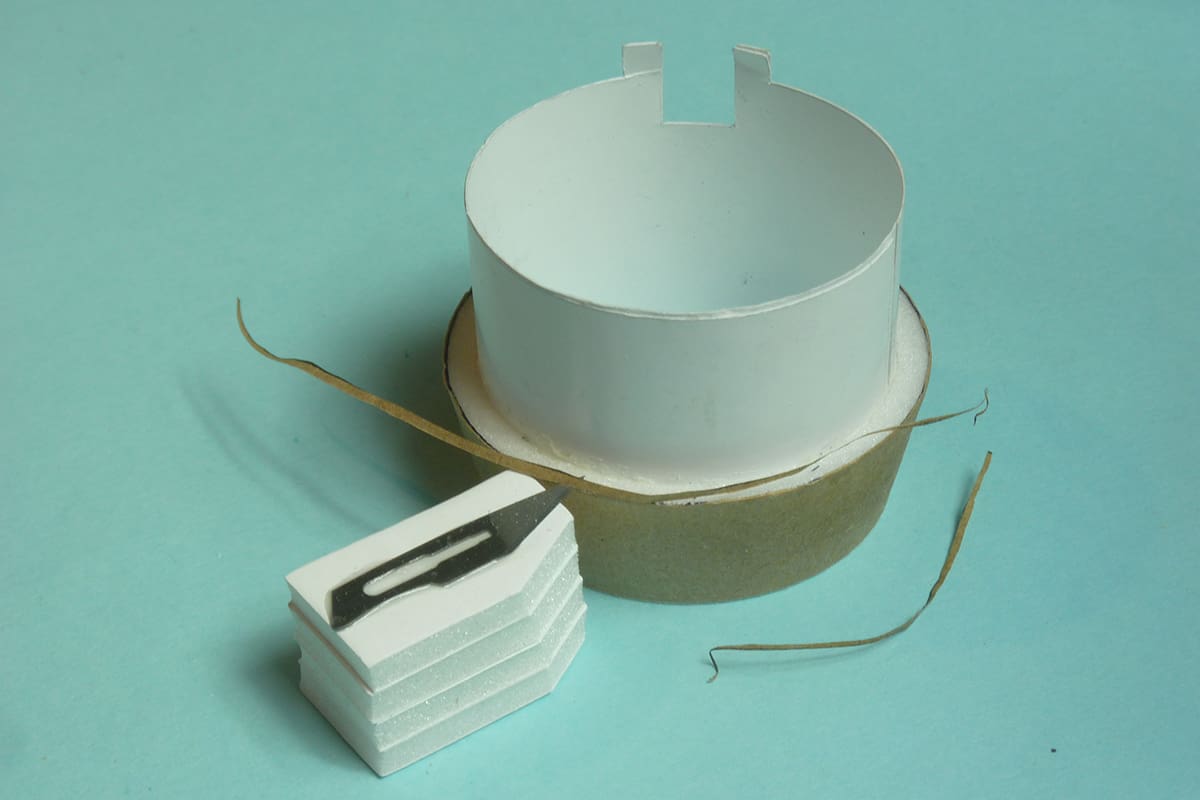
- When dry trim off any excess card so the slots are flush with the top of the wings. I made a special tool for this as shown in the photos. Keep the tool as we use it again on the fuz.
- Reinforce around the slots with brown paper and thinned glue.
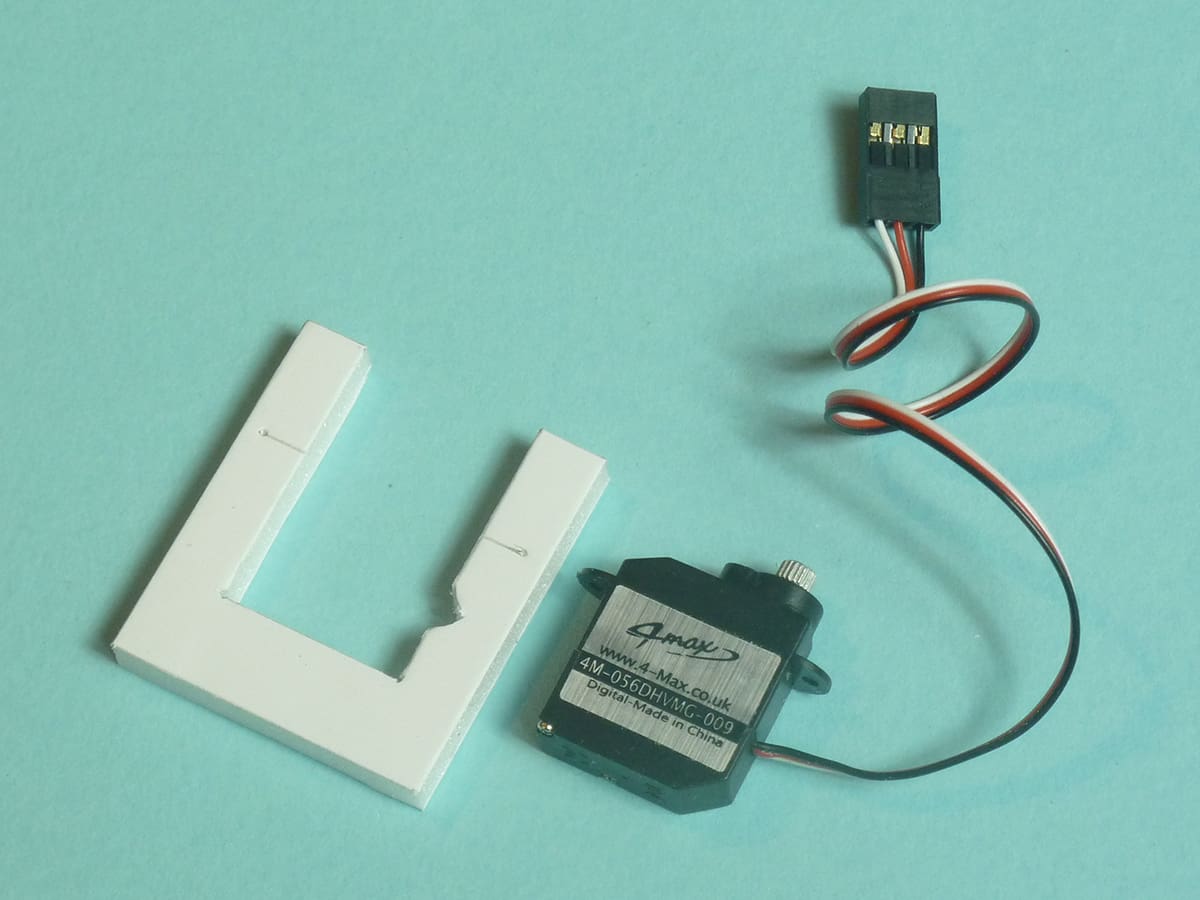
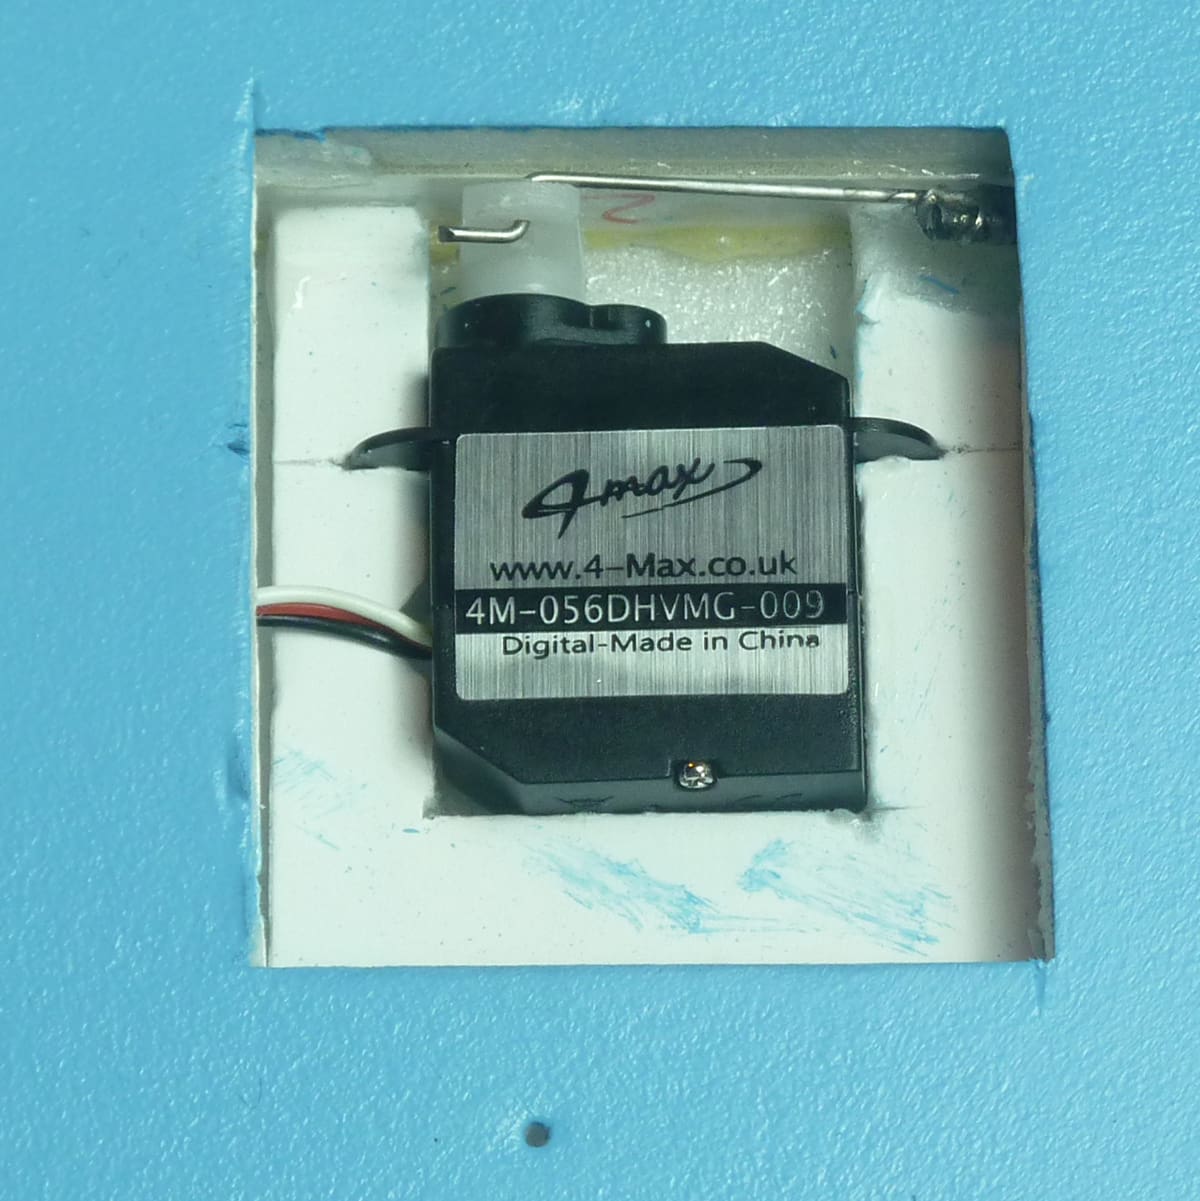
- Cut out the servo frames to suit your chosen servos and glue in place.
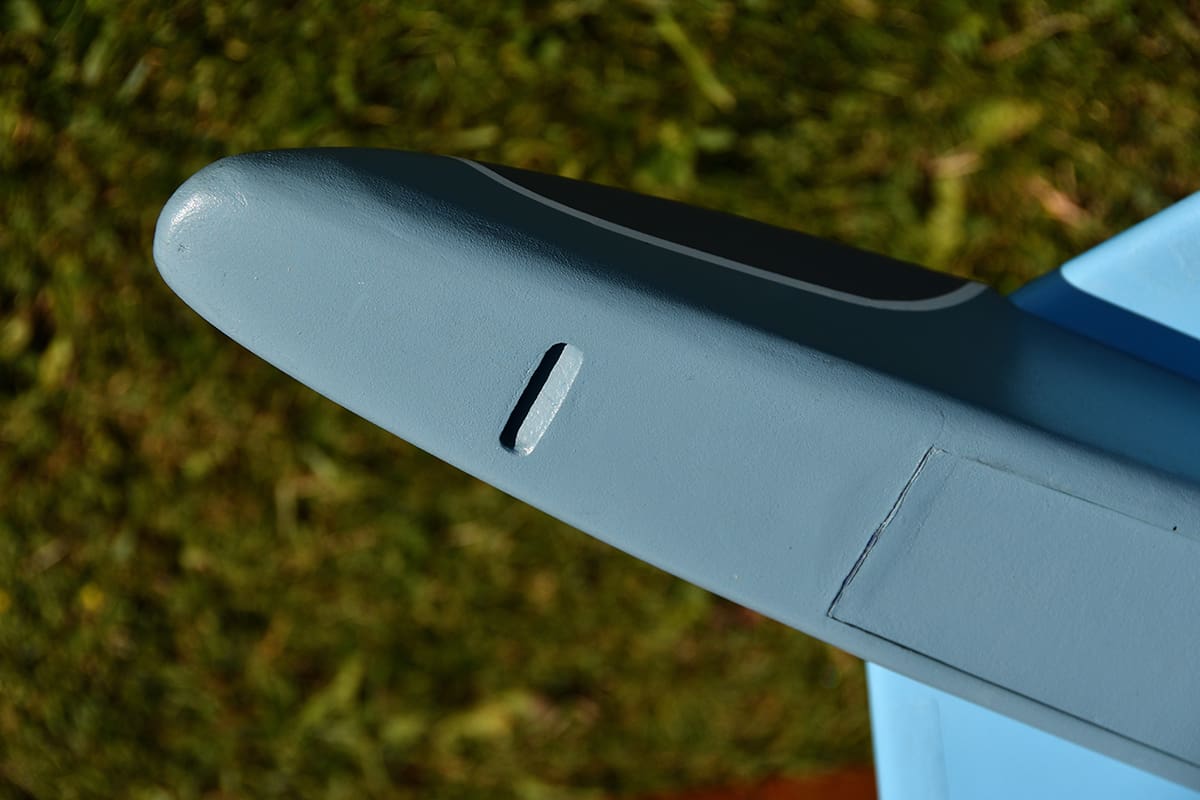
- Establish the dimension “a” on the drawing and using a brass tube or similar with sharpened end “drill” the pushrod exits in the top skin. Sleeve the holes with some rolled up brown paper tubes.
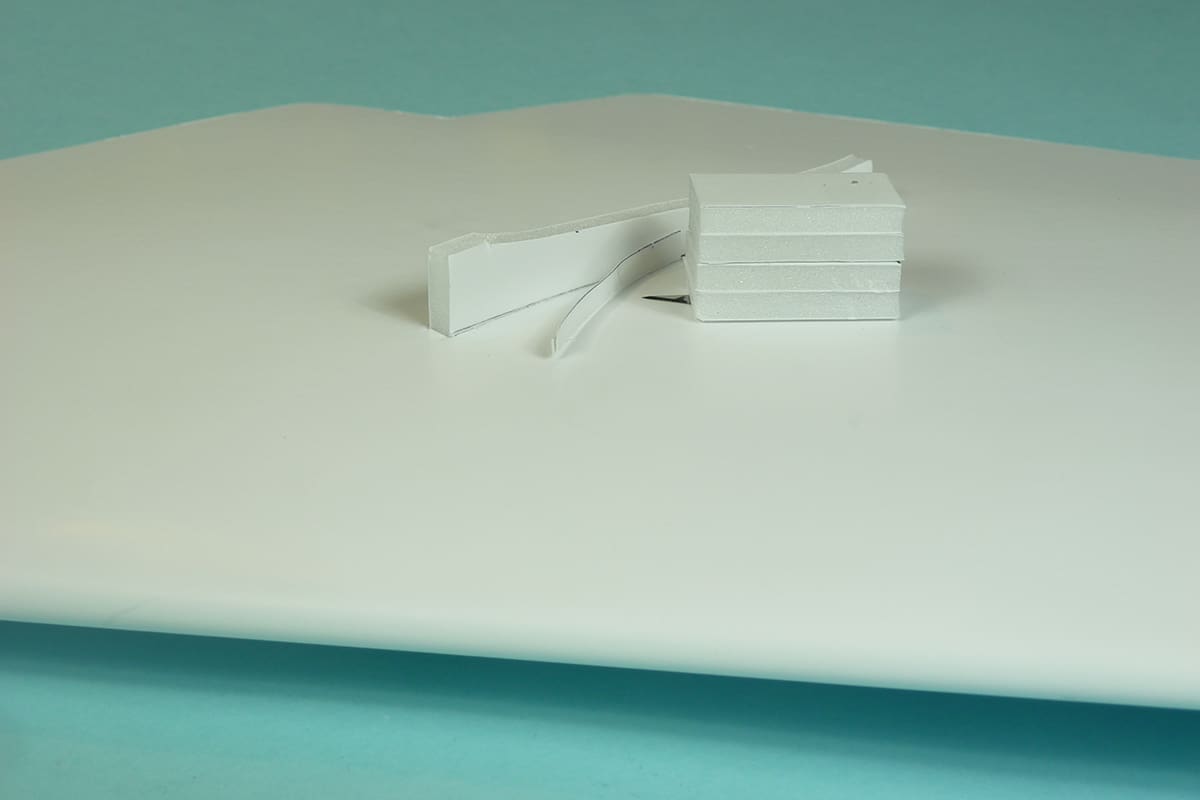
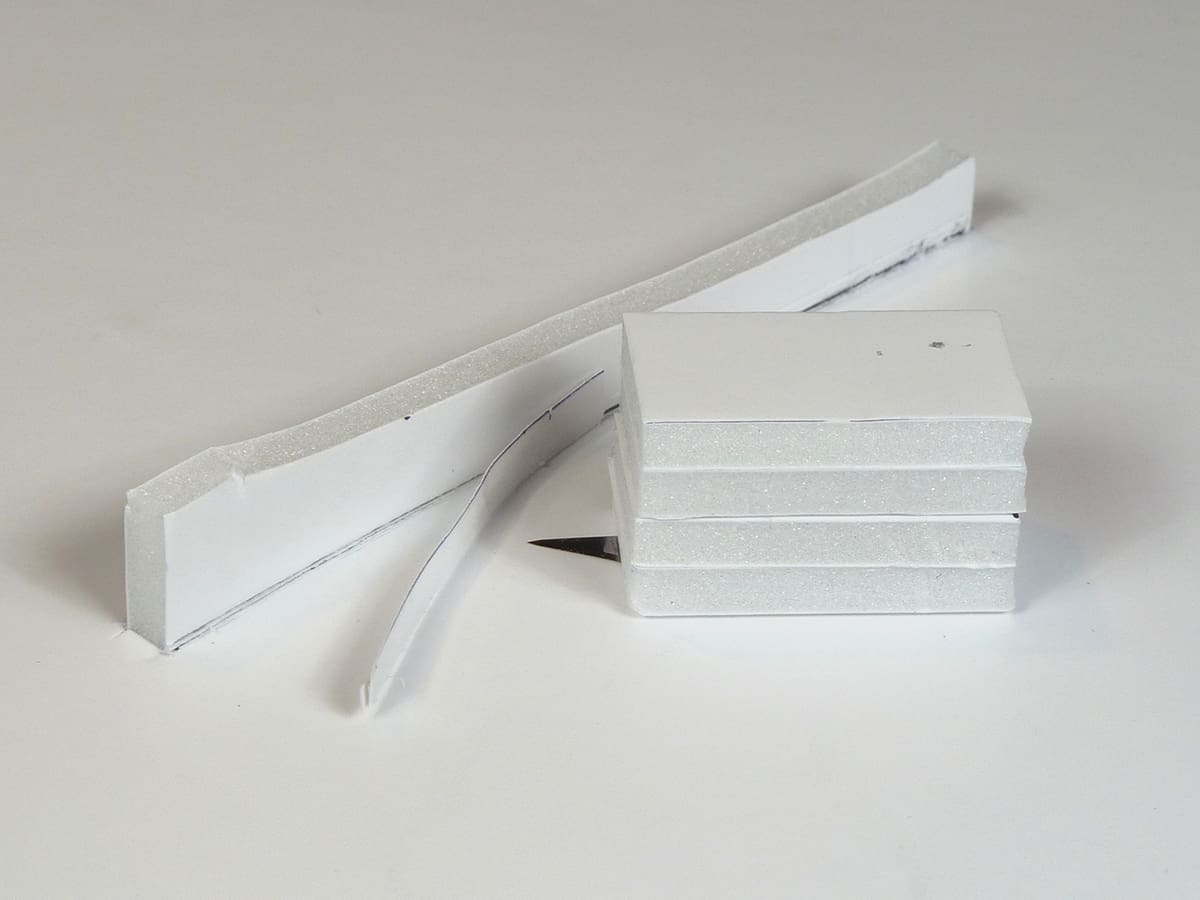
- Make the elevon horns from five pieces of card glued together and wrapped in brown paper.
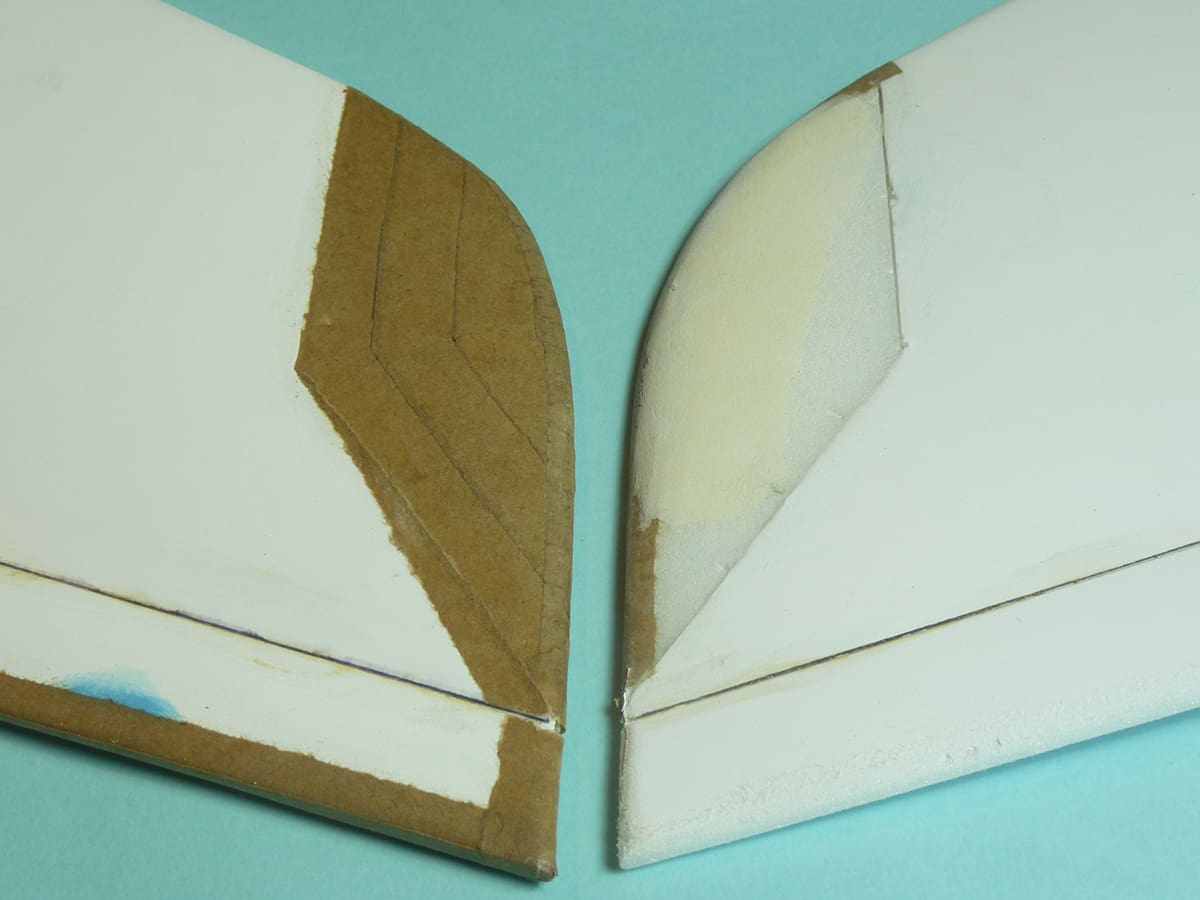
- With the wing tip propped up 15mm off the building board sand the edge of the top skin at the root so the wing root is at 90° to the building board. Mark the edge of the bottom skin with felt pen to ensure it isn’t inadvertently sanded.
- Sand a small chamfer on the elevon LE to increase the down movement but be careful not to sand the top skin card as this forms the hinge. Seal the exposed foam with a film.
- Tape the bottom skins together at the root, open up the gap and apply Gorilla Glue Clear to all the joining surfaces of the top and bottom skins and the spar.
- Prop the tips up 15mm under each tip as the glue dries and make sure the top surfaces of the wings line up at the root.
- Once dry add the dihedral brace as shown on the plan and photos and add the brown paper wing join reinforcement.
- Cut off the root LE and sand the top surface flat as shown on the plan.
- Remove the bottom sheet forward of the spar and add the internal brown paper reinforcement at the wing join.
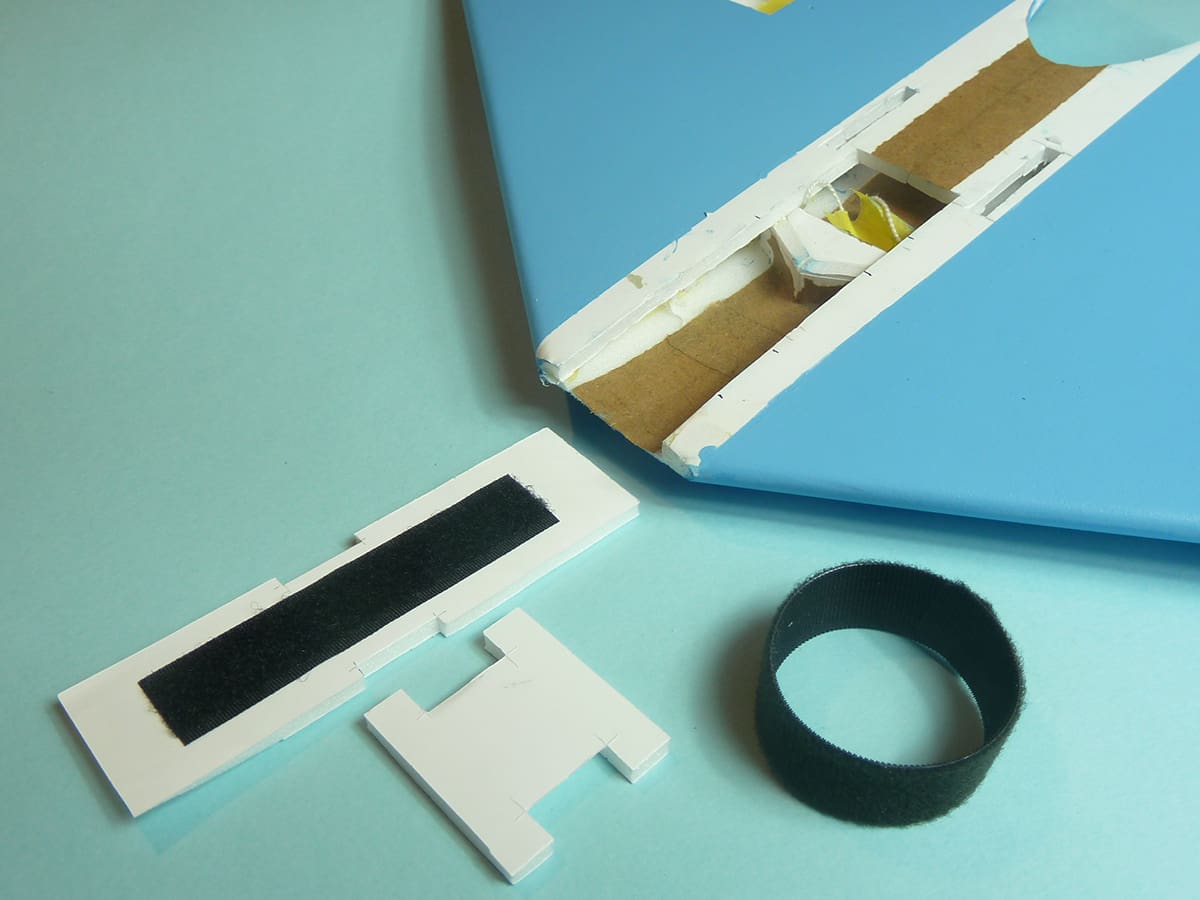
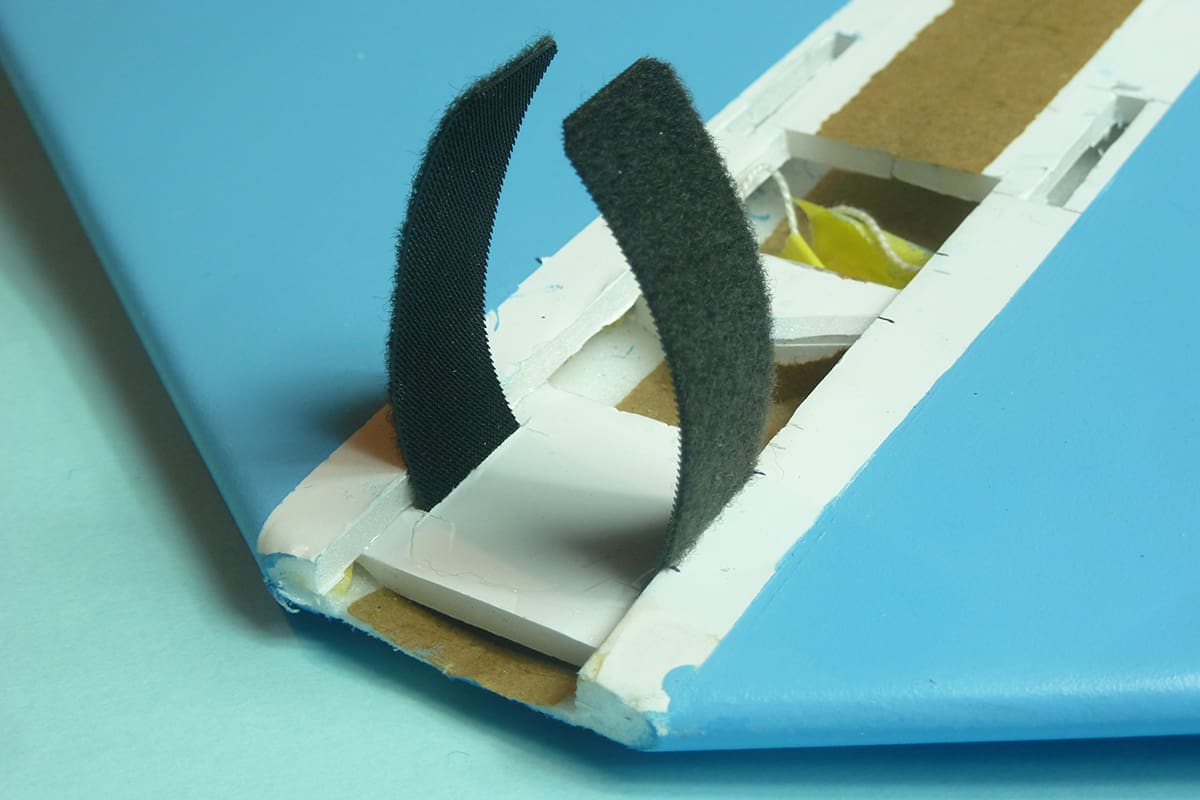
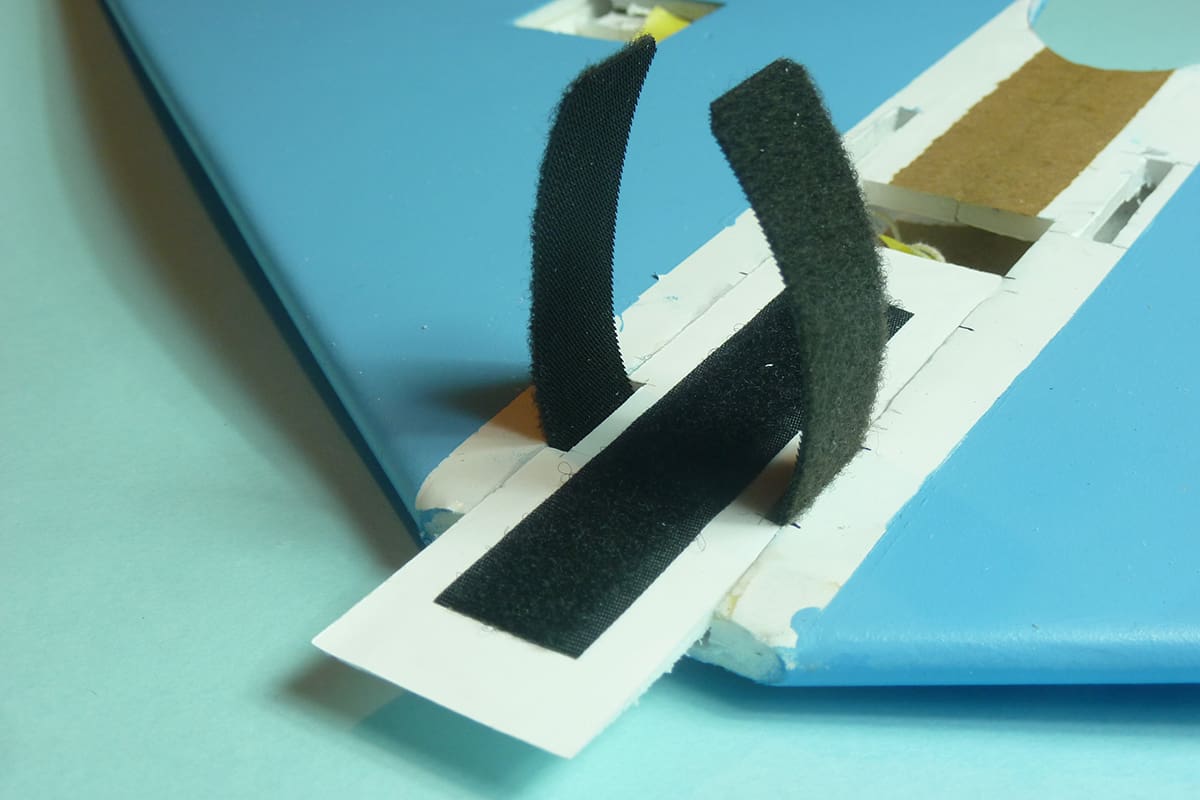
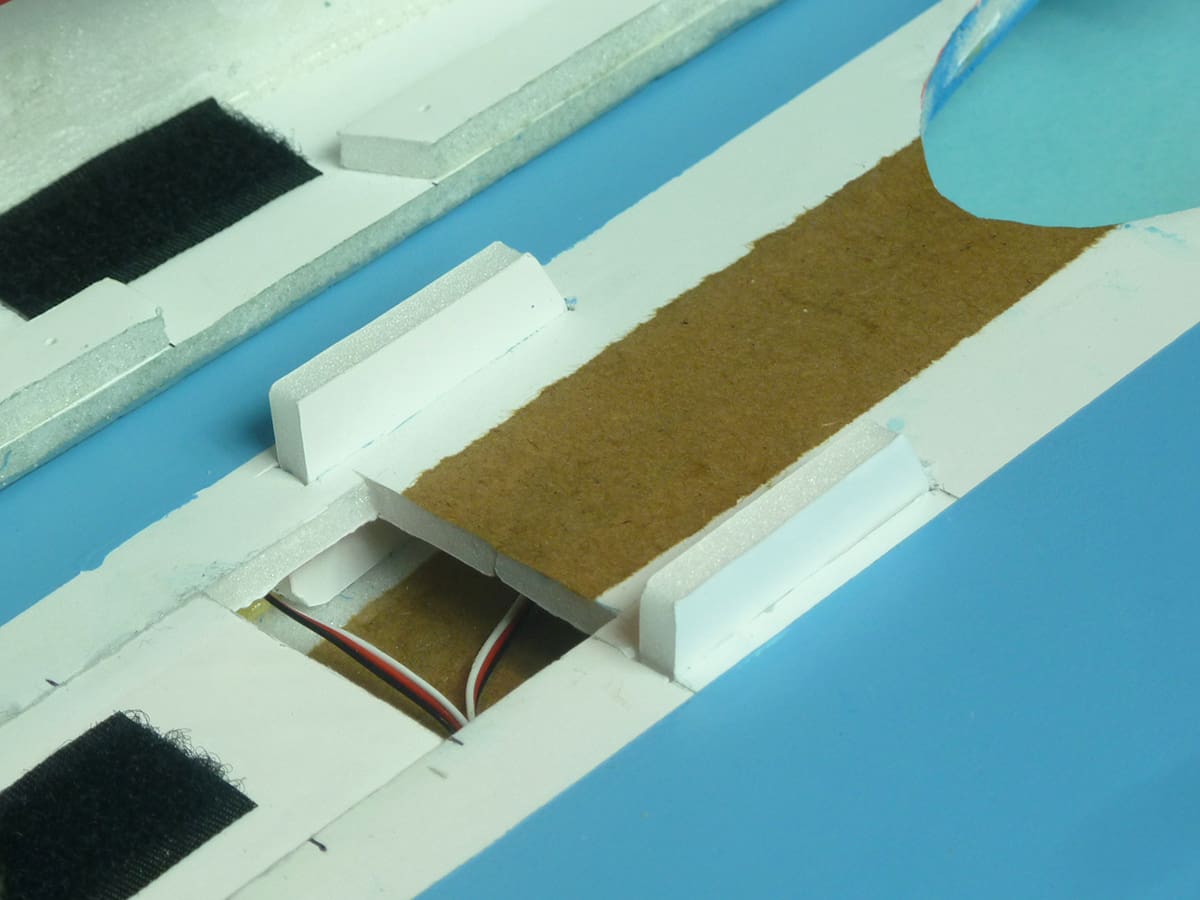
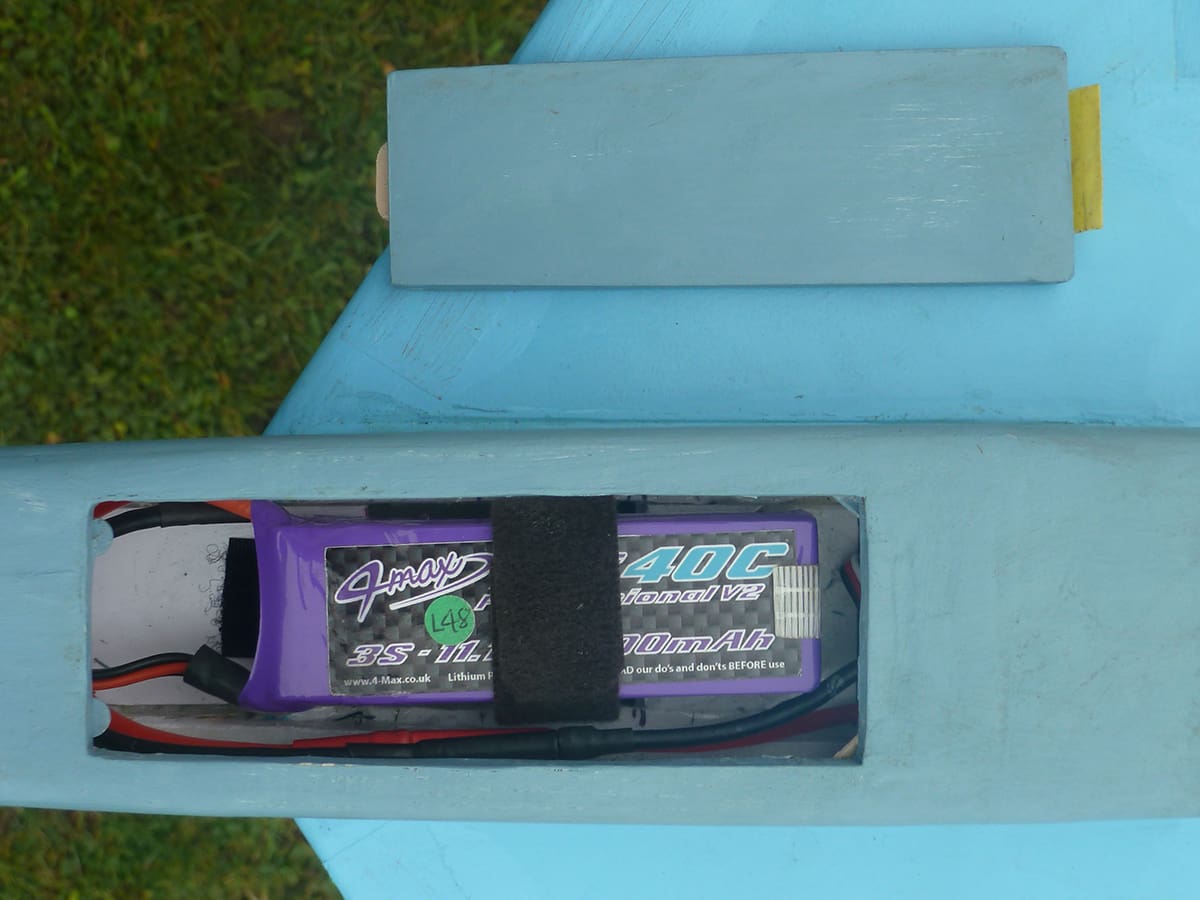
- The battery floor is made up of two pieces of Foamboard. First fit Part A and the Velcro retention strap. These slide in behind the bottom skins. The front edges might need trimming to accept the curvature and taper at the LE.
- Finally add the battery floor. This should be flush with the underside of the wings at the spar and stand slightly proud at the LE thanks to the slight upsweep of the bottom skin.


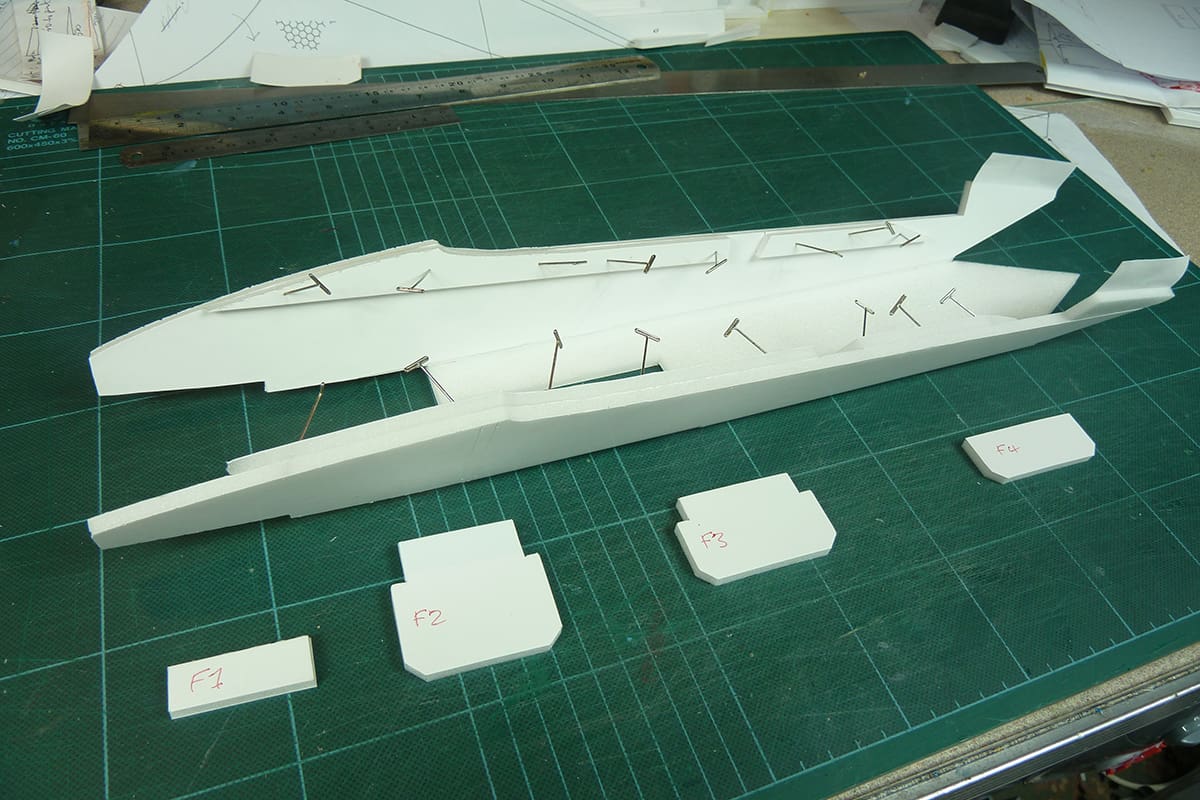
Fuselage
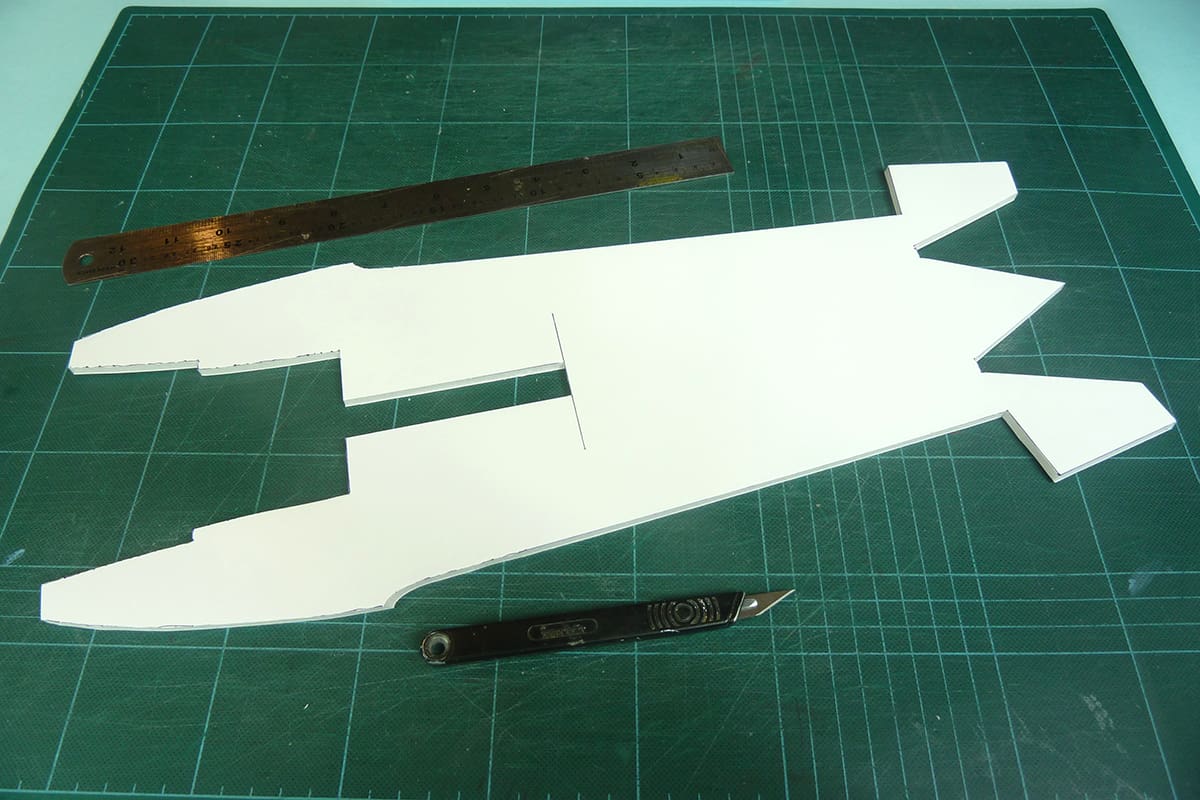
- Start by marking the outline of the fuselage blank onto the Foamboard using a pin as you did with the wings and cut out.
- The surface you are looking at will be the OUTSIDE skin of the fuz so turn over and write INSIDE in several places to avoid any confusion.
- Turn the blank over again so the OUTSIDE is uppermost and position over the plan.
- Using the extension lines on the plan as guides cut away the sections of outer card and foam that need to be removed at the EDF location.
- Turn the blank over so the INSIDE is uppermost and again lay the blank over the plan.
- Using the extension lines as guides mark and remove the card from the fuz bottom.
- With the INSIDE still uppermost mark and score the two crease lines between the bottom and the sides. Use a straight edge and a pizza cutter as before. A deeper crease is beneficial here.
- Add the wing seats, 2 pieces per side with a slot between for the wing fixing lugs.
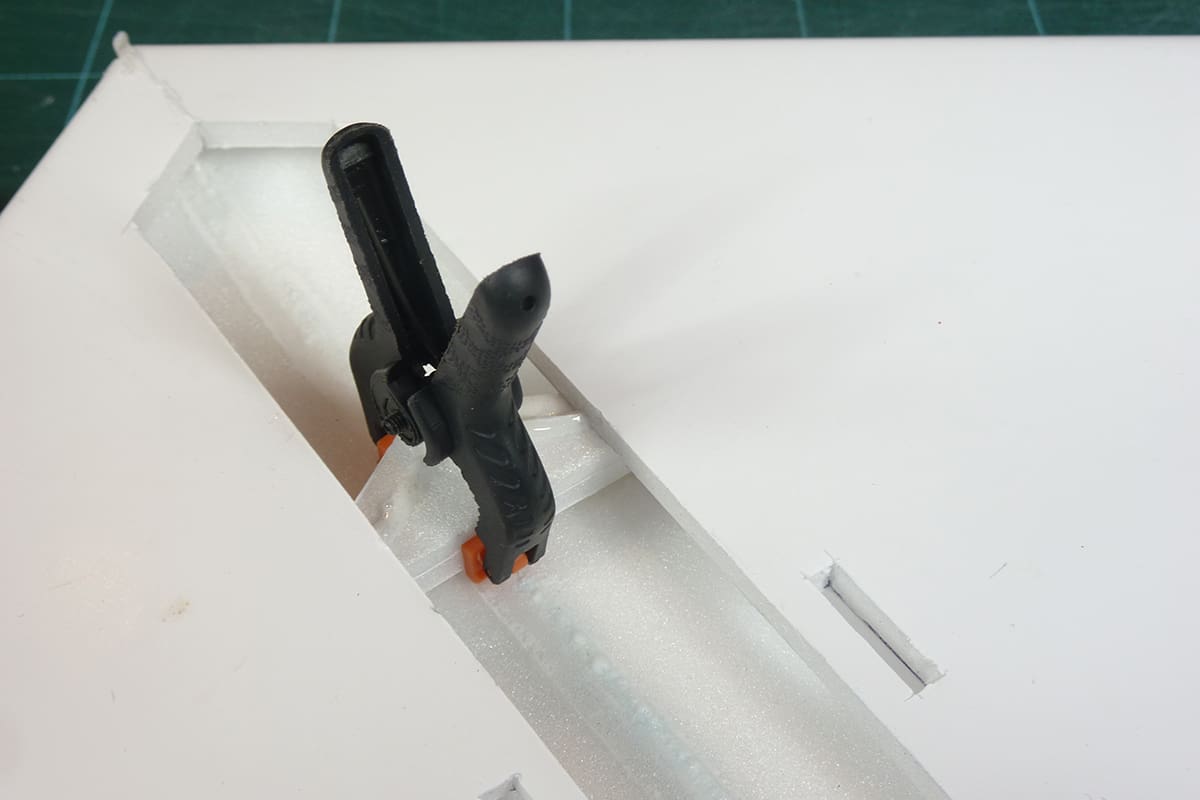
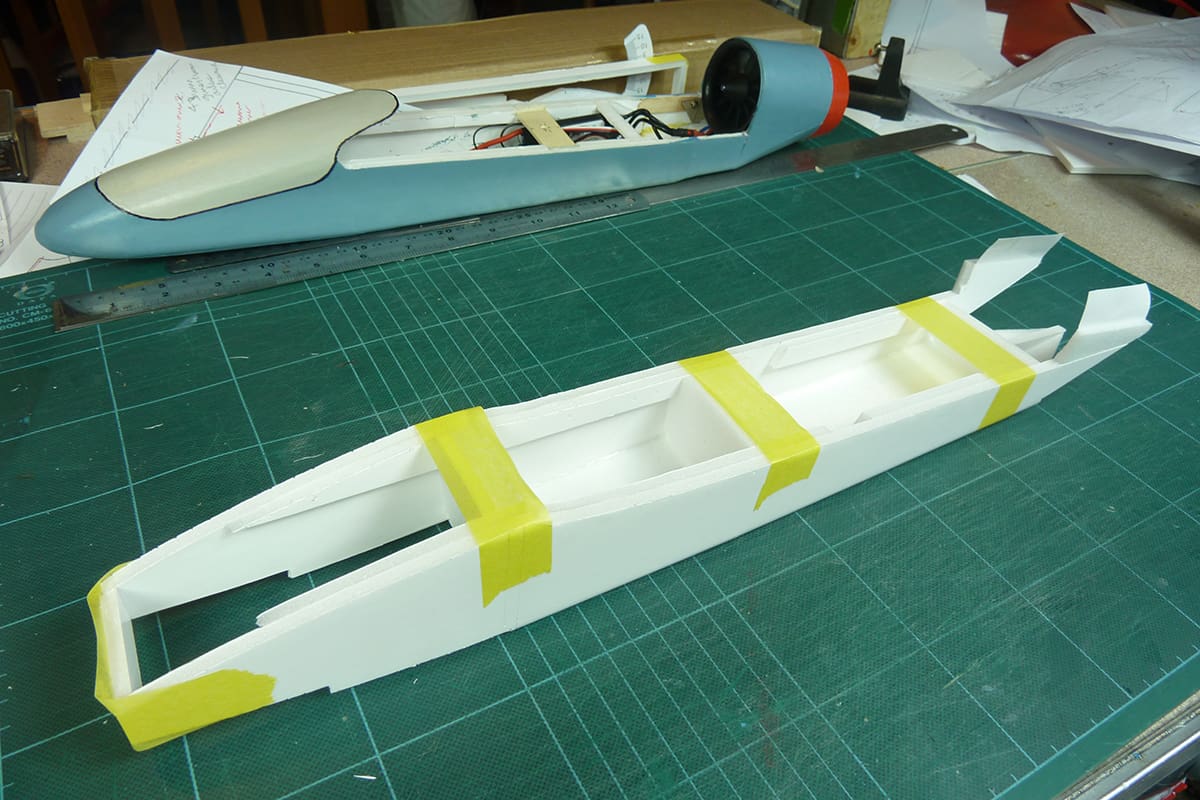
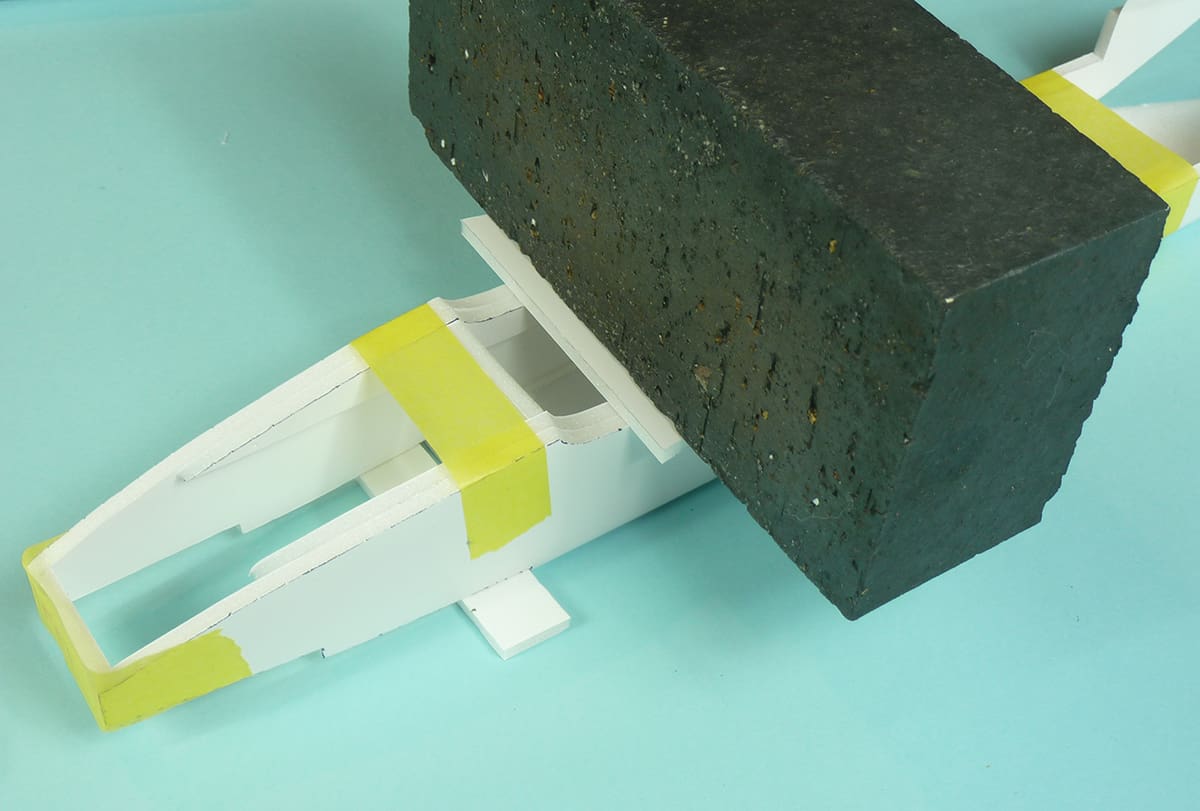
- Cut out the formers. Run Gorilla Clear Glue along the creases in the fuz blank and fold the sides up with the formers trapped in place. Note – only F1is glued in place at this stage, the others are just used as spacers for now.
- I used my SLEC Building Jig to hold the sides vertical while the glue dries.
- Some weights on top of the wing seat will help the fold in the hatch area to stay in place while the glue dries. Put some scrap Foamboard in front of the hatch area to prevent the fold from being over flattened.
- When dry remove from the Jig and the fuz should keep its sides at 90° to the bottom. Leave the formers in place for now.
- Dry fit the wing and trim the wing seats at the LE so the wings sit properly on the wing seats.
- Cut out and glue in place the top and bottom sheeting to the nose remembering to include the air intake duct in the underside of the nose. Dry fit the wing to make sure the slope of the top sheet matches the sanded wing LE area.
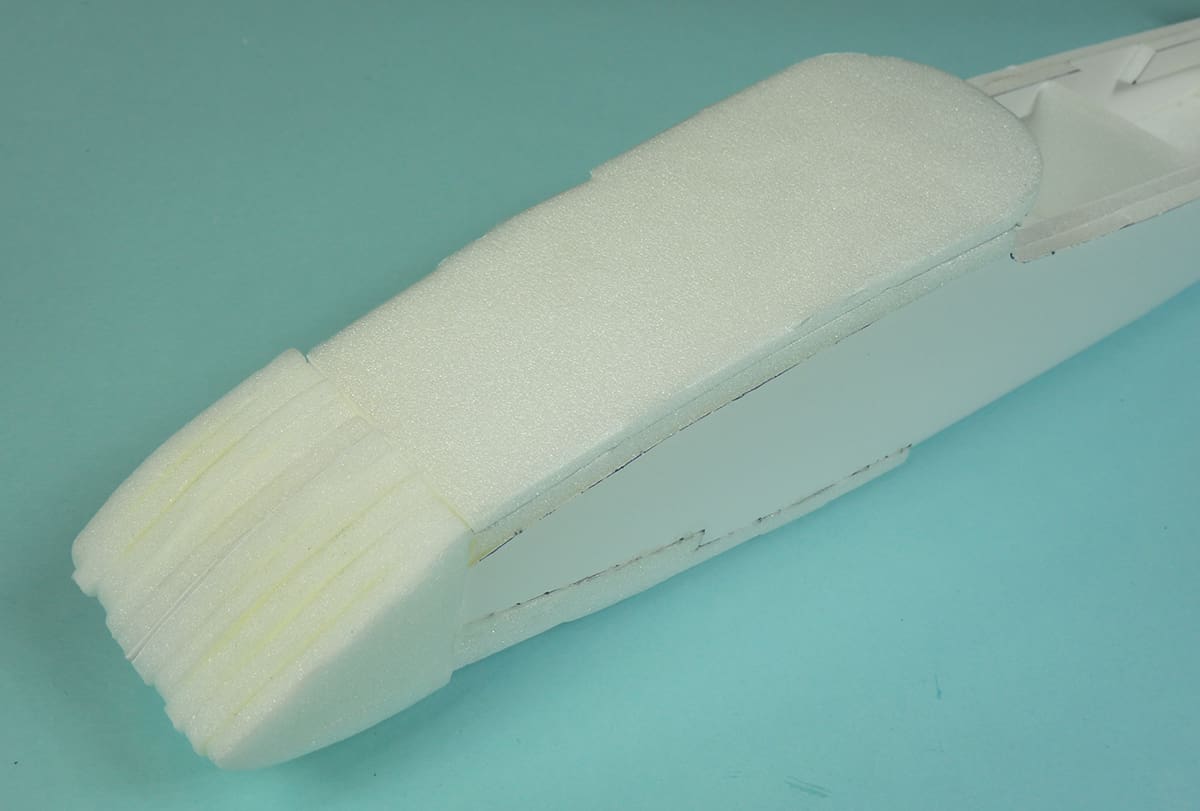
- Sand the front of the fuz flush with F1, make up the nose block and glue in place.
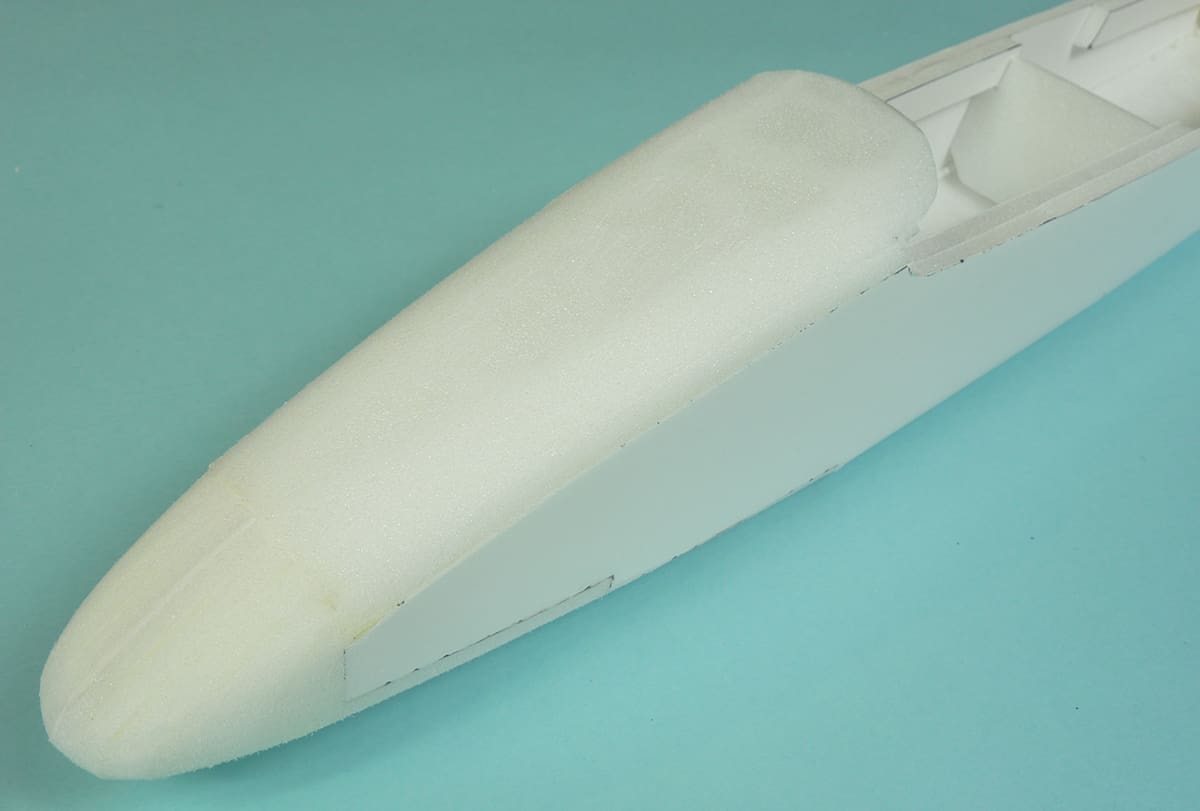
- Sand the whole nose area to a pleasing shape making sure the top sheet blends in nicely with the wings upper surface.
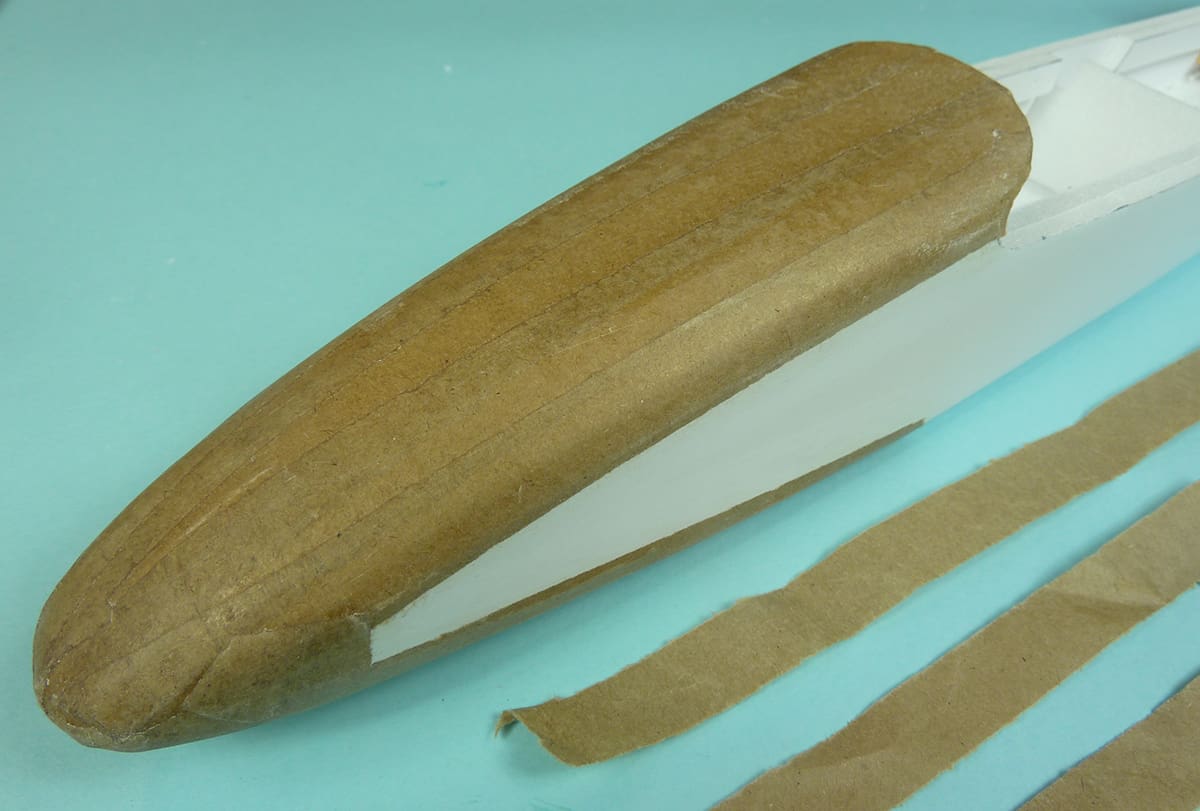
- Seal the exposed foam with strips of brown paper and thinned glue. I also added brown paper to the fuz sides to behind the wing LE to strengthen the nose.
- Make up the hatch and cut an opening in the underside of the fuz to suit. Line the edges of the hatch and opening with brown paper. A film hinge at the front locates the hatch and a magnet at the rear holds it closed.
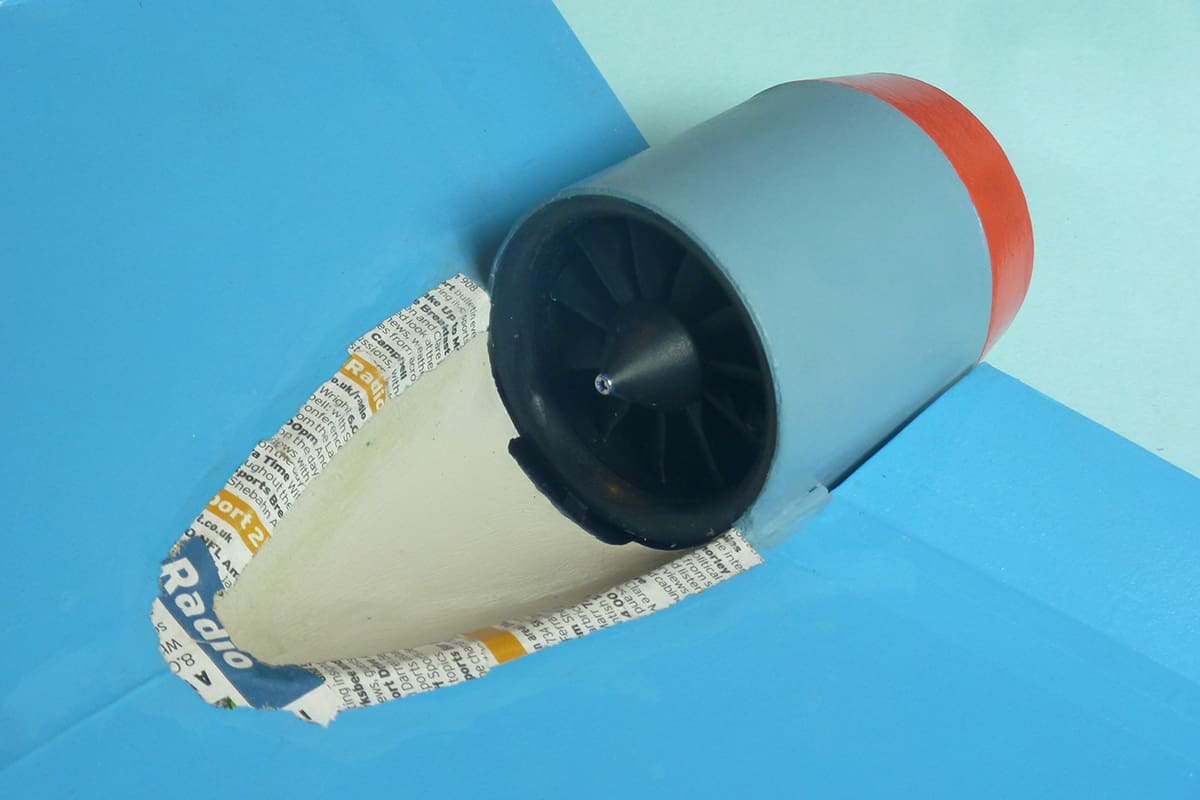
- Make up the EDF mandrel. The only critical part is ensuring the EDF efflux tube is the exact diameter required. See plan and photos for details.
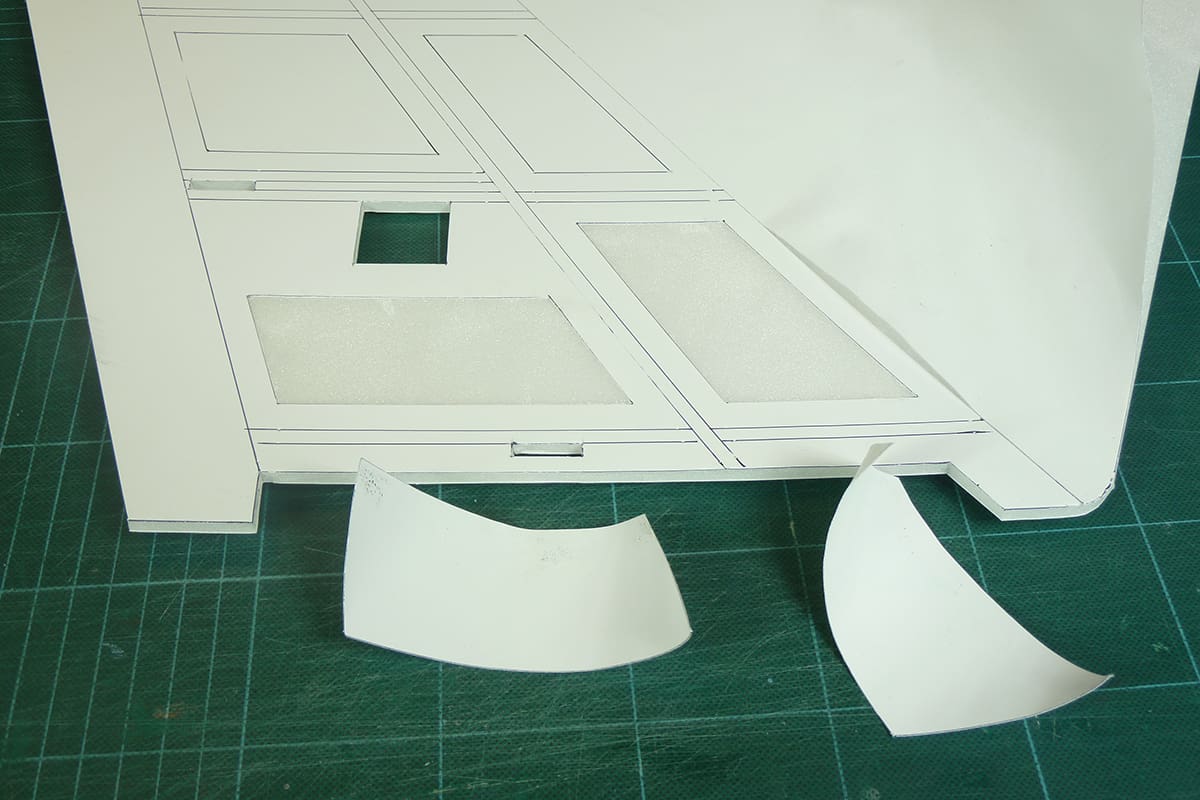
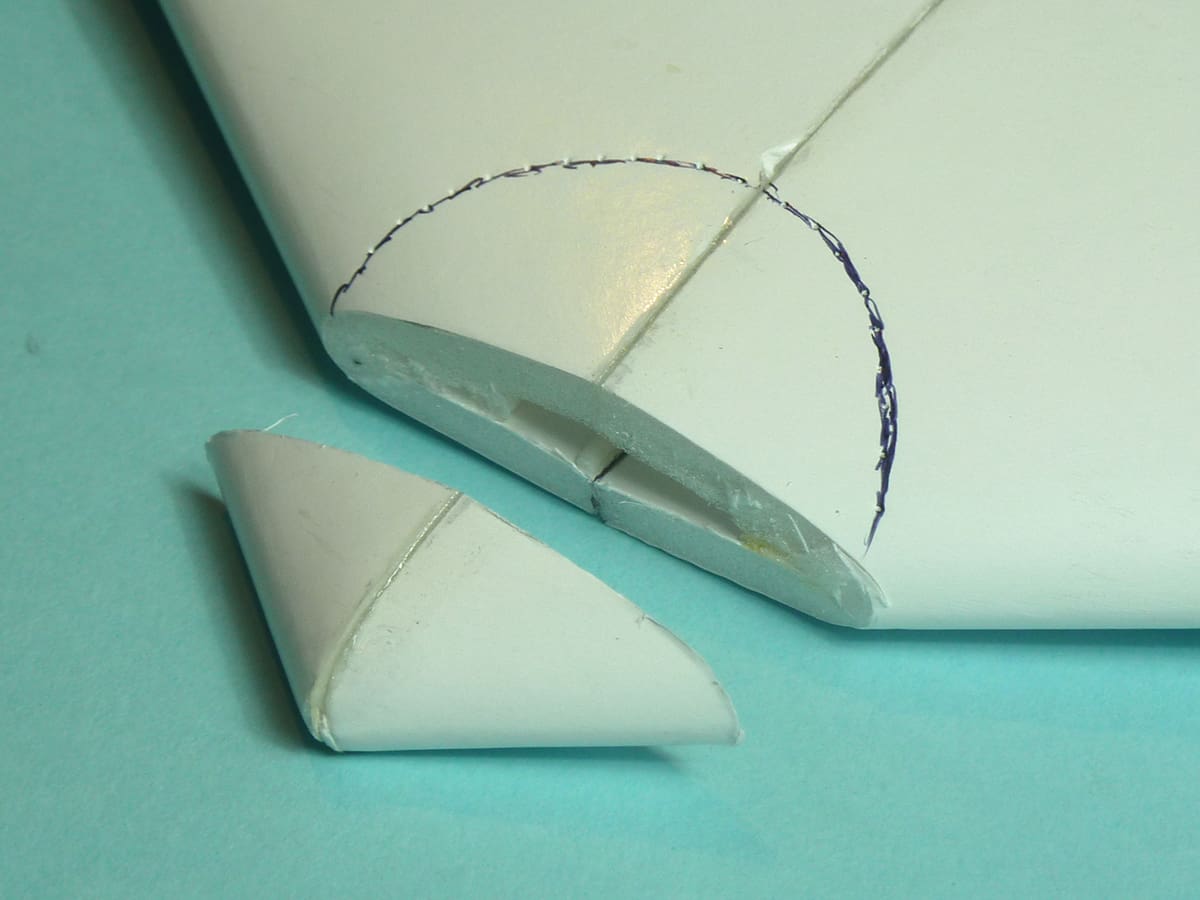
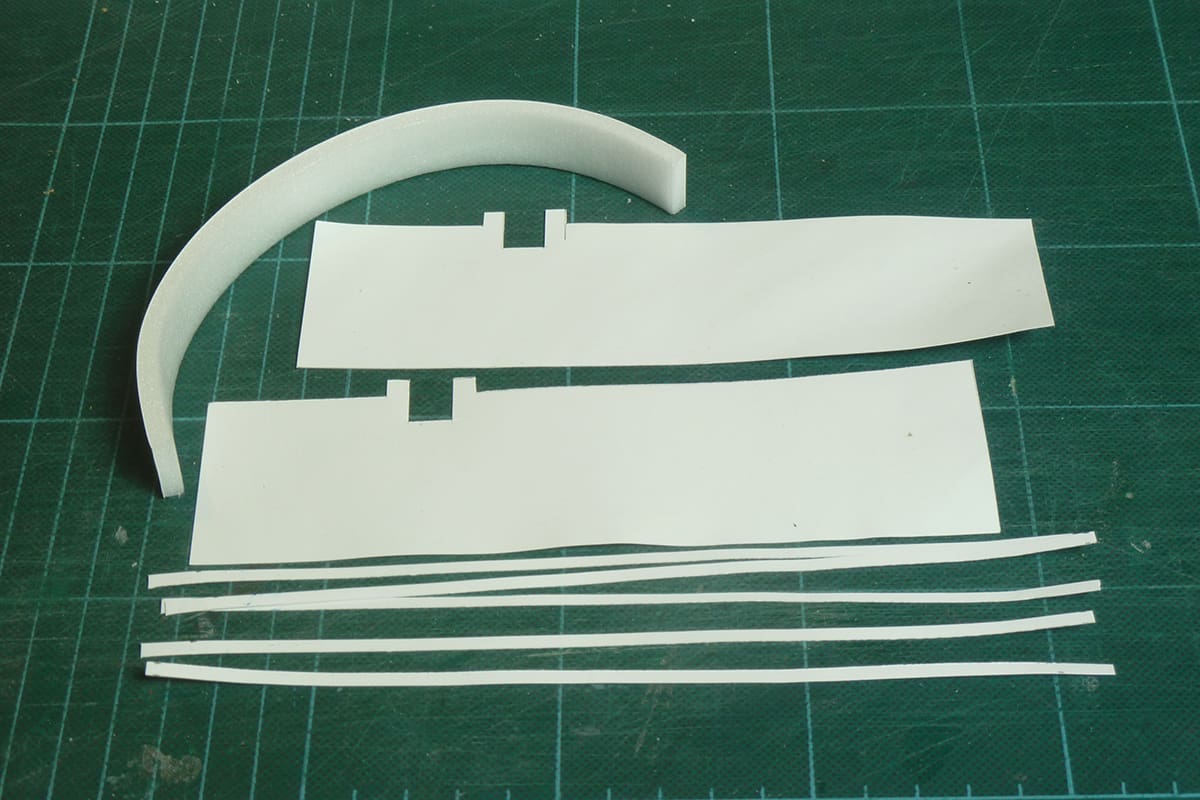
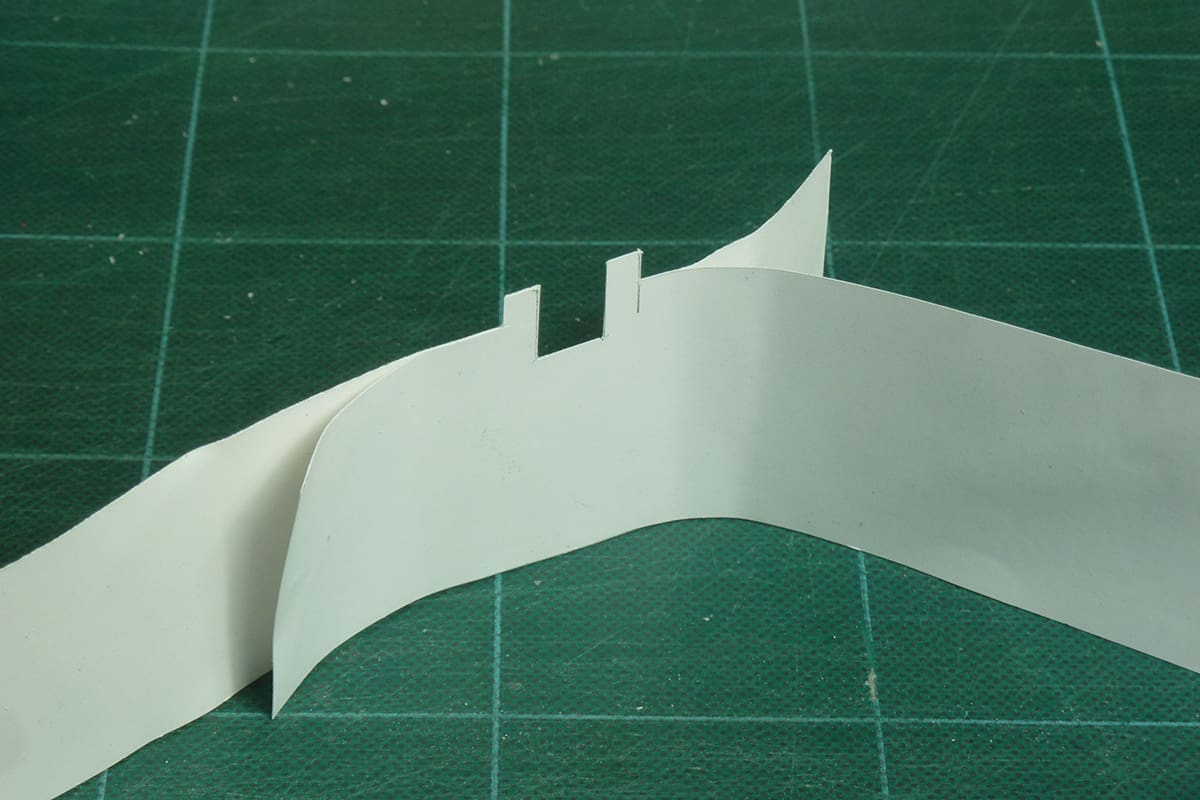
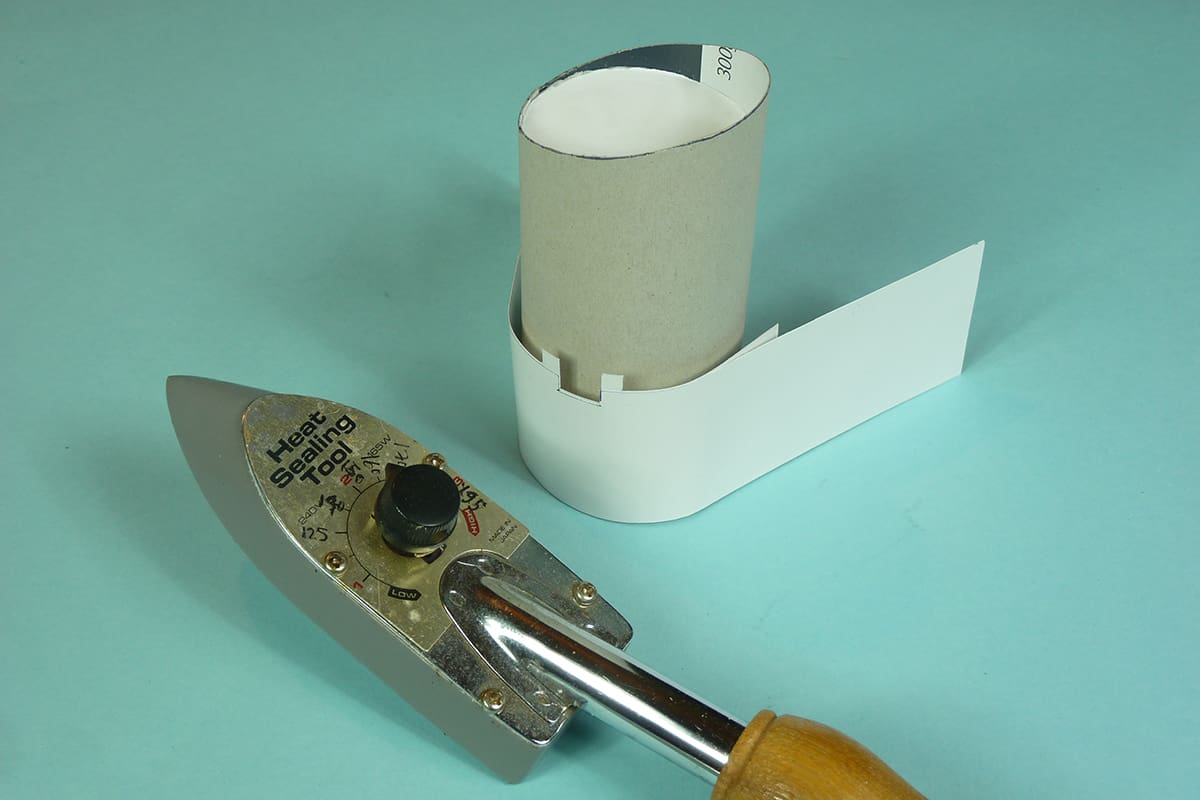
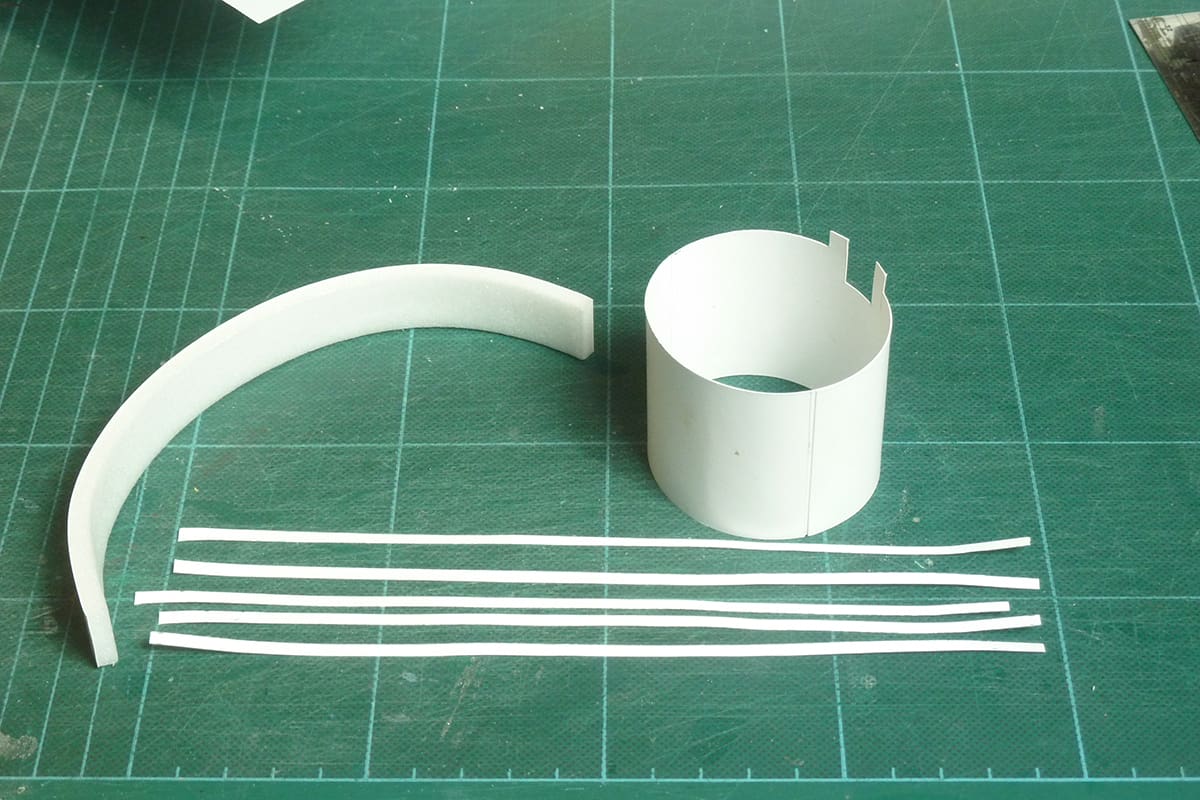
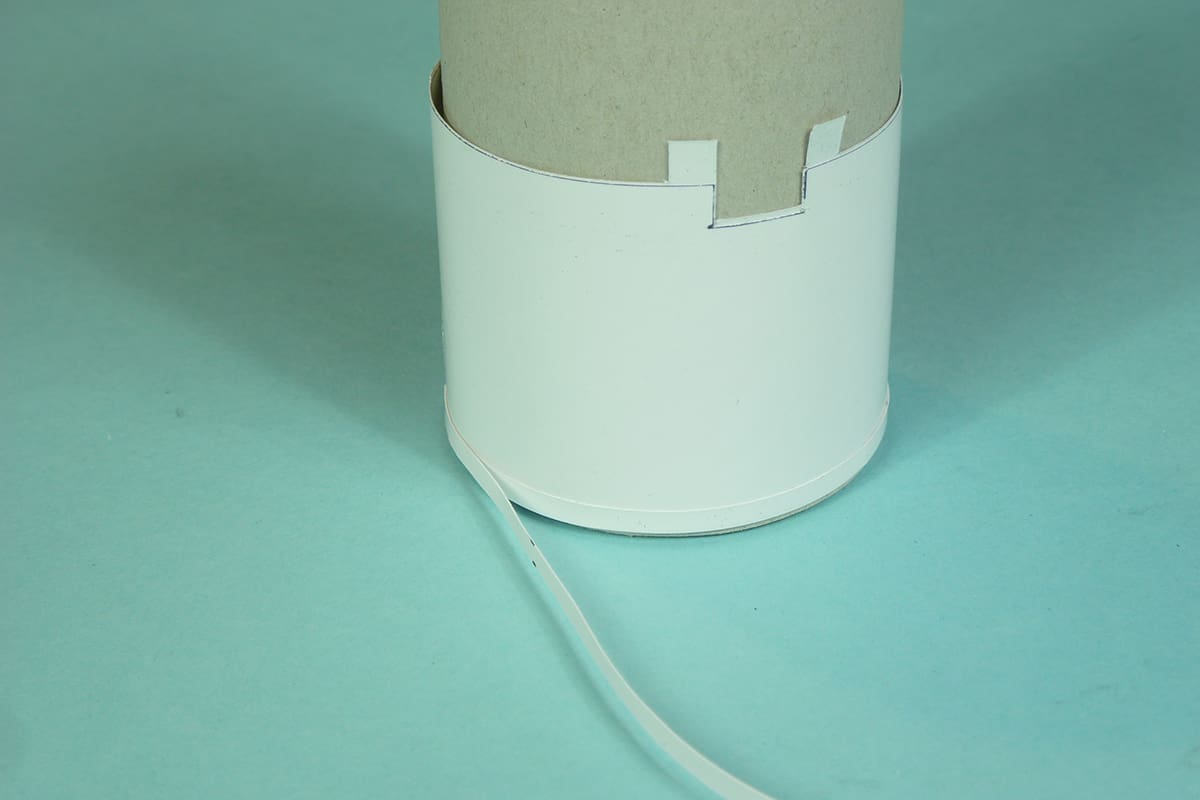
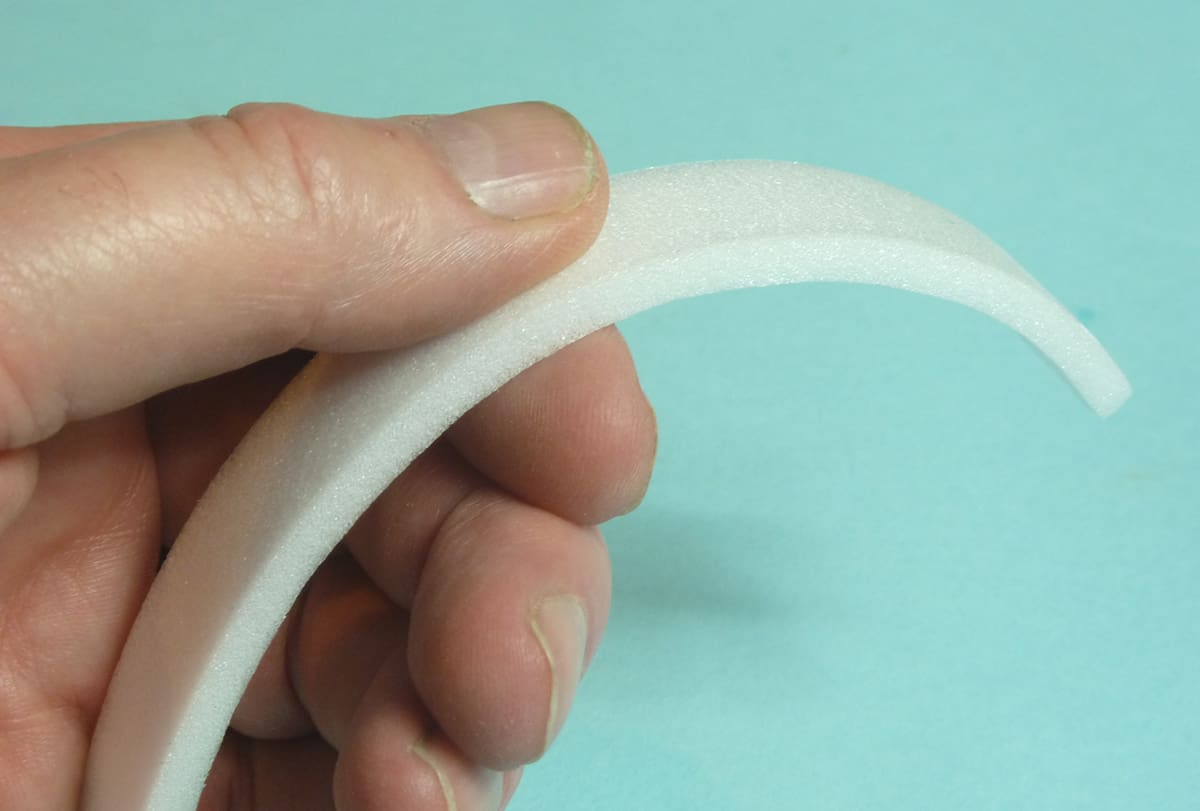
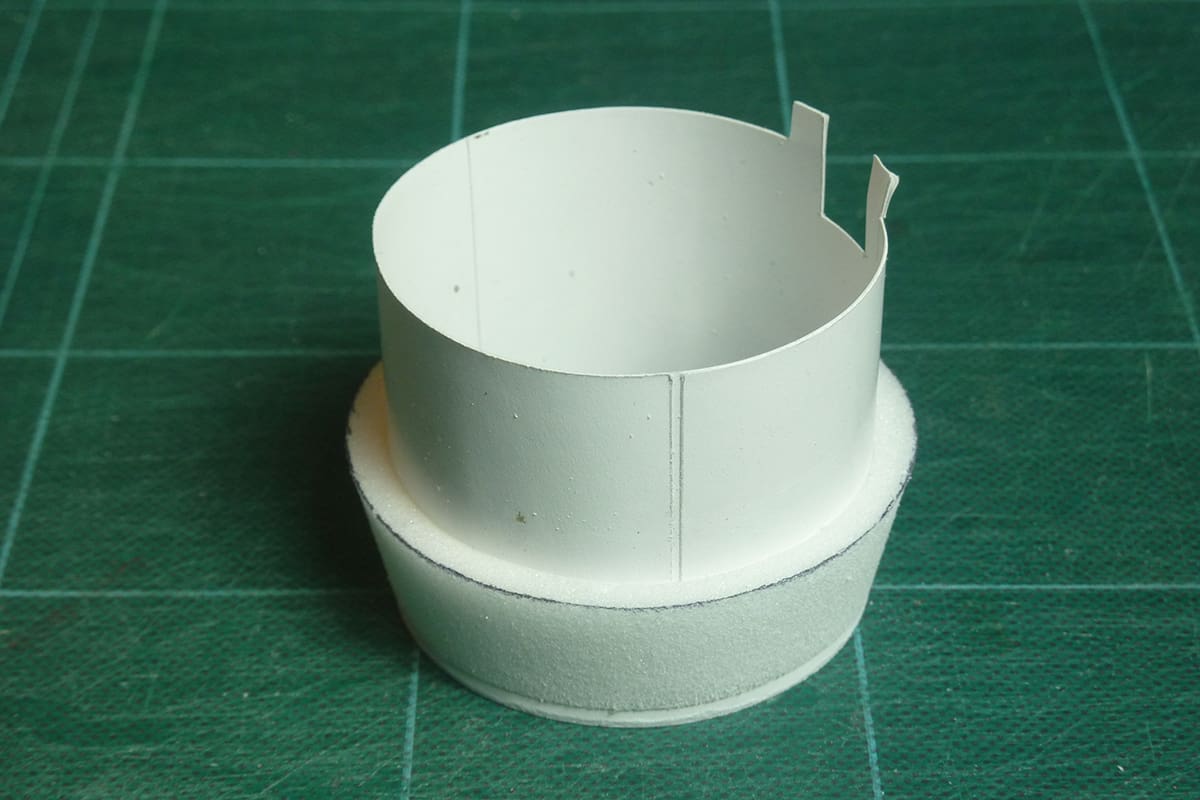
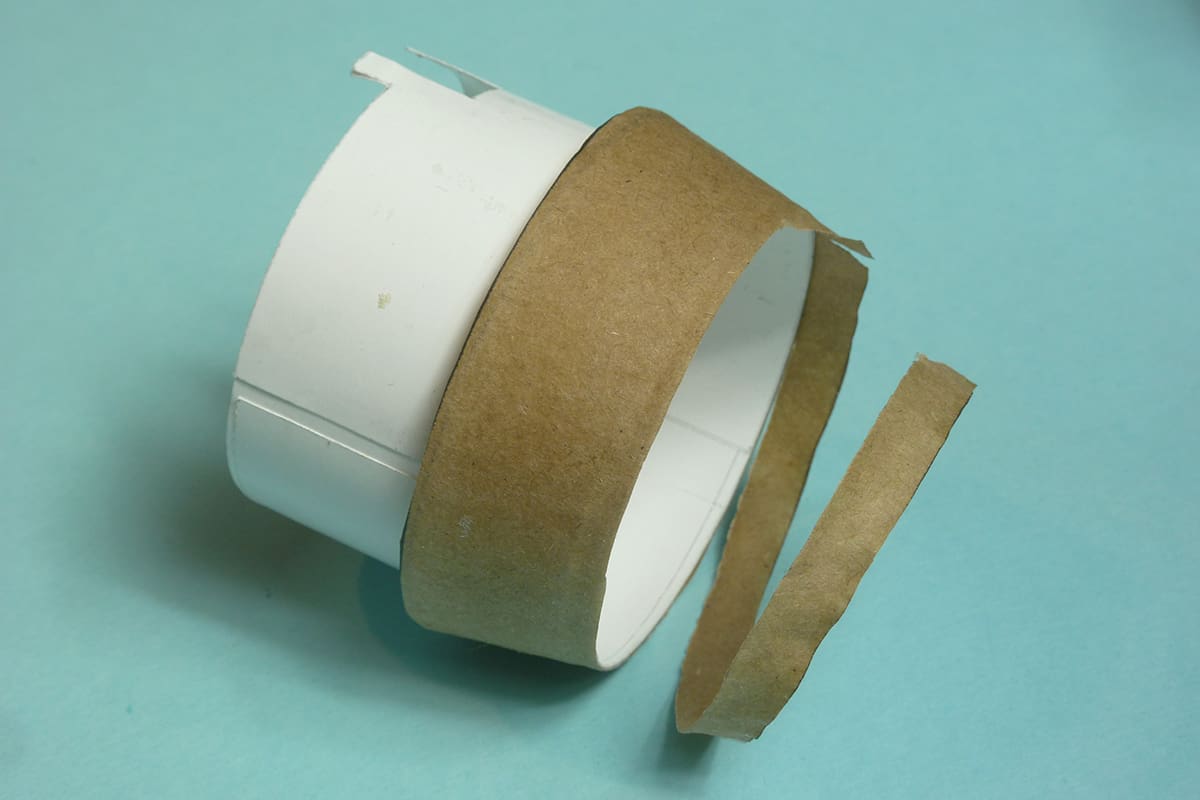
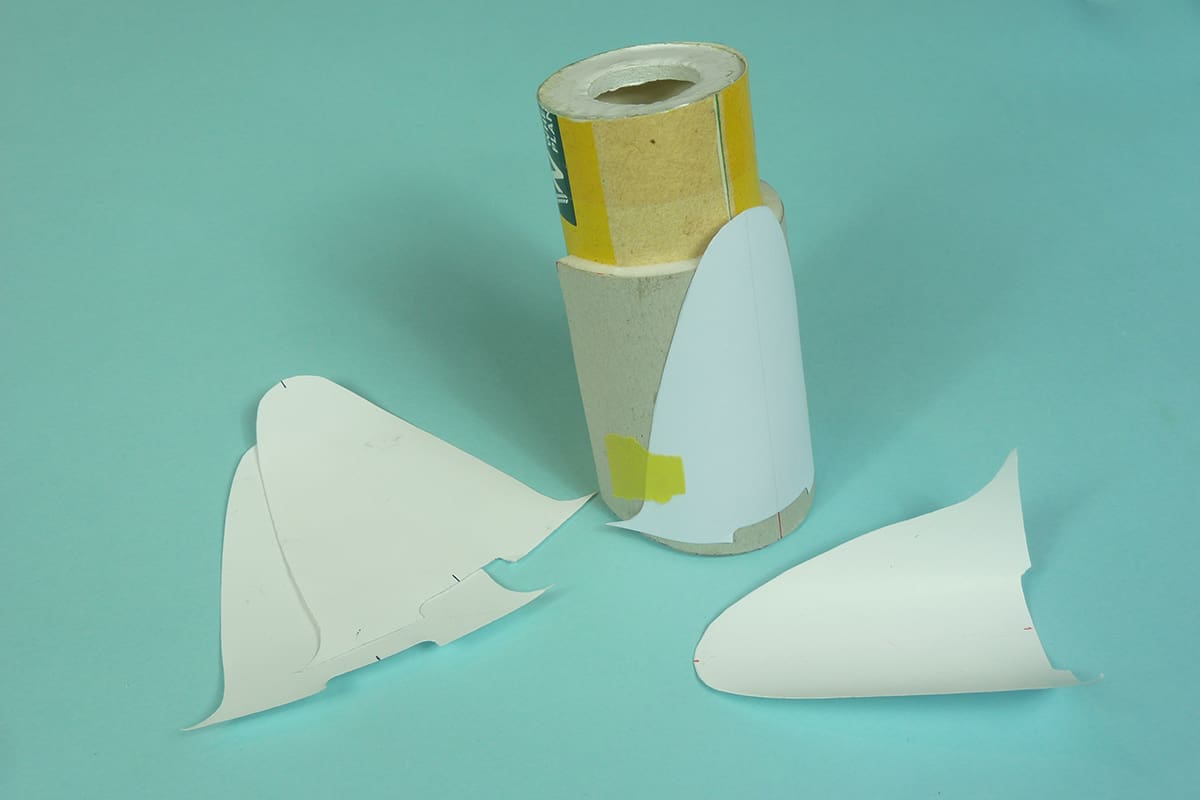
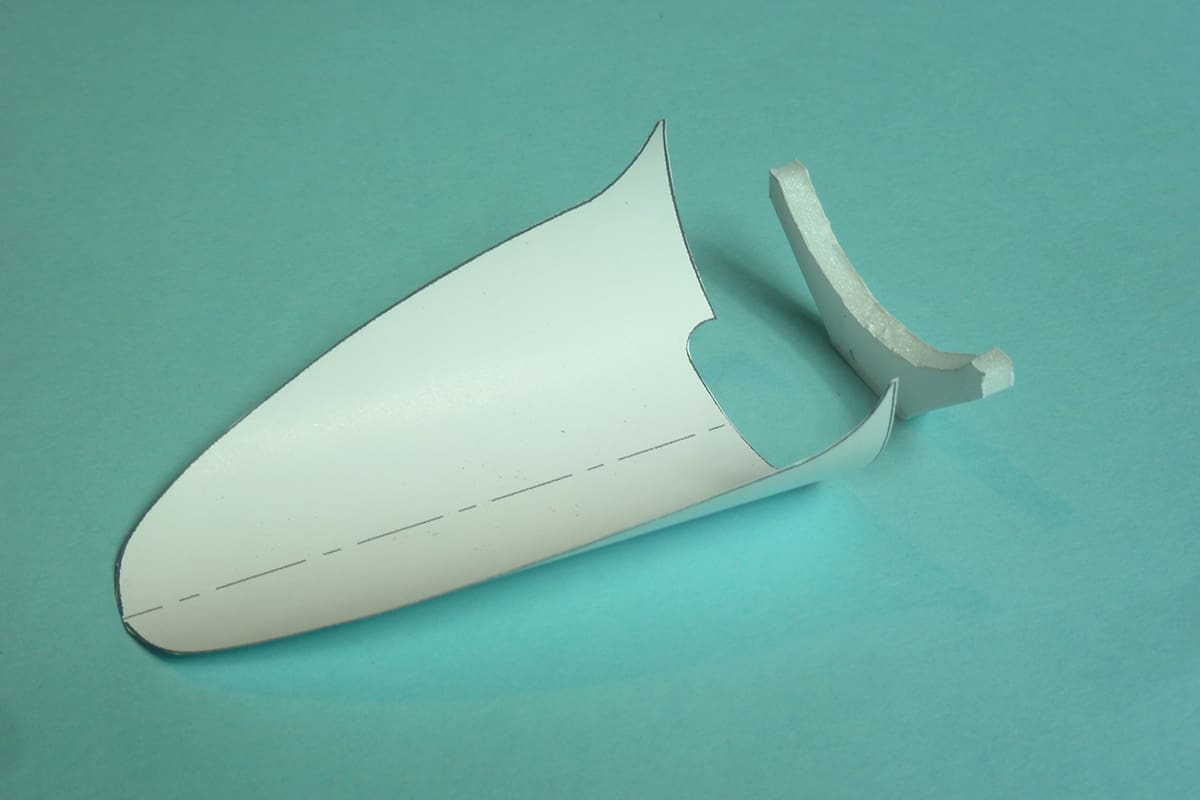
- Cut out the foam EDF fan casing inner skin and gently form a curve to it. Gently pull the casing over the edge of a kitchen worktop and slowly increase the curvature. Take your time, go too quick and it’ll crease or crack! Wrap it around a suitable tube to force a curve slightly tighter than the EDF unit. Leave for a while until the curve “sets”
- Build up the EDF efflux nozzle from card, foam and brown paper. See plan and photos for details.
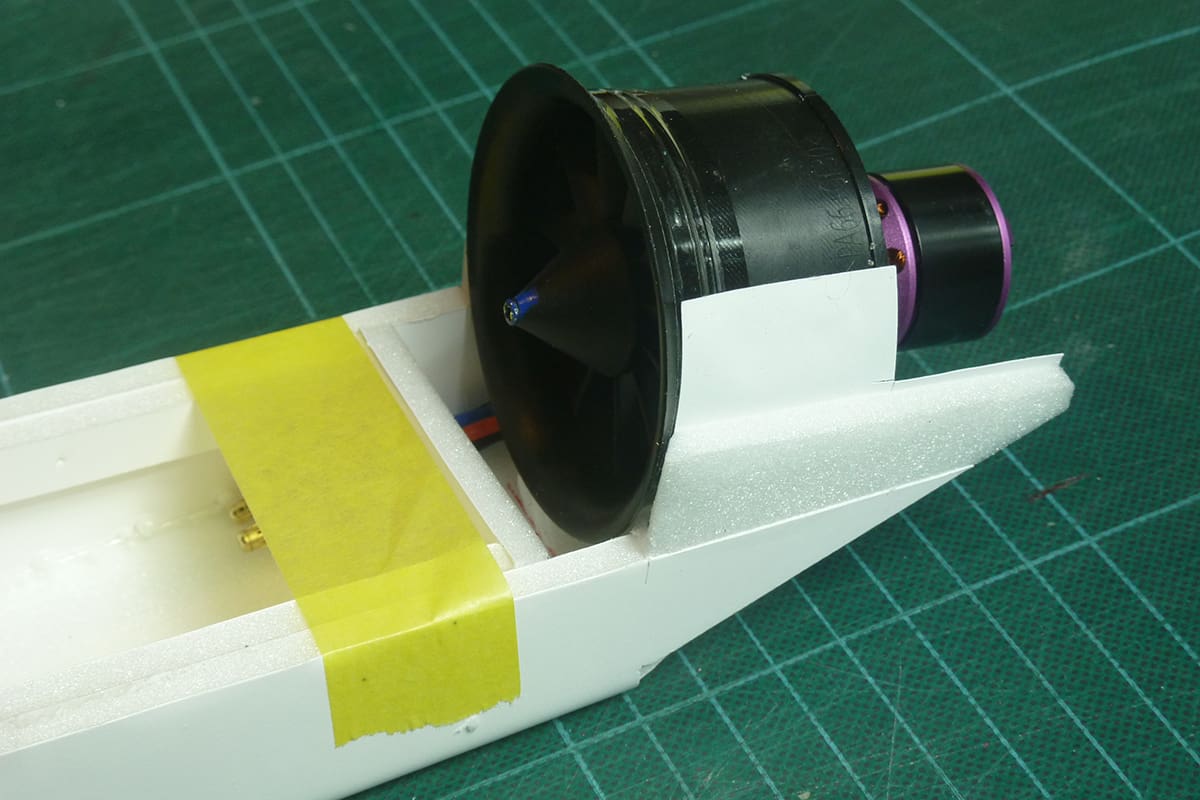
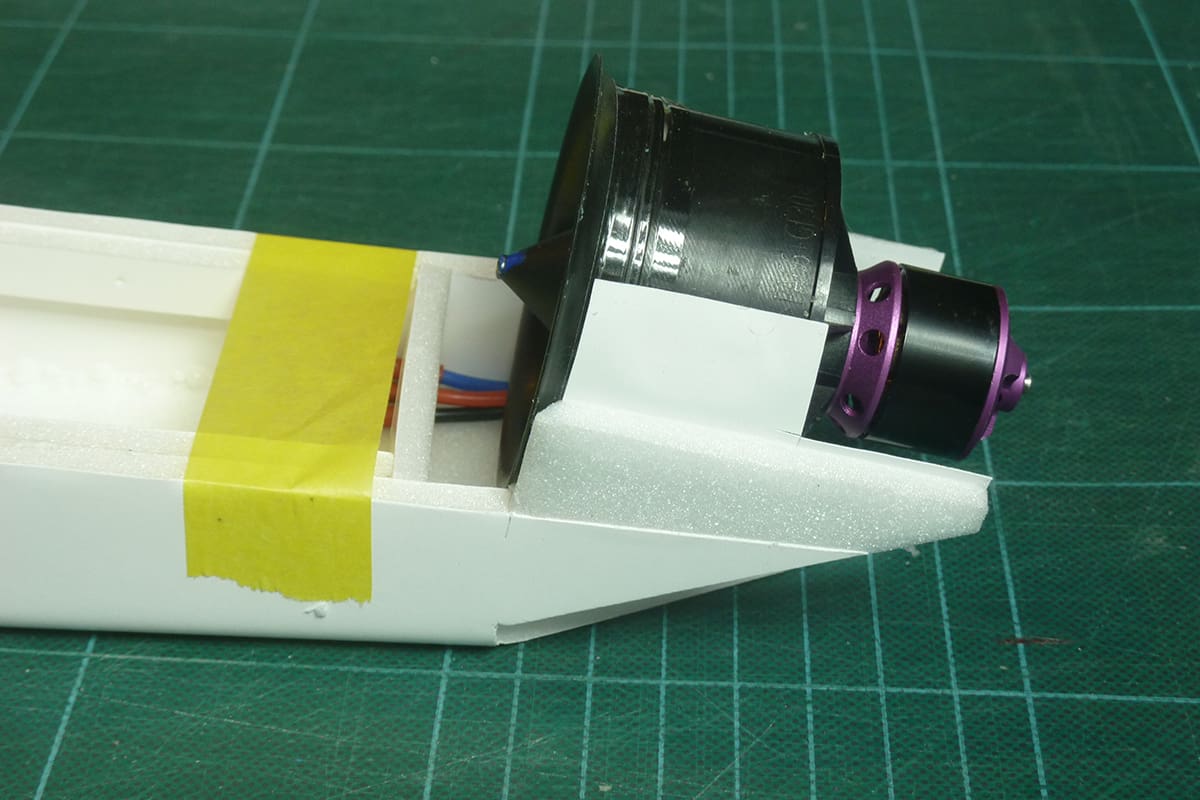
- Make sure the fuz bottom is flat at the rear and glue the EDF stool in place.
- Glue the EDF unit onto the stool and glue the card of the fuz sides onto the sides of the EDF unit. Check against the plan that the right amount of up-thrust is present.
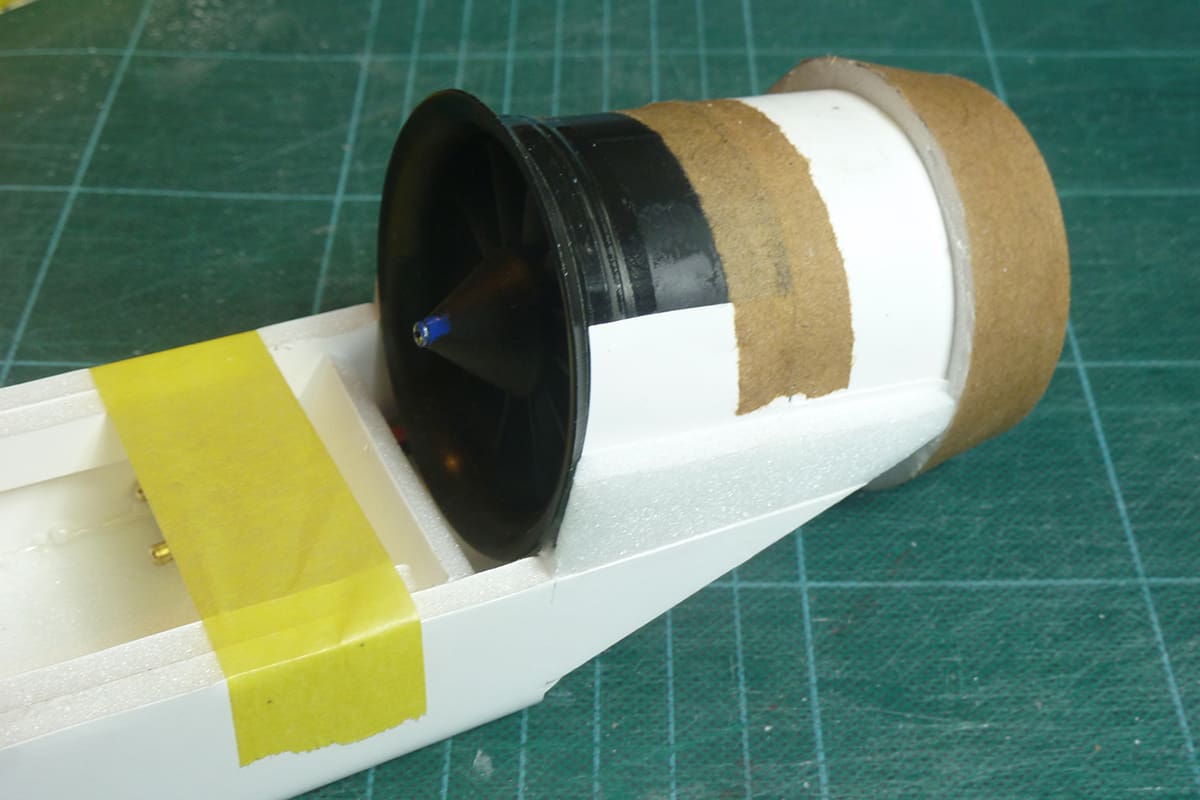
- Slide the EDF efflux nozzle onto the mandrel and glue the nozzle to the stool and the fuz sides making sure it is tight against the outlet of the EDF unit all the way round, the notch allows the wires to pass through.
- Add a strip of brown paper over the joint for alignment and additional strength and leave to dry. Double check the up-thrust.
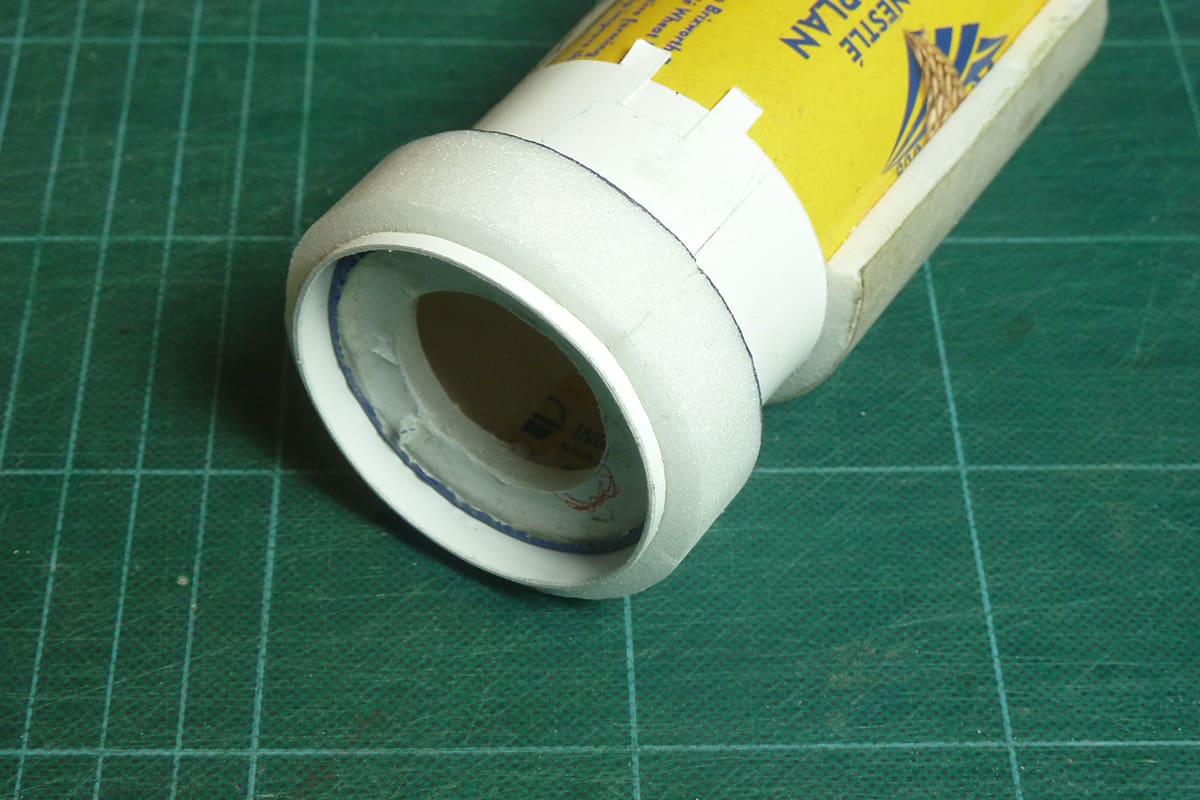
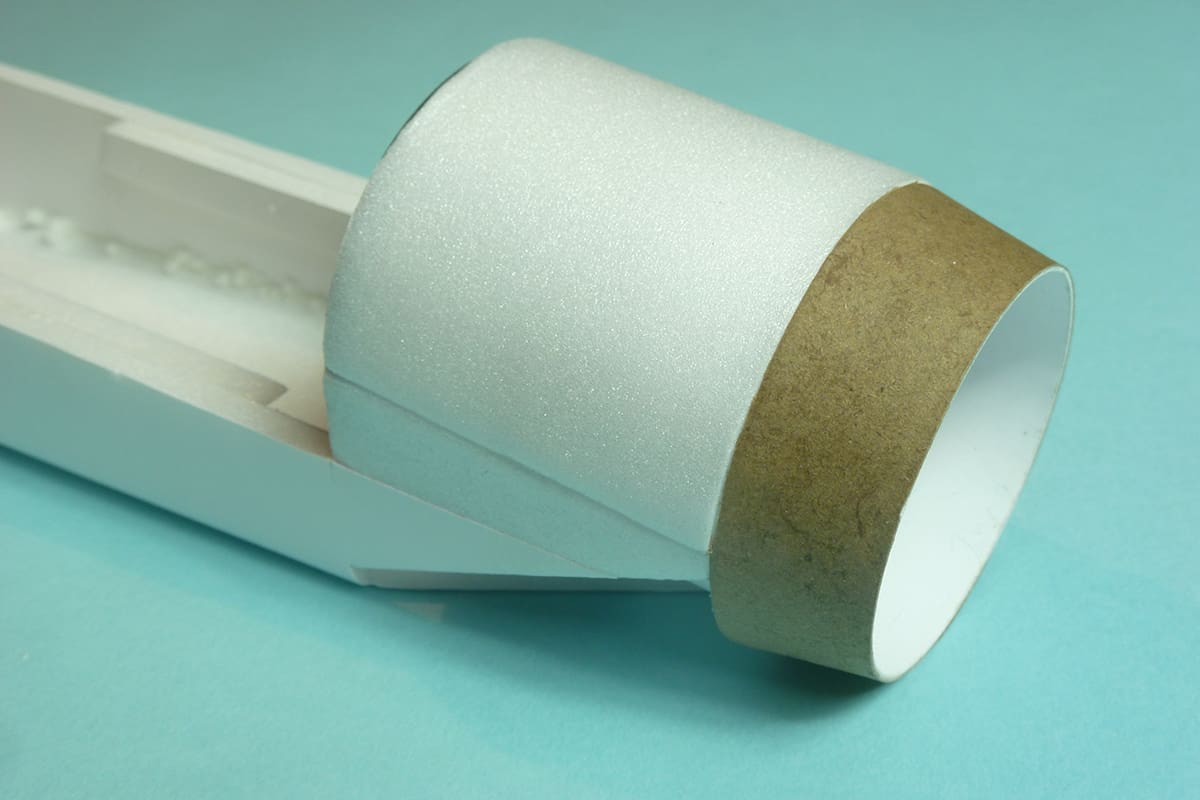
- Hopefully the foam EDF fan casing inner skin now has a tight curve and can be glued in place. Chamfer the ends to blend in with the fuz sides. The EDF mandrel can be withdrawn when the glue has dried.
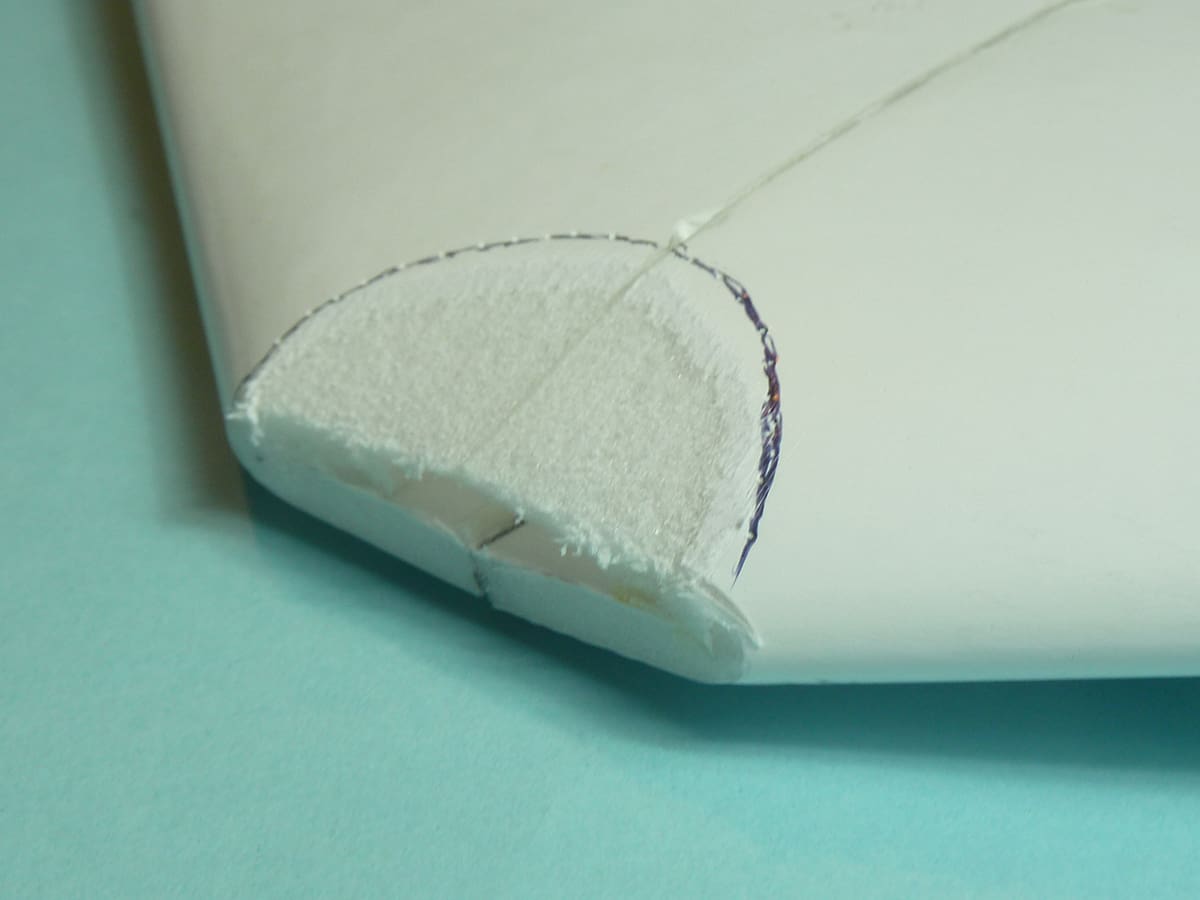
- Sand off any high spots where it meets the fuz sides and sand a rounded edge to the LE at the EDF inlet.
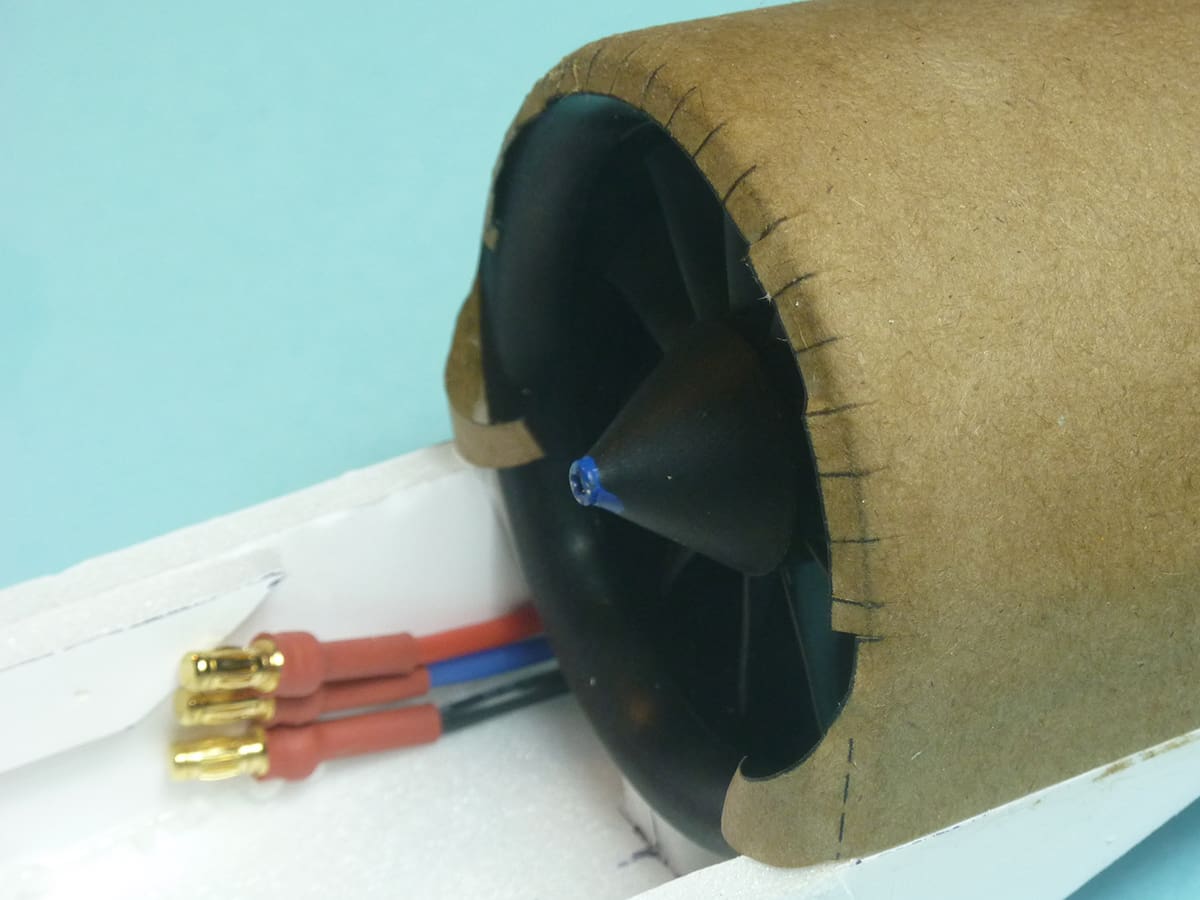
- Add the brown paper EDF casing outer skin with thinned glue.
- All being well there should be no step where the over EDF skin and efflux outlet meet. If there is a step add further layers of brown paper to build the levels up.
- Line the EDF side cheek openings with scraps of foam.
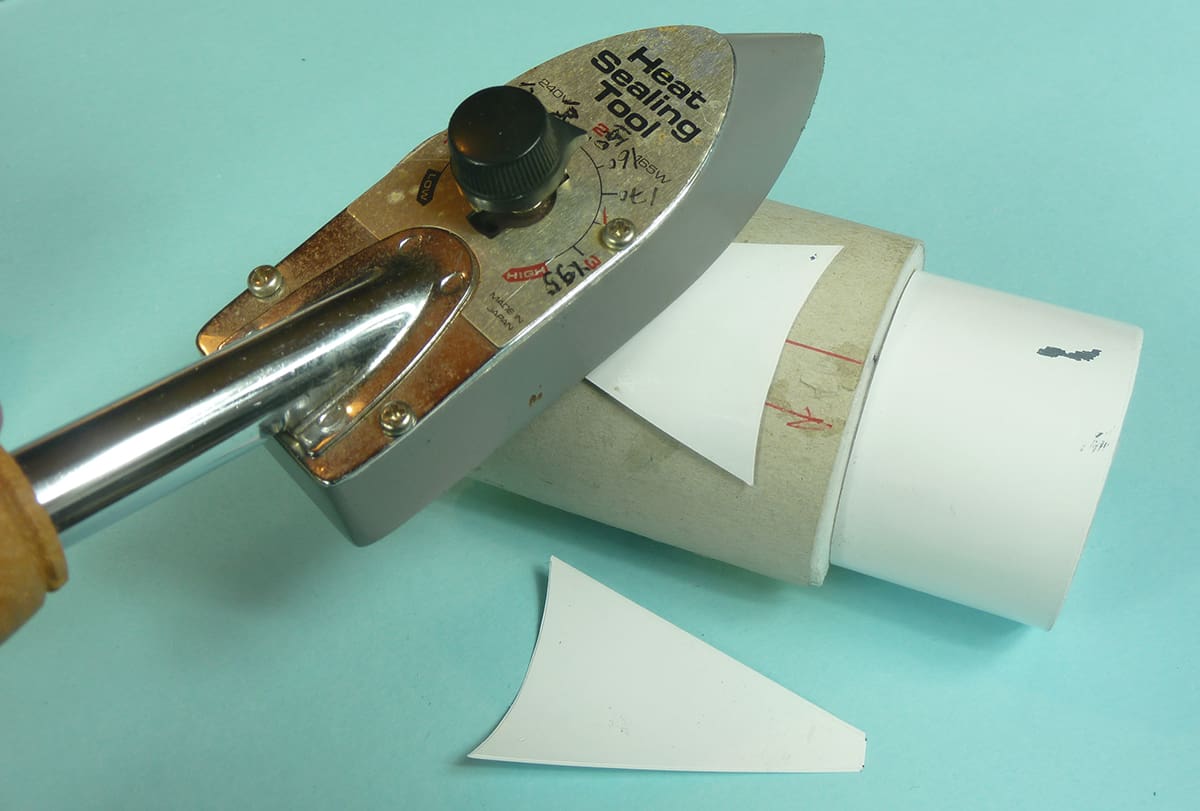
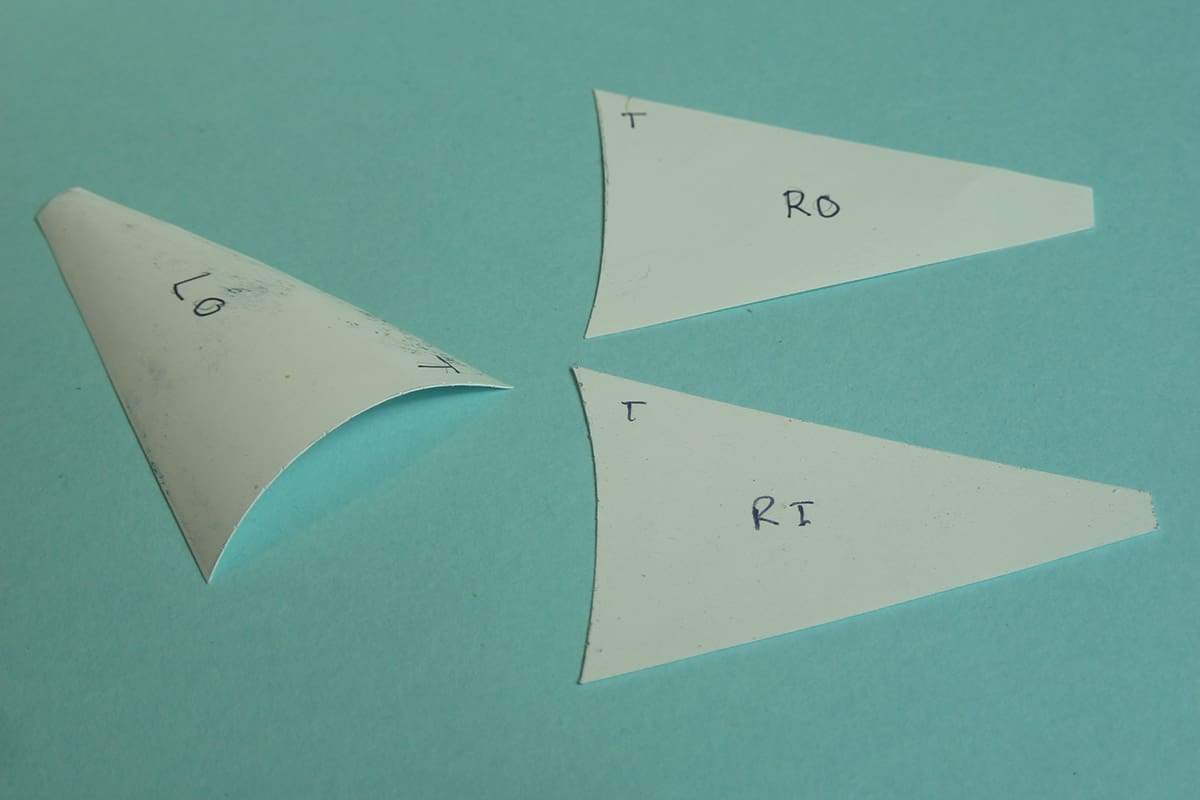
- Form the side cheeks from two pieces of card with the glue sides together using the mandrel and heat from a film iron to set the curve. Make sure you make a handed pair!
- Glue the side cheeks in place making sure they are flush with the fuz sides, bottom and the efflux nozzle. These might need a little trimming to accommodate building tolerances.


Finishing and Final Assembly
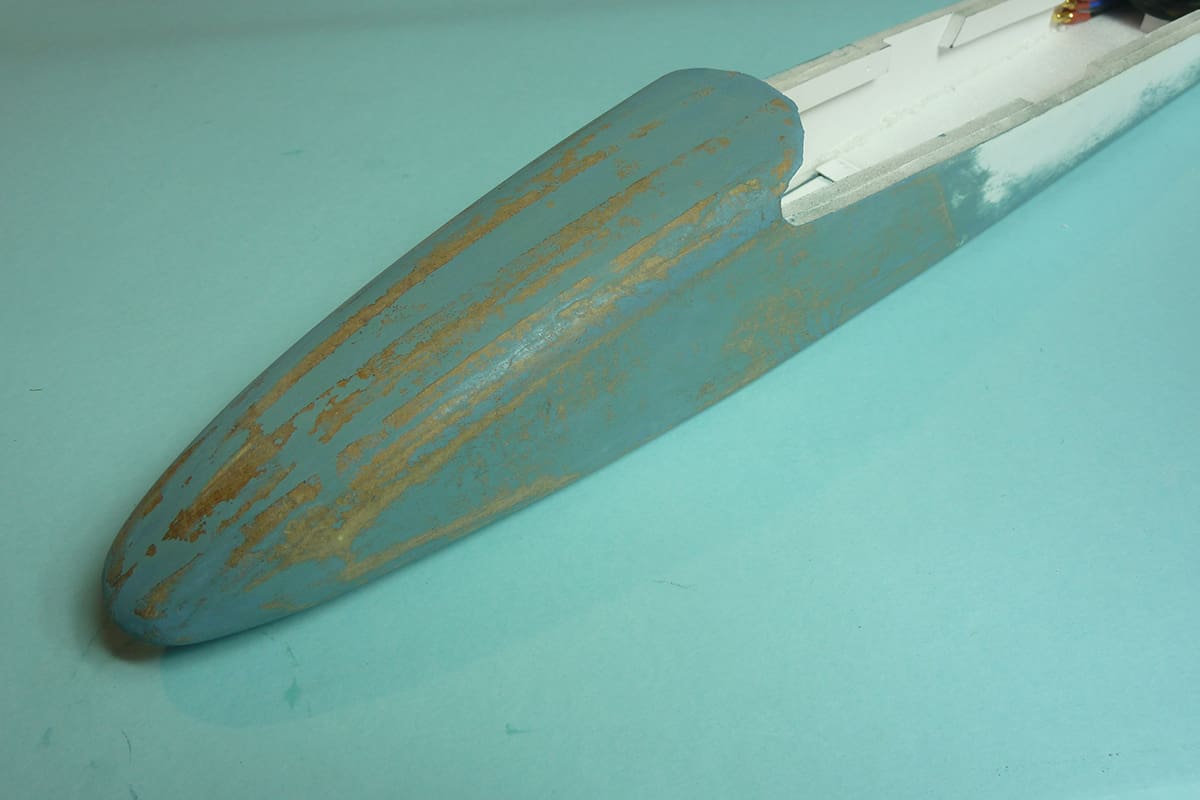
- I found it easiest to finish the wing and the fuz separately before gluing together.
- The quickest, easiest and cheapest method to finish the model is with the Valspar emulsion paint from B&Q. This paint has proven to stand up well to damp conditions and only occasionally needs a bit of touching up to keep the pristine condition.
- Give the components a light sanding to remove any obvious lumps in the brown paper and to take the shine off the card surface. Then apply a thin coat of paint to seal the surface.
- Bulk up some paint with microballoons and brush this over the edges of the brown paper.
- Lightly sand to eliminate all the inevitable high spots and apply two final thin coats to finish, ready for some stick on trim to be applied.
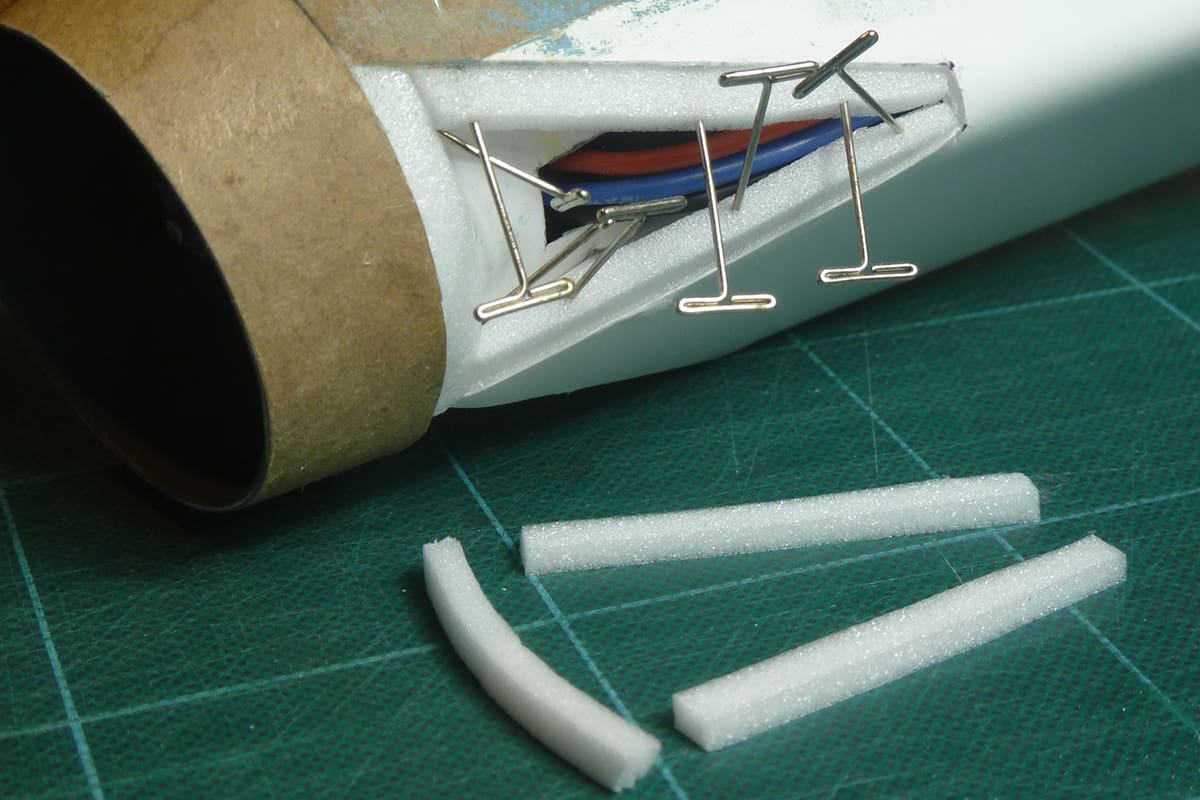
- I shortened the ESC leads to the motor before installing the ESC, receiver and elevon extension leads into the fuz.
- Before gluing the wings in place check for correct rotation of the EDF unit.
- Remove F2, F3 & F4 and do a final dry fit of the wing to make sure it sits on the wing seat and blends in with the fuz top skin.
- Using Gorilla Glue Clear glue the wing fixing lugs into the slots in the wings and before the glue dries run a bead of glue along the wing seat and into the gap in the wing seats and around the front of the battery plate.
- Slide the wing LE and battery plate into the fuz at the front and slide the wings TE over the EDF housing. The whole lot should self-align. Apply weights to the top of the wing to ensure the u/s of the wing is in contact with the wing seat and leave to dry.
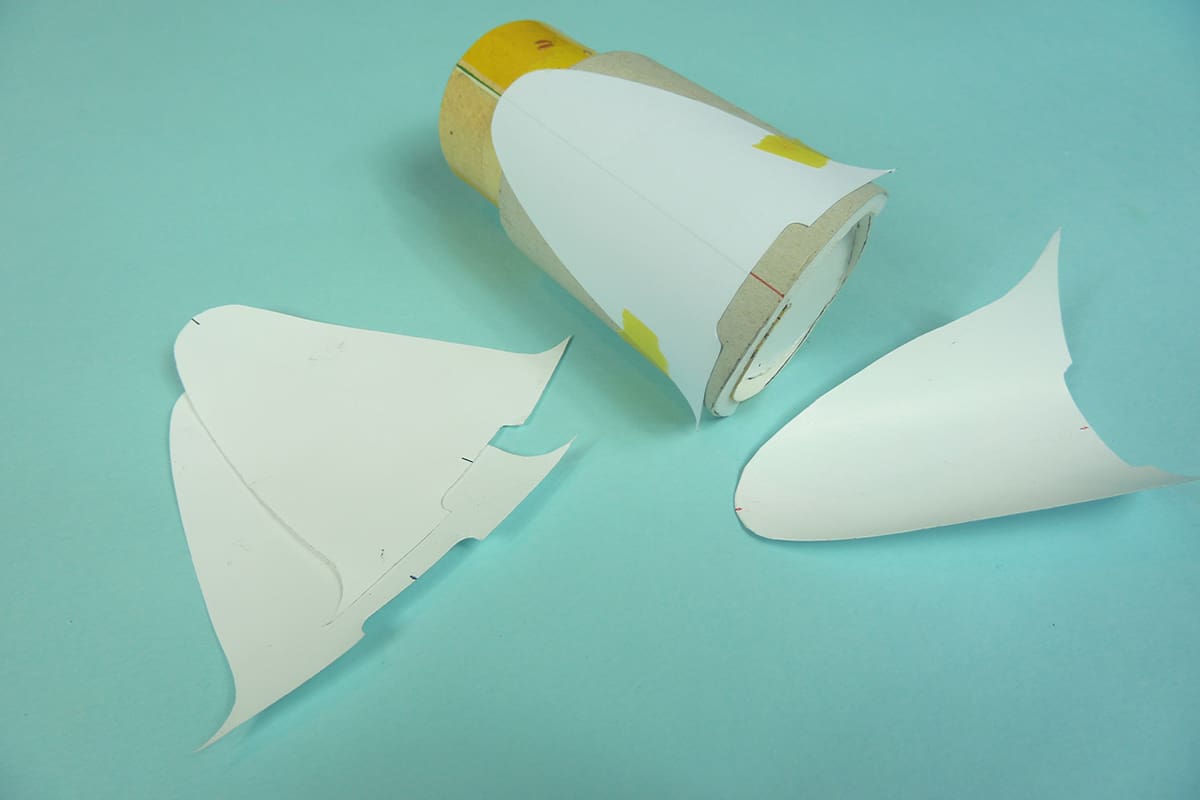
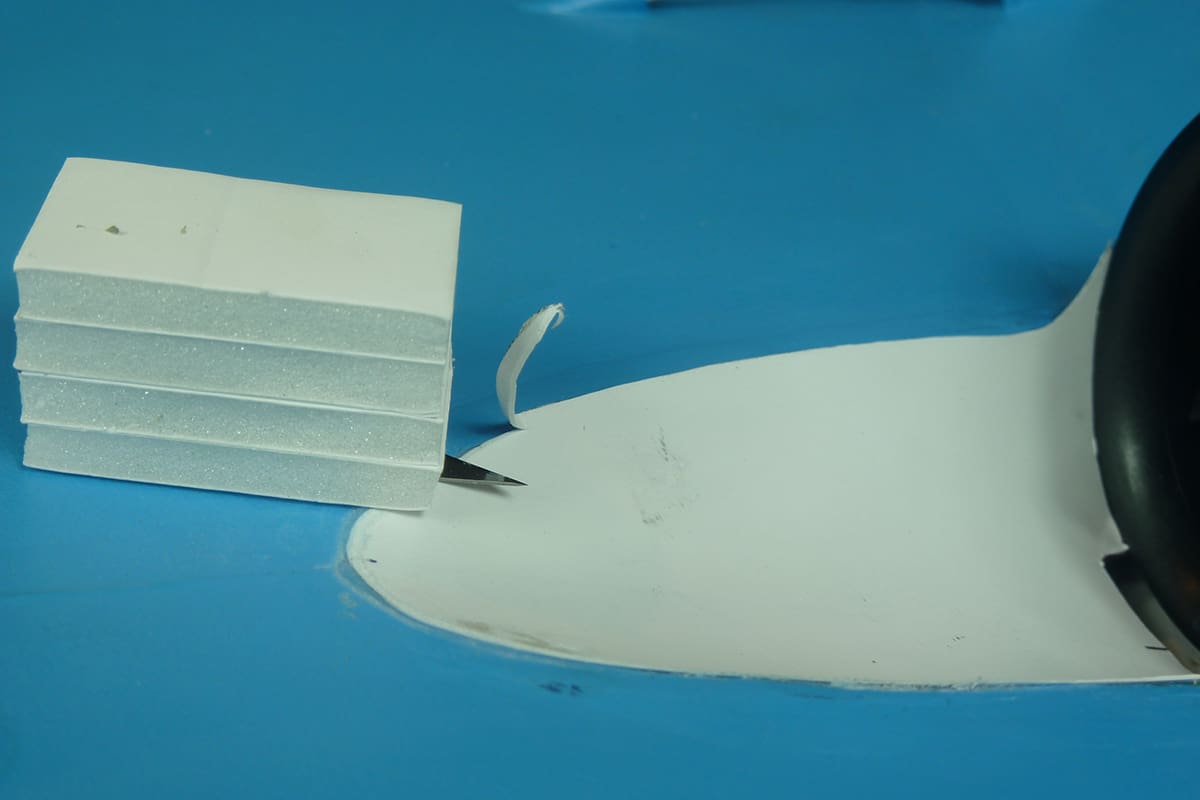
- Make up the EDF inlet scoop from two pieces of card which are glued face to face by applying heat whilst they are formed around the EDF inlet scoop mandrel.
- Juggle F4 and the inlet scoop until the inlet scoop is in line with the outside rim of the EDF bellmouth. Once the correct position is known, glue them in place using Gorilla Glue Original to fill any gaps.
- Place the inlet scoop mandrel into the scoop and weigh down while the glue dries.
- When dry trim off the excess scoop so it is flush with the top surface of the wing using the special tool made earlier.
- Fill and touch up the join between the scoop and the wing.
- Two 4-Max 4M-056DHVMG-009 servos are perfectly suited for the St8us elevons. I use the metal geared versions for extra security. The plan shows a handy gauge to set up the elevon throws – those shown are a good starting point.
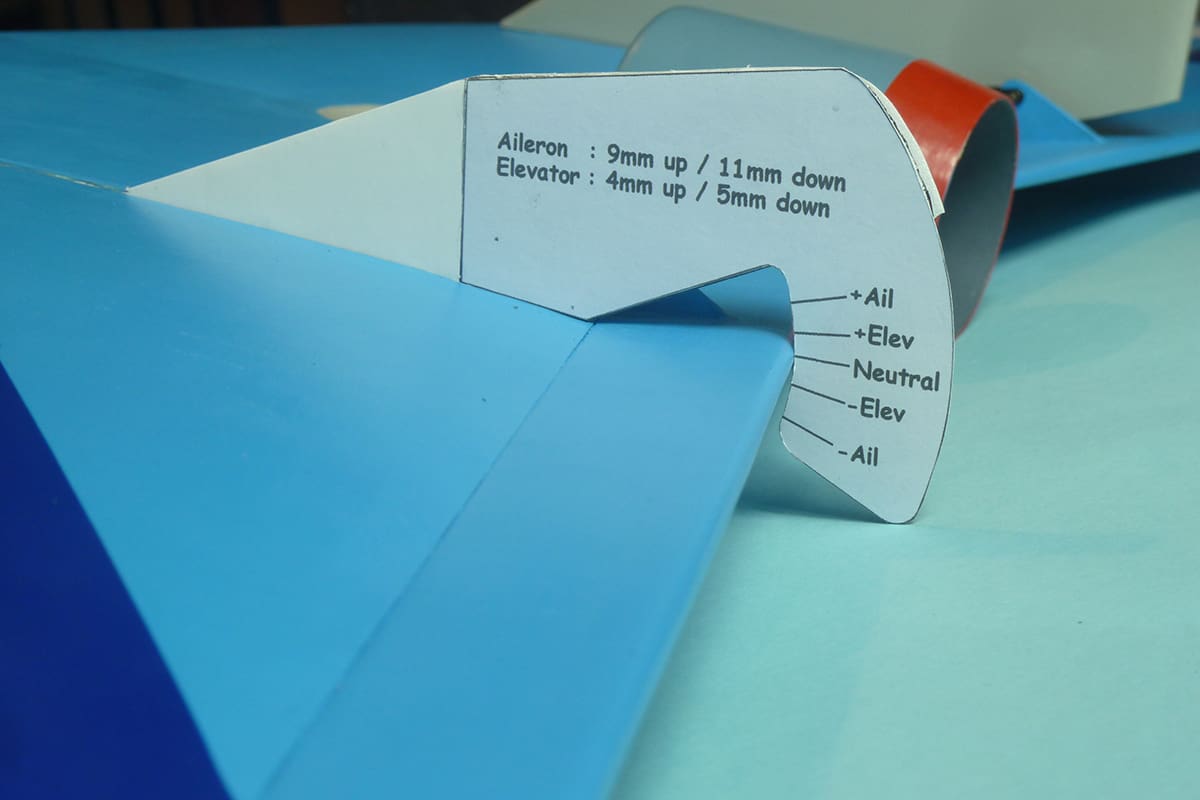
My preference is slightly forward of the rear extreme.
Ready to fly the original St8us weighs 615g. Before heading off to the Patch I plugged my Wattmeter into the circuit and recorded: 10.2V, 43.6A 440W. I also measured the thrust at 705g, that’s a Thrust to Weight ratio of 1.15:1 which bodes very well for some exciting flying.
TRIM TO SUIT!
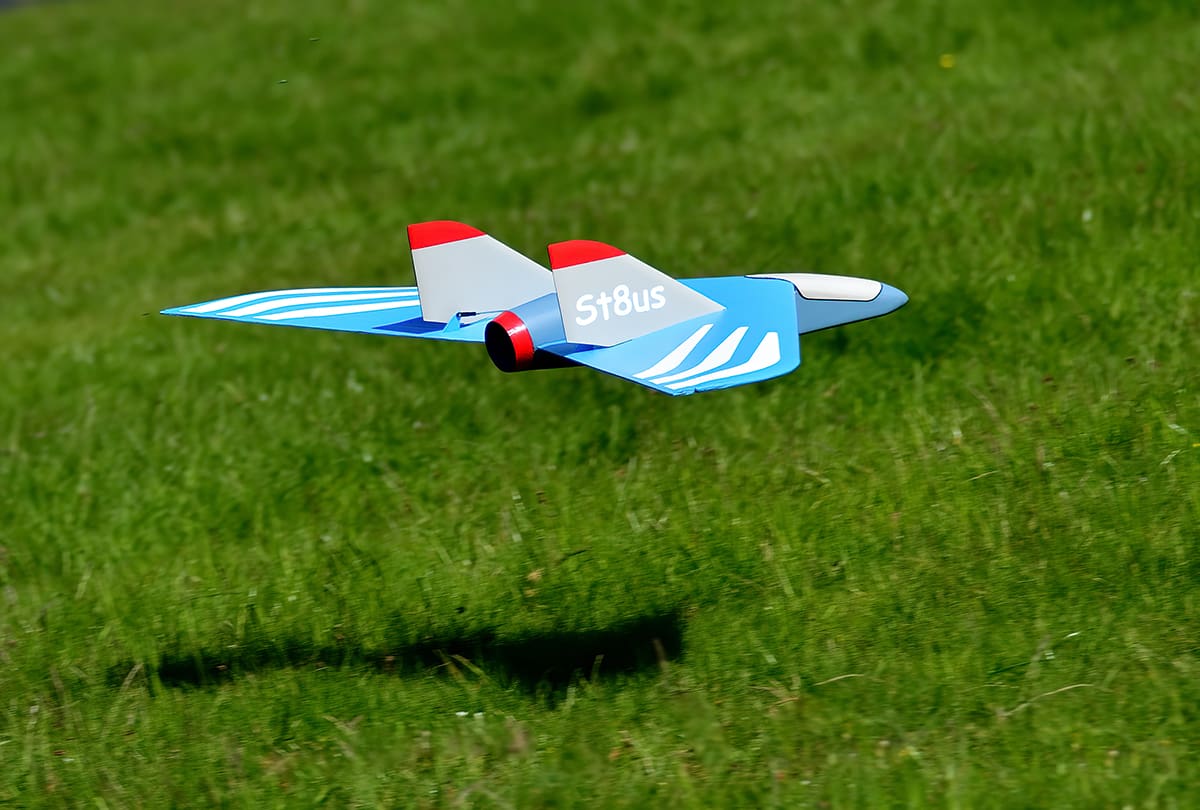
St8us has a very wide speed range. With a bit of up trim added she’ll happily stooge around at 20mph or so but once the throttle is opened up the combination of fixed pitch and high revs from the EDF unit along with the low drag airframe means she’ll fly straight and level at 74mph. That’s only 9mph slower than terminal velocity in a dive (yes I did measure them!!). This wide speed range means you’ll have to choose which trim settings to go for.
As presented here the “sweet spot” CG, elevon reflex and control throws give a great sports aerobatic performance. There is a slight climb when the throttle is opened but some folks like that. The CG can be moved forward if preferred which eliminates any stall but don’t go past the forward limit as you’ll start to lose elevator authority. Move it back at your peril though! Even at the rear limit shown there is an increase in pitch sensitivity making her very twitchy and she’ll tuck under in a dive. It’s also very easy to drop into a flat spin which can take a full revolution to recover from – scary!!
My personal preference is set up as the plan with a tiny amount of down elevator compensation mixed in with the throttle to cancel the climb out on full power. There is only the equivalent of 3 or 4 clicks of down trim introduced at full throttle but this flattens out the flight path nicely and makes for some exciting high speed aerobatics and low level passes.
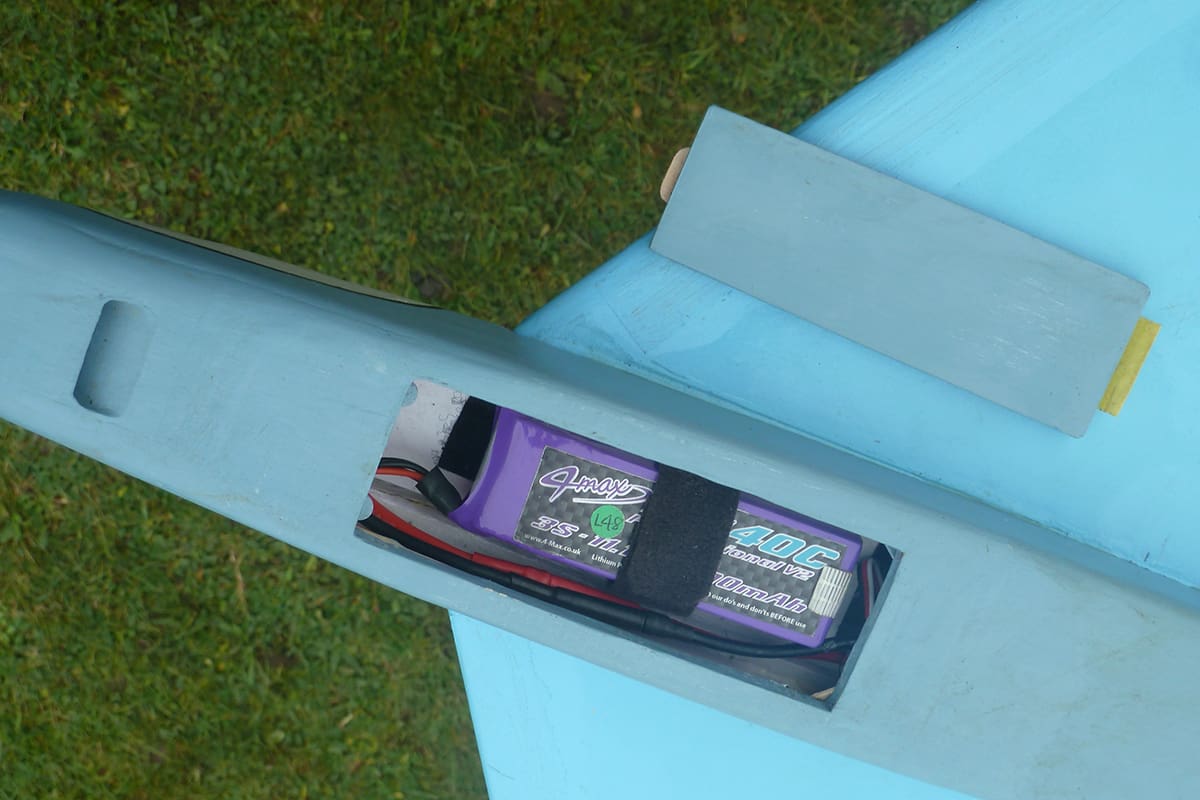
with magnets at the back. The opening is generous to allow scope to tweak the CG by moving the battery back and forth.
FLYING
St8us gets away from a hand launch with around 50% throttle and no worries of a damaged finger! She’ll also easily ROG in around 6 metres if the surface is smooth – no rudder is required as there is minimal torque from the EDF unit. Once the EDF gets “on song” St8us is off and you can throttle back to get familiarised with how she looks and behaves. Once happy have yourself a ball!
St8us is easy to fly but is quite fast, especially on full throttle and soon becomes very small. I find it best to only use full power on power hungry aerobatics and the occasional beat up the strips. This throttle management lengthens the flight times; I have my timer set to 3½ minutes throttle which gives me around 6 minutes total flying time which suits me fine.
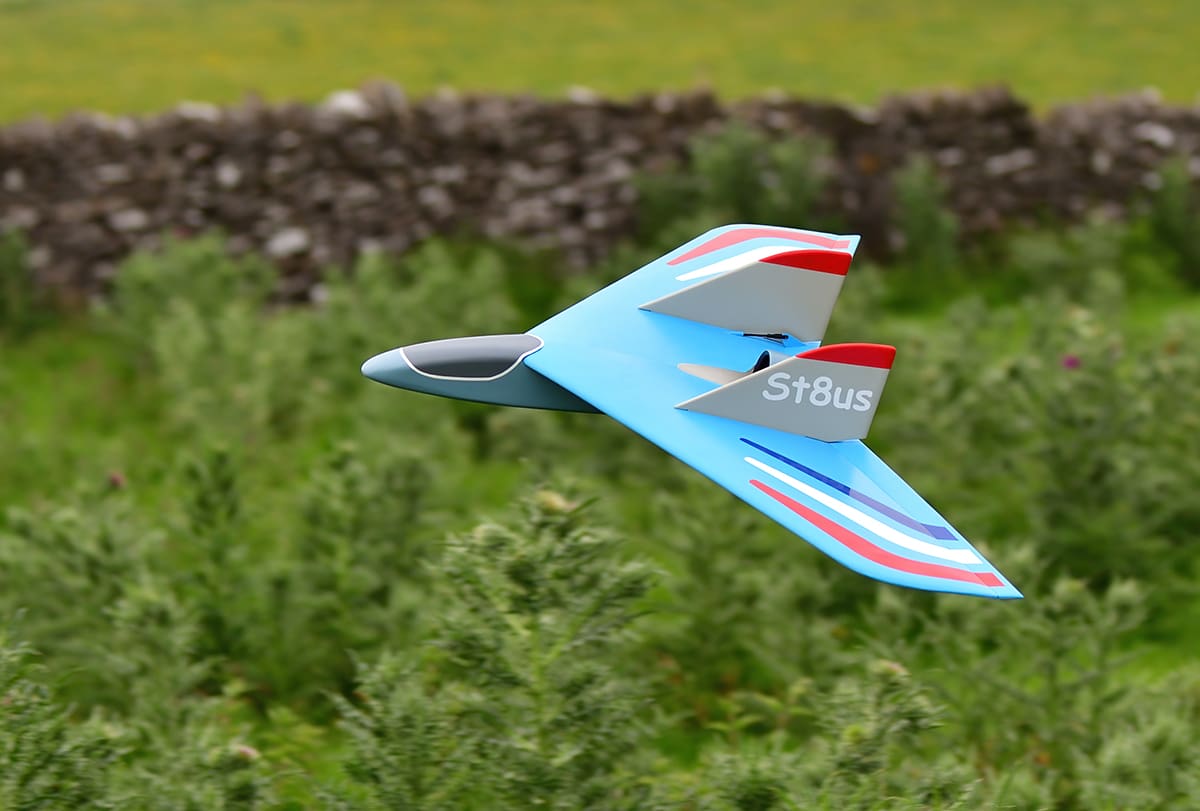
St8us will do all the usual aerobatics not requiring a rudder. She does some lovely big jet-like loops and with the CG shown on the plan only requires a touch of down when flying inverted. I find 30% expo helps soften the control around neutral while allowing some crazy antics with the sticks in the corners!
With the power off St8us glides around nicely, I’ve actually flown mine as a slope soarer and she handles the conditions very well. The good gliding performance becomes a bit of an issue though when landing, especially if there is no head wind, as it can take a while to bleed the speed off to get her to settle.
FINAL ST8US REPORT
Foamboard has turned out to be a quite resilient building material. The first two prototypes took some abuse with multiple crashes and cartwheels while I was sorting out washout, reflex and thrust angles The wing is particularly strong but a few creases appeared on the nose which didn’t curtail any of the test flying and can easily be filled and repainted. The only real nemesis of Foamboard is water so make sure all areas are kept covered or painted to prevent moisture ingress.
I’ve thoroughly enjoyed working with this new material. Learning new skills and techniques during the design development has been a total joy! I’m really chuffed with how St8us turned out; she looks a lot better than my first attempt 33 years ago! The fabulous flying performance is the cherry on the top. I hope you get as much enjoyment out of building and flying yours.
…..Happy Landings