John Stennard sets himself a challenge to make some small, simple and light EDF models for flying indoors in spaces smaller than an average sport hall.
Words & photos: John Stennard
I have enjoyed flying electric ducted fan (EDF) models since they became more practical for the average modeller. ‘Hot’ brushed buggy motors and eight cell packs of NiMH cells were used in my first successful models and then, of course, brushless motors and LiPos appeared. EDF has not looked back since then and now, certainly in my case, the size and complexity of your EDF model is only limited by your budget, your available flying space and your skill set. The area, the quality of the surface and closeness of trees etc. can be deciding factors here and certainly limit what we can comfortably fly at our field.
Enjoy more RCM&E Magazine reading every month.
Click here to subscribe & save.
As a keen indoor flier, I have always been interested in indoor EDF and enjoyed flying numerous small foam models using 30mm EDF units. For ease of construction and simplicity these have been profile models, although there is plenty of scope for models using a lightweight built-up structure. My foam profile models need a four-court flying space for comfortable piloting. Models like Eric Strefford’s Trident Kits F-4 Phantom and F-18 Hornet have a moderate flying speed so sharp and abrupt manoeuvres usually need to be avoided. The fact that they fly relatively slowly is not detrimental to their visual impact, in fact the Phantom can be flown slowly at quite a high alpha angle and looks very impressive.
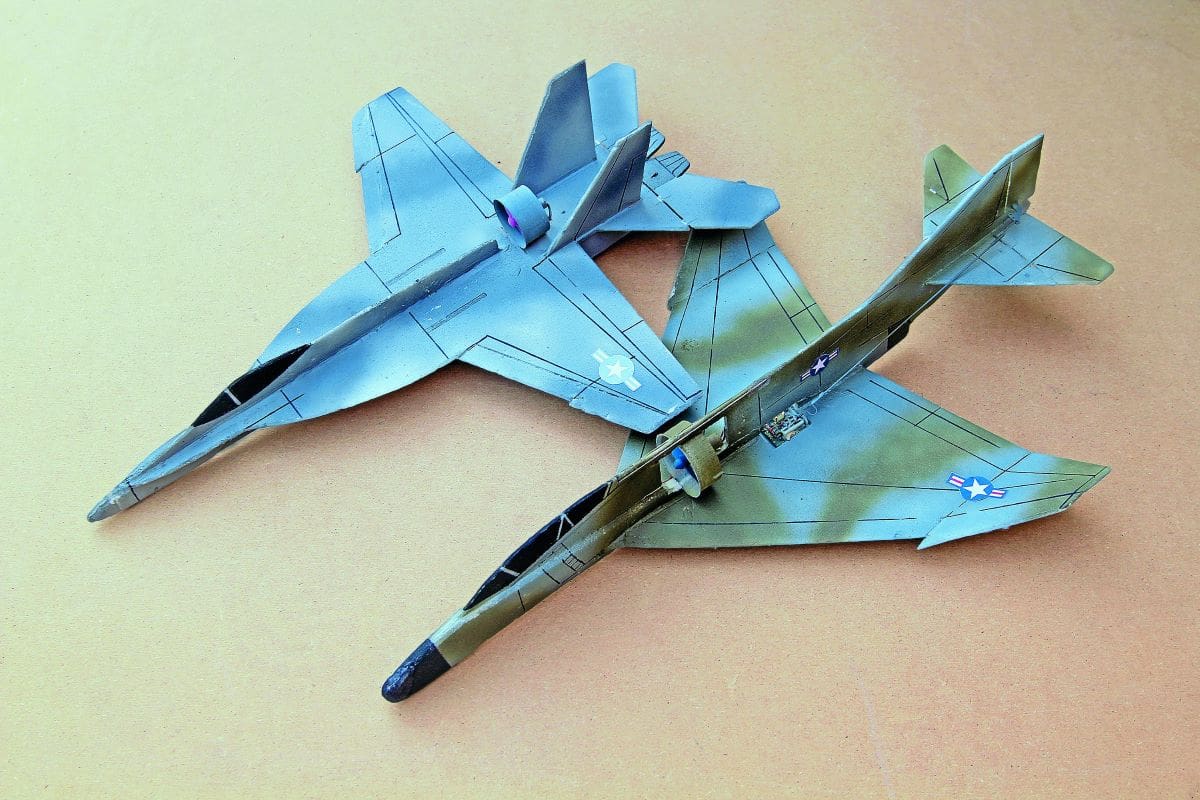
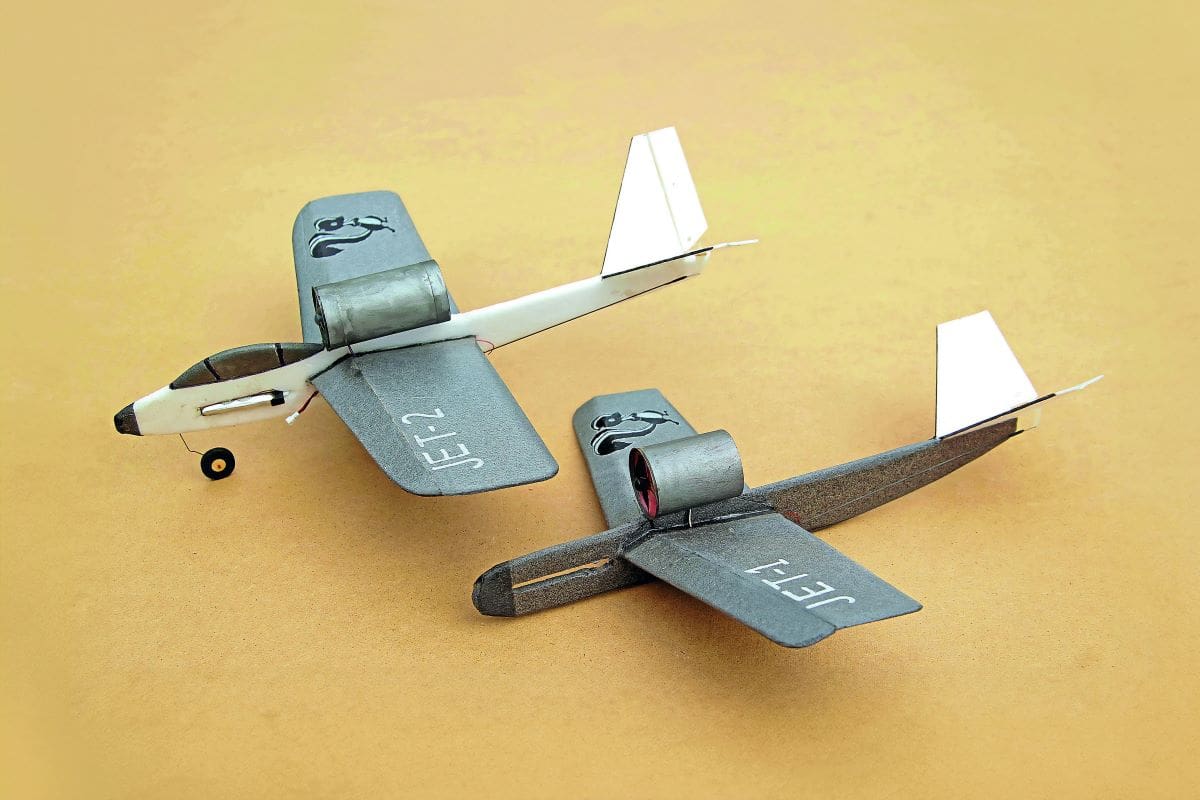
These models have a flying weight of around 35g and I have pondered for some time on whether I could make a smaller indoor EDF model that could be flown in limited spaces at slower speeds. The challenge was to make a small, simple and light EDF model for flying indoors, possibly in spaces smaller than an average sports hall. The KISS motto being an important factor! Initially the plan was to build one model, but this aircraft flew so well I immediately set to work on a second model! For simplicity I’ll call them Jet 1 and Jet 2 (changed to Jet 22 to avoid confusion!)
INITIAL PLANNING
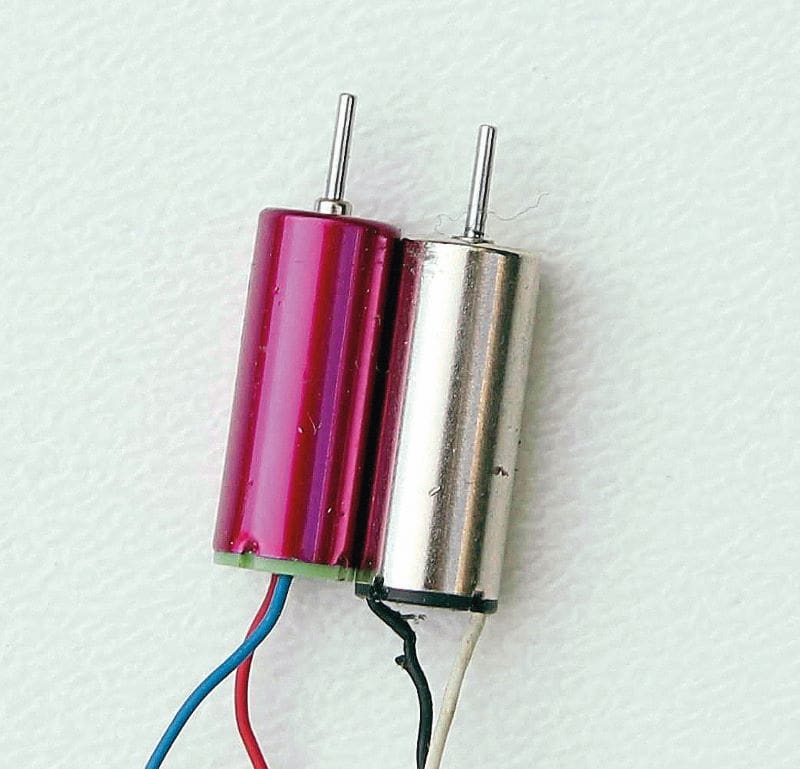
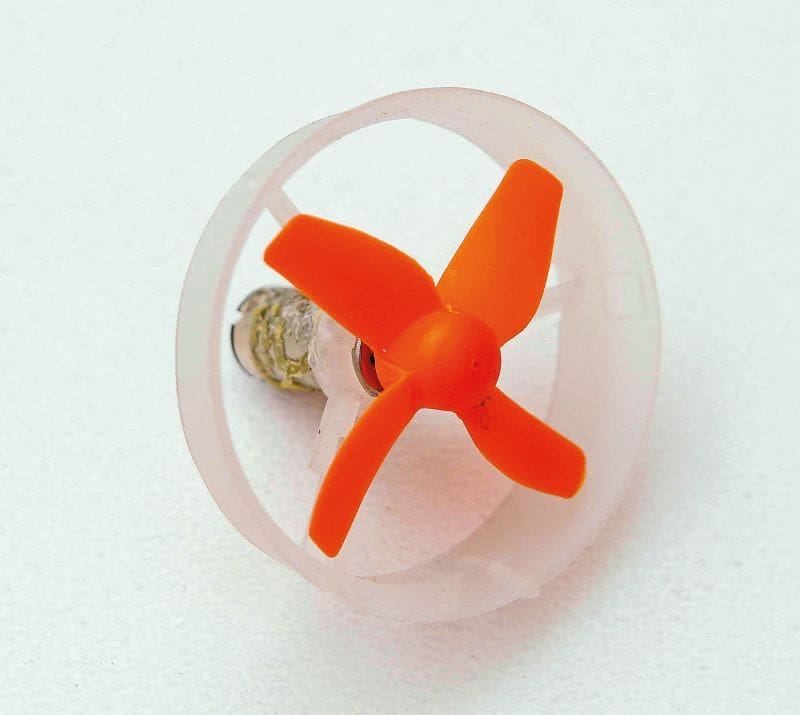
The starting point must be the equipment and I decided at an early stage to use one motor/shroud unit from a micro quad as the power unit. The unit I used came from a redundant Eachine E010 and has a 6mm coreless motor; failures with this type of micro quad are usually linked to the flight board rather than the motors. A bonus with this popular size of motor is that if extra power is required higher revving ‘upgrade’ versions are available. The motor and shroud weigh 3.5g and of course one quad will provide four of these units.
The lightest option for the receiver (Rx) and servos is to use a micro-Rx module of the Vapor type. The very lightest of these is the version used in the Mini Vapor or Vapor Lite. This unit weighs around 3g and is physically slightly smaller than the standard size unit. It is a 3-channel Rx with rudder, elevator and throttle. Although these models are no longer in production the Rx module, EFLU6807, is available from some sources, although it is rather expensive. An alternative is to use the slightly heavier versions that are readily available such as the Microaces ‘All in One’ or the similar MXL Crossover version from Steve Webb Models and other online sources. These have the additional aileron output sockets and, if not required, these sockets can be used as a power supply for micro-LED lights. The standard version of these units has a 3A brushed output, but versions are available with higher outputs. These units are still surprisingly light, starting at around 3.7g. The flight battery can be used to achieve the correct C of G and I anticipated initially using a 1S 150/180 LiPo (4.6g) with the option of a 1S 250 (5.8g) if required.
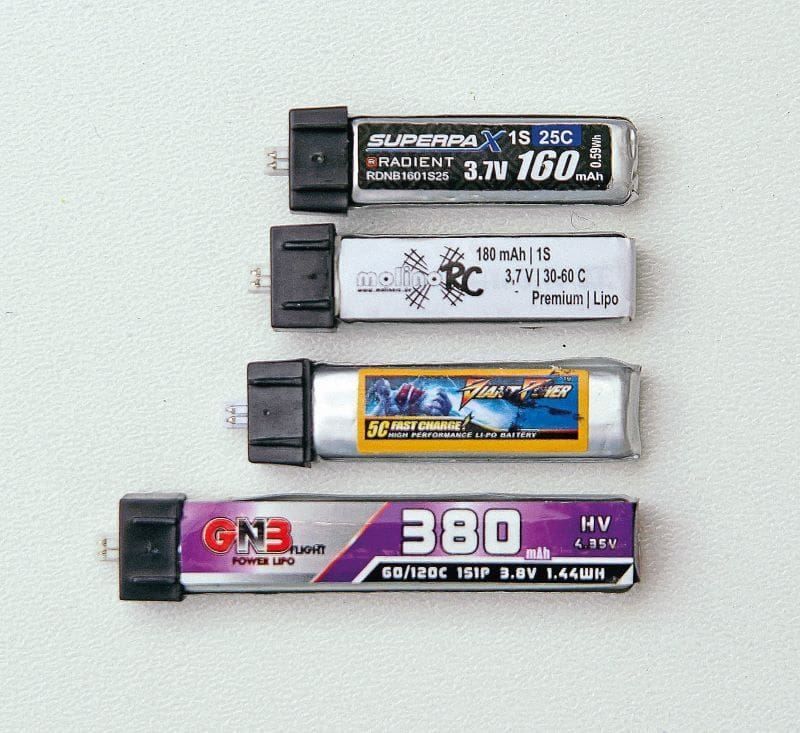
Whilst looking at batteries I have just started using the new GNB 1S 60C 380 LiHV with Molex 1.25 connector from HobbyRC. At 7.6g it is too heavy for my micro EDF models, but I have already found it extremely good with small helicopters and aircraft that use a 1S LiPo and which can accommodate the additional weight.
DESIGN & BUILD
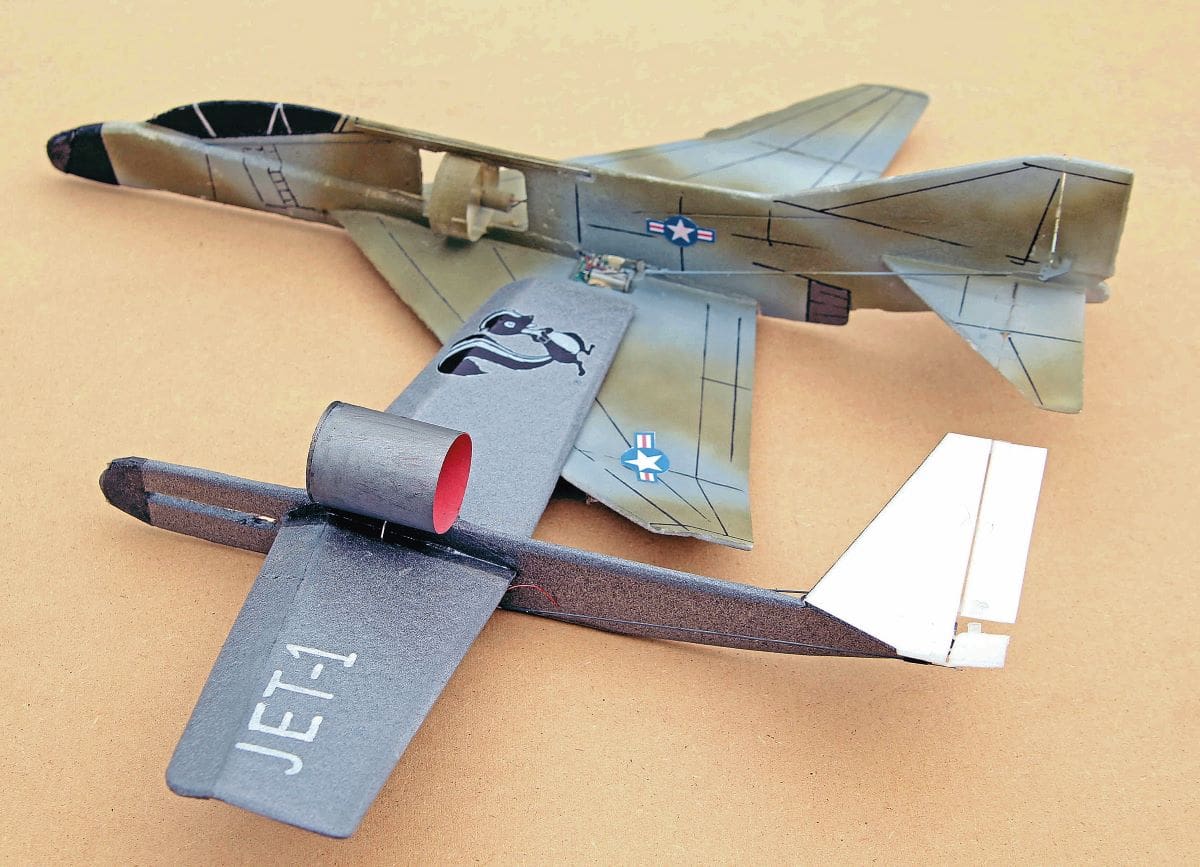
With the hardware weighing around 11g, I now needed to design and build an airframe to achieve the micro EDF performance I was looking for. One of the simplest jet airframes is the Heinkel He 162 Volkjäger design from WW II. The shoulder wing and top mounted turbine make for ease of construction. I decided to make a Jedelsky wing with dihedral and no ailerons. If I was using the Mini Vapor Rx unit, I had only had two channels available for rudder and elevator control. Unfortunately, the He 162 tail unit presents a problem. The twin fin tail unit was designed to avoid issues with the jet efflux but makes the rudder control linkage more complicated. The micro-Rx linear servos have a limited amount of power and movement, so I decided to use a V-tail format. All the V-tail models I have owned always flew well and, of course, the successful Fouga Magister French jet trainer from 1952 featured a V-tail.
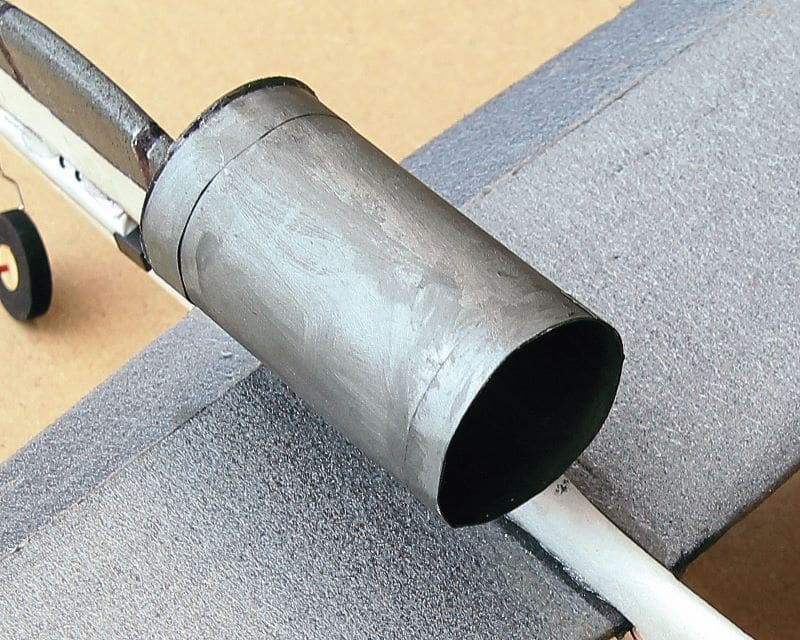
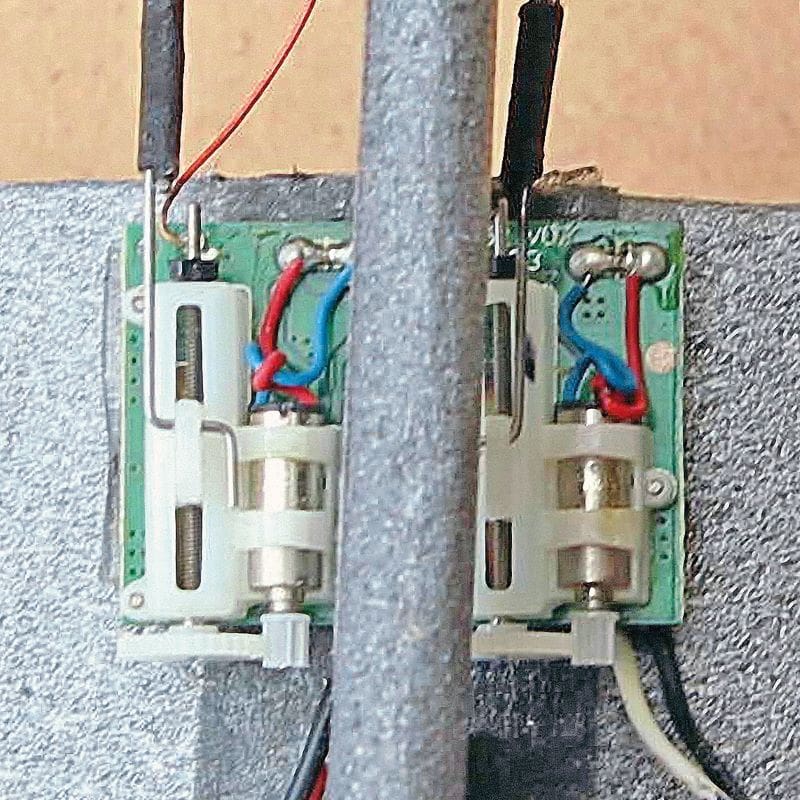
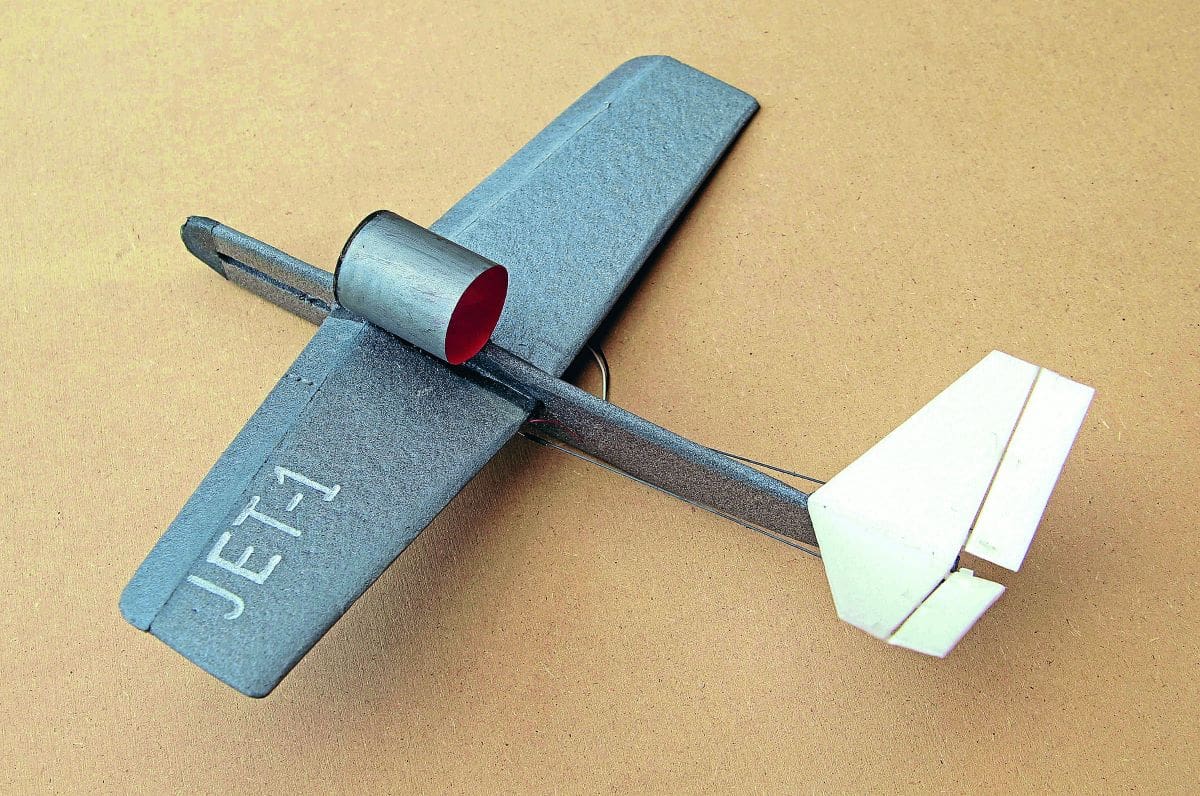
After a few preliminary drawings I decided not to attempt any type of scale model and settled for wingspan of 300mm and a root chord of 90mm. 3mm Depron is used for the wing and the leading edges are slightly swept back, with a dihedral of 20mm under each tip. I think the use of a lifting profile wing is important as I am looking for a slower airspeed. I opted for the easily built Jedelsky type wing, with the bent leading-edge section around 20% of the wing root length. The fuselage is very simple and is made from 6mm Depron, with a length of 320mm and 35mm wide with basic curves and shaping. Each half of the V-tail is 800mm in length, with a root chord of 700mm and is made from 2mm Depron; these measurements include the 18 x 60mm control surfaces. I set the V-tail halves at 90°.
A product I used for the first time has proved to be very successful. It is Carbon Tissue from Deluxe Materials. I have used this with UHU Por and cyano (CA) to strengthen the root dihedral and fuselage nose area. It worked well and added a lot of strength in potentially vulnerable areas for a minimal increase in weight.
Although it would add some weight, I decided to use a thrust tube behind the fan unit. This was 450mm in length and rolled from thin card. I did not attempt to restrict the diameter at the exit.
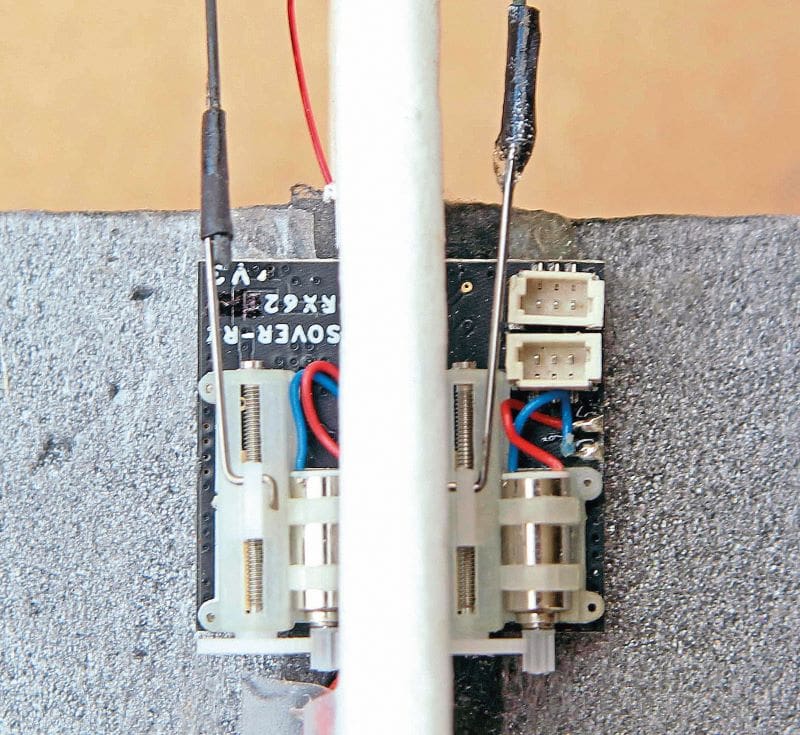
The Rx module was fixed with mounting tape to the underside of the wing, next to the trailing edge. This avoids long control rods for which 1mm CF rod is used. Plastic micro control horns from redundant models are used on the control surfaces, with the usual Z-bend connections. A possible issue, if you have a basic transmitter (Tx), is that it may not have a V-tail or elevon function. With my Spektrum DX6 Tx I was able to use the V-tail setting for the Mini Vapor Rx module.
The motor/tailpipe unit was glued to the top of the fuselage with the orifice 20mm back from the leading edge of the wing. A 1S 180 LiPo was taped to the nose area to find the best position to achieve the correct C of G of around 1/3 wing chord and a slot was cut to accommodate the LiPo. This slot could be enlarged if required to suit a larger capacity battery. I was really pleased to find that the model without the LiPo weighed only 13g. With a 180mAh LiPo the flying weight is around 18g. As a comparison the latest UMX Night Vapor flying weight with the same battery is 26g.
IN THE AIR
Test flights in the garden were very encouraging and the model flew very smoothly and handled well using the V-tail controls. Our garden is not large enough to allow for circuits so I had to wait until I could try the model in a local field to fully test fly it. In zero wind conditions the model proved easy to fly at a range of speeds. Full power was not required for level flight and the V-tail worked well, giving accurate control. The model could fly very slowly and in quite tight circuits, just what I wanted for small space indoor flying. A holiday outreach activity at Aerospace Bristol gave me the opportunity to try the model in a small 13 x 9m space and it proved easy to fly in this small area.
JET 22
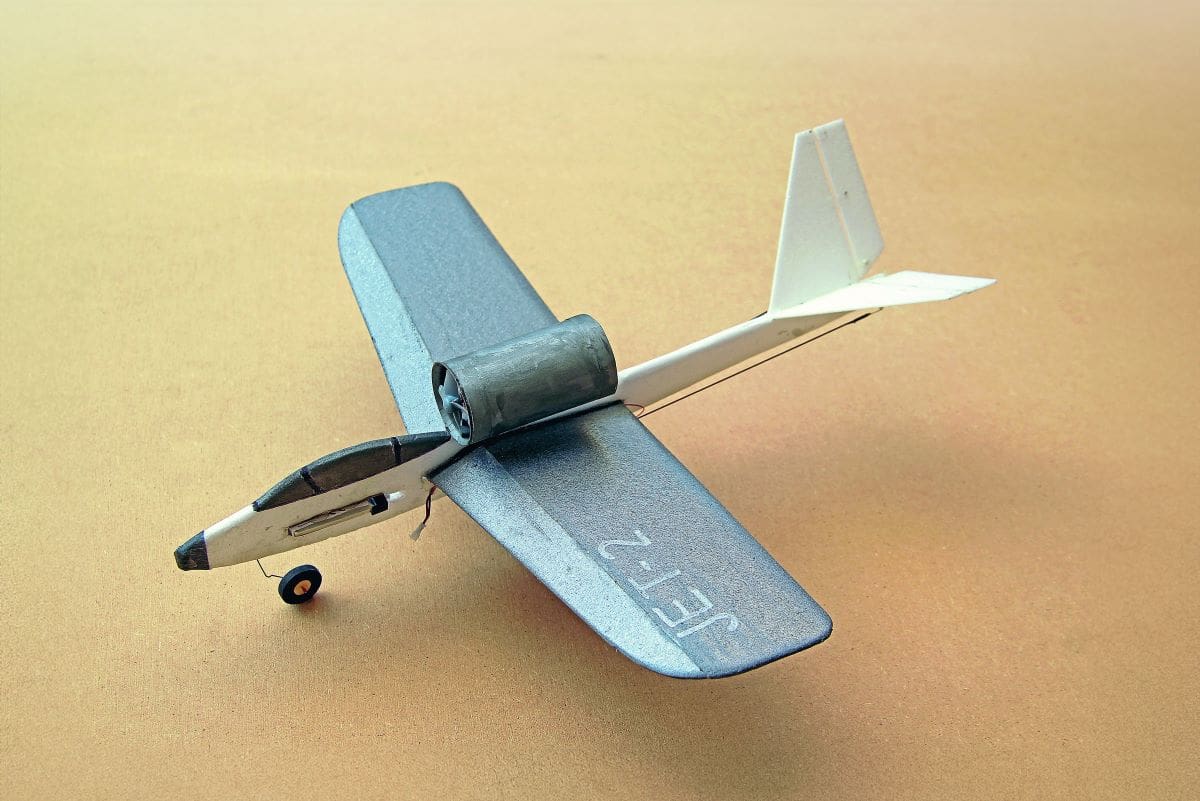
With Jet 1 performing well I wondered whether I could make a slightly larger, heavier and more ‘scale like’ model and retain the same excellent flying characteristics. I looked at a small French jet, the Sipa S 200 Minijet, but the twin booms still present the same issues as the He 162 for the rudder and elevator controls. I quickly reverted to the He 162 design and decided to make a more realistic fuselage but keep the V-tail format. This model would have the same type of quad shroud but with an uprated motor and possibly an undercarriage. I increased the wingspan to 330mm and the root chord to 350mm and used the same Jedelsky wing and dihedral. The fuselage, with a cockpit for a scale appearance, has a length of 350mm and I retained the same dimensions for the V-tail unit. This time I used the same type of shroud/motor unit but with a ‘hotter’ Racestar 59000rpm coreless motor, to which a paper tailpipe of 70mm in length was added.
A Crossover RX module was fixed in place with double sided tape and positioned on the underside of the wing close to the trailing edge. Before fitting this receiver, I set it up for V-tail use in the Tx. Since this Rx has aileron outputs the two linear servos operate as rudder and elevator, so I had to use a rudder/aileron mix to enable me to use the aileron and elevator sticks for control. It would not be possible to do this using a basic transmitter, but a Crossover RX Tool is available to enable elevons and V-tail to be set directly within the Rx.
I was very pleased to find that the airframe weighed only 16g and I cut a 1S battery slot to achieve the correct C of G. Initially I was not going to add an undercarriage (U/C) straight away but with the airframe weight only slightly heavier than Jet 1 and the U/C components only weighing a few grams, I fitted it before any flight tests. The lightweight main wheel U/C was sandwiched between 1mm ply and glued into a slot in the fuselage just rearward of the G of G. The nose wheel leg was glued into a slot in the fuselage.
The final bare weight of Jet 22 was just 18g. This puts the flying weight around 23g. Glide tests in our garden were very good and brief flights under power were very encouraging. Flight in a larger space showed the Jet 22 to be easy to fly and have ample power.
FUTURE DEVELOPMENTS
These nano EDF models have shown that a very lightweight EDF model is practical with ‘off the shelf’ components. I quite literally mean off the shelf where you keep all your recycled items–I did not have to buy anything for my model. The slightly heavier, more scale like Jet 22 also benefited from being built from redundant gear. Only the Depron was new but, again, came from stock I already had.
There does not seem any point in trying to achieve an even lighter model. Making a nano twin EDF model would be practical and the extra EDF unit would only add around 4g. However, the successful V-tail format would not perhaps be practical, but the model would probably fly well with rudder and elevator.
UPDATES & UPGRADES
There are several things to report here concerning standard micro EDF units, plus a couple of my new micro scale EDF models.
Eric Strefford’s Trident Kits–scale micro EDF models–fly well on the original fan unit but upgrades are now available. Steve Webb Models, who retail the Trident kits, have two alternative EDF units. One is the unit used in the Minimum micro EDF models and this is slightly larger at 37mm diameter and uses an 8mm coreless motor. Its four-blade prop/impeller is deceptive as it looks the same size as the other fan units, but it is bigger. The unit gives more thrust and I have fitted one in my F-4 Phantom. I have also switched to the 1S 380 LiHV so I am gaining improved handling and increased duration.
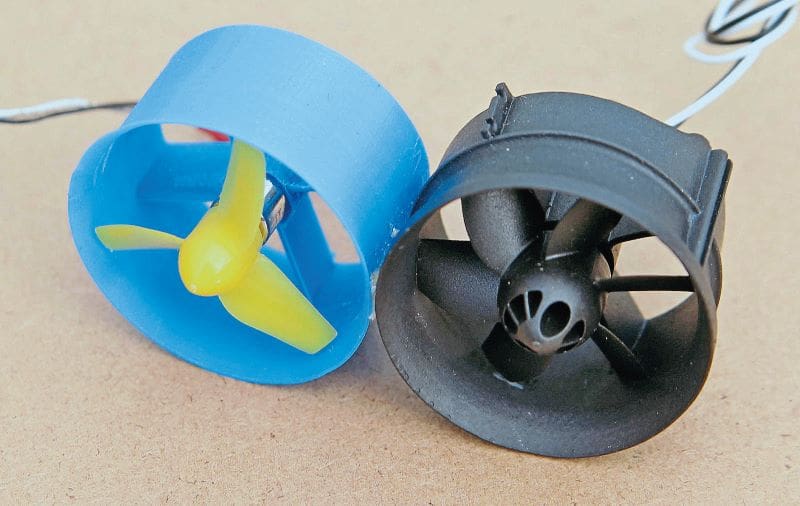
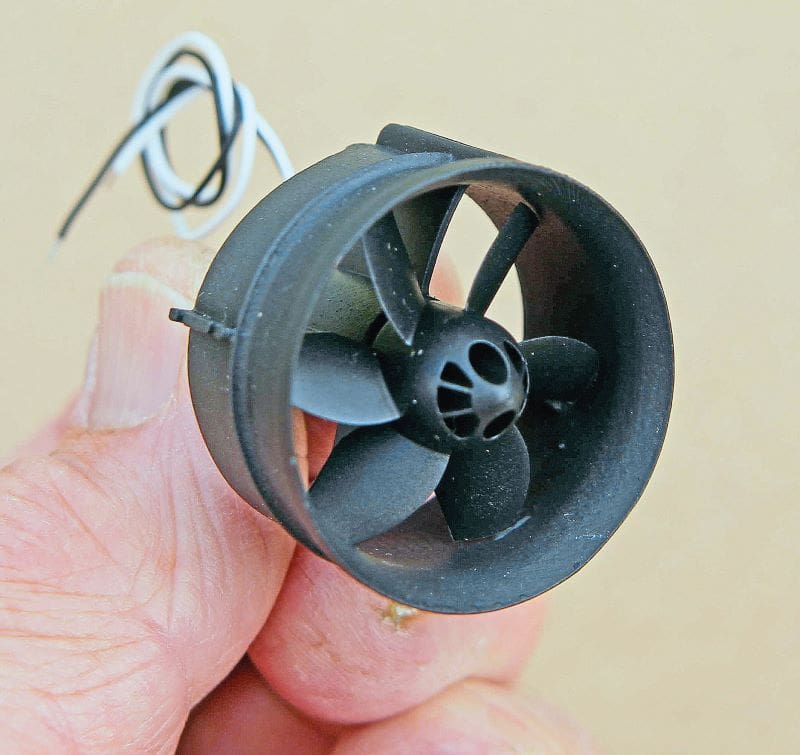
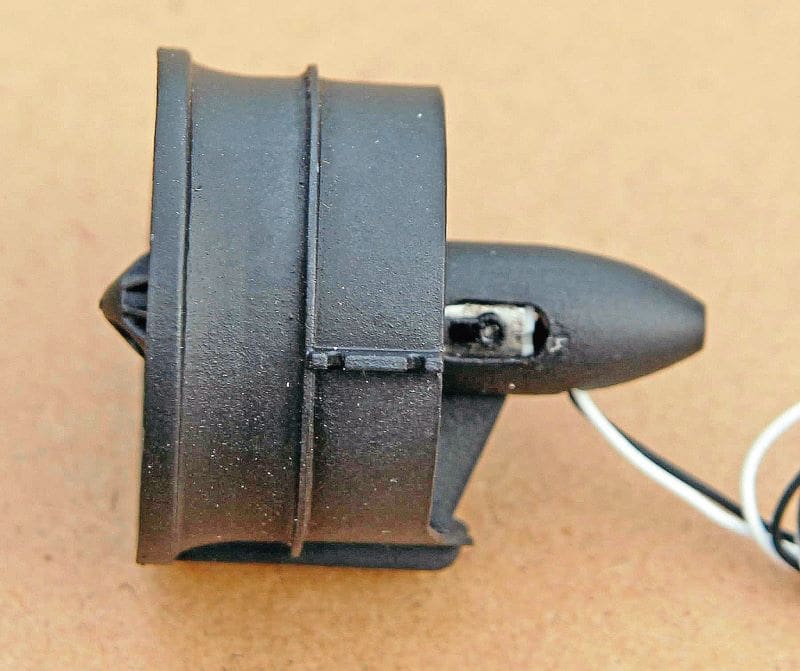
The other unit is the K30 EDF Super-Micro unit. On the box this is called a ‘mini jet power system’ and it is a very different proposition. It looks like a miniature version of a bigger EDF unit, with a nicely rigid shroud, a faired-in coreless motor and a six-blade impeller with cooling air slots in the spinner. The specs on the box list a weight of 9g, 50g of thrust on a standard 1S LiPo, 56g on a 1S HV LiPo and a maximum current of 4.2A. This means that you need a 5A output from your micro-Rx and most do not necessarily have this level of output. SWM have a Crossover Ma-RX42E-D receiver which is Spektrum compatible and for 1S use with a 5A output. It does also mean a higher output 1S LiPo is required, and this is where the new 1S 380 LiPo is perfect. Higher capacity 1S LiPos are of course available but if it’s for micro indoor EDF we are trying to keep the AUW as low as possible.
I decided to fit a Minimum EDF unit in a new scale model, use a Super-Micro version as an upgrade in my Trident Hawk and fit my second one in another new model. The Super-Micro unit fitted easily into the Hawk, replacing the Streff version. Fortuitously the Rx module in the Hawk has an integral ESC that provides the required output. There is a considerable increase in thrust, guaranteeing an improved performance.
NEW JETS
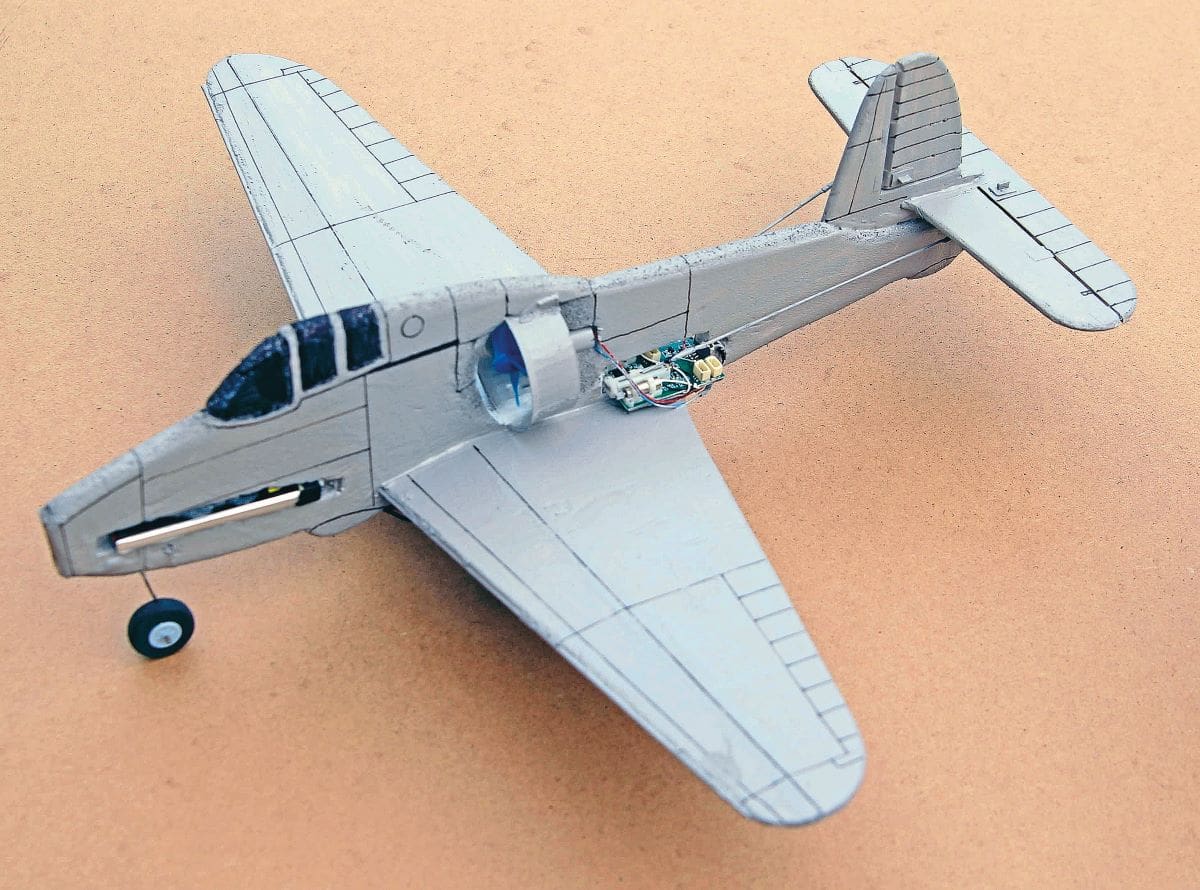
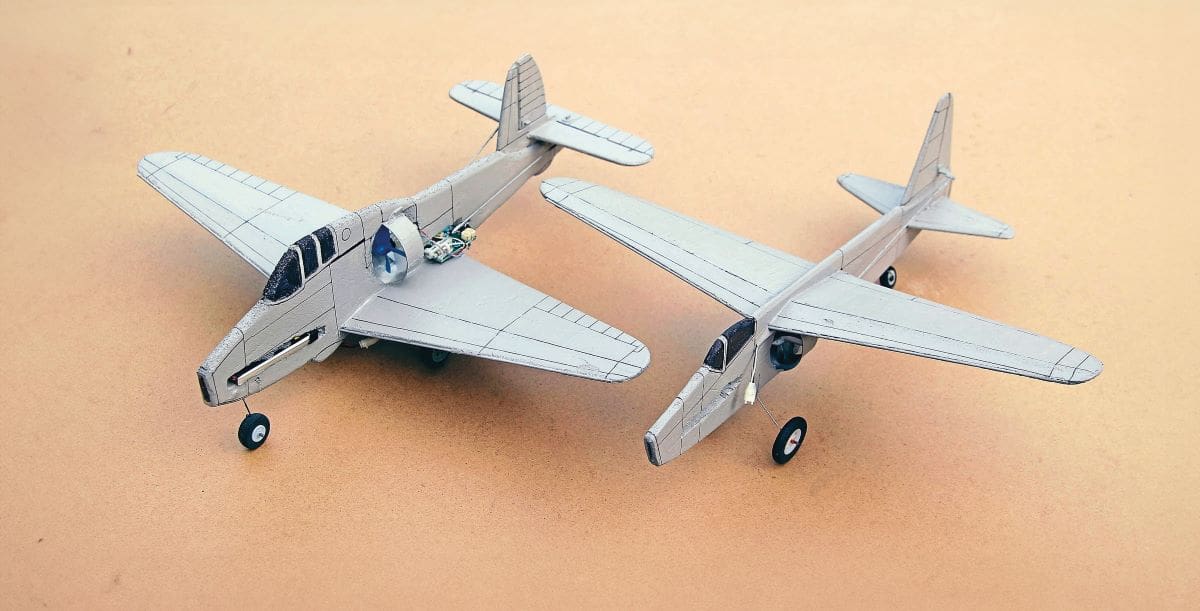
With two new jets to build it was hard deciding which aircraft to model and then I hit on an interesting idea. Why not build versions of the first two jet aircraft to fly, the Heinkel 178 and the Gloster-Whittle E 28/39. These offer a simple and functional airframe with a generous wing area. The Heinkel flew first in August 1939 but fortunately the need for jet powered aircraft was sidelined. The Gloster-Whittle E 28/29 first flew in May 1941 and benefitted from advances in technology, but again the need for jet powered aircraft was not seen as an immediate priority. However, as soon as the importance was understood the speed of development rapidly increased, with the Me 262, Arado 234, He 162, Gloster Meteor, DH Vampire, Bell P-59 Aircomet and the extremely successful Lockheed P80 Shooting Star all being developed, built, and flown in a very short time frame.
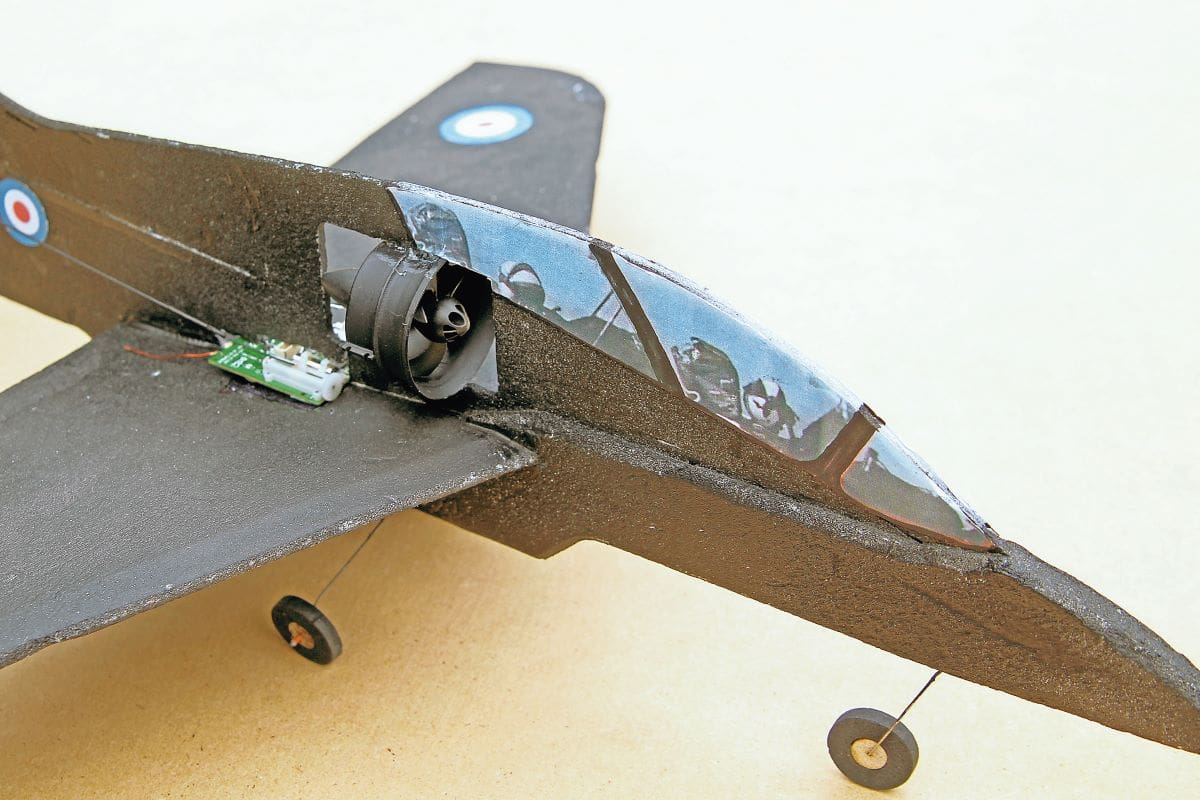
I built the E 28/29 first using a 330mm long 6mm thick Depron fuselage, a 3mm Depron wing of 360mm span and 3mm tail surfaces. A Jedelsky wing was made with dihedral and a Minimum fan unit was fitted as I thought that this model would need the extra power. A spare E-flite Rx module, from a UMX Extra, was installed and a simple trike U/C was fitted. After adding some nose weight the model flew well and, after switching to the 1S 380 LiPo, I was able to remove some weight and enjoy the extra power and duration. This model without the LiPo weighs 32g and 39g with, so it’s a bit of a heavyweight.
Construction of the He178 followed the same format, with a fuselage length of 355mm and the same wingspan. The wings and tail parts were made from 3mm Depron using the same method as the E 28/29. The He 178 was a taildragger so the U/C was simple to install. The plan to use the higher power Super-Micro units was abandoned as the model was very light, so I fitted a standard 30mm Streff fan unit in this model and a basic Vapor type Rx module. The He 178 turned out to be particularly light at just 19g, plus 6g for the 1S 180 LiPo, so a flying weight of just 25g. Flight tests proved that the Streff fan gave plenty of power and the He 178 was easy to fly.
I have an aversion to naked white foam so I gave both models a coat of light grey. I then could not resist adding some panel lines, etc! The Gloster E 29/29 will get its correct camo colour scheme at some point.
SUMMARY
Indoor micro EDF models are not new, and some magnificent single and multi-engine scale models have been built and flown. For the average indoor enthusiast foam models of the type I have shown are interesting to plan and build for at minimal expense. As I have also demonstrated it is also very practical to scale down an EDF model so that it will fly in a smaller environment, which can be a factor at some indoor venues.


